
Click Here if you listened. We’d love to know what you think. There is even a spot for feedback! Read along below!
New(ish) Beekeeper Column
Raising VSH Queens
By: Richard Wahl
VSH Significance
If you have been keeping bees for any length of time, you have already met the limiting factor in today’s beekeeping environment: the varroa mite. Compared to varroa, most other challenges we deal with, such as small hive beetles, wax moths, or uneven nectar flows are inconveniences that can usually be managed with routine attention. Varroa destructor is different. It weakens colonies directly by increasing virus loads, shortening worker lifespans, and turning healthy hives into Winter losses. Chemical treatments can reduce mite levels, but they are not a long-term, stand-alone solution. Resistance develops, residues accumulate in wax and mites may eventually gain the upper hand. For the hobbyist or small-scale beekeeper, this reality hits especially hard. Most of us are not managing hundreds of colonies, and hate to lose any percentage of hives each Winter. Each hive matters and every Winter loss feels personal as well as expensive.
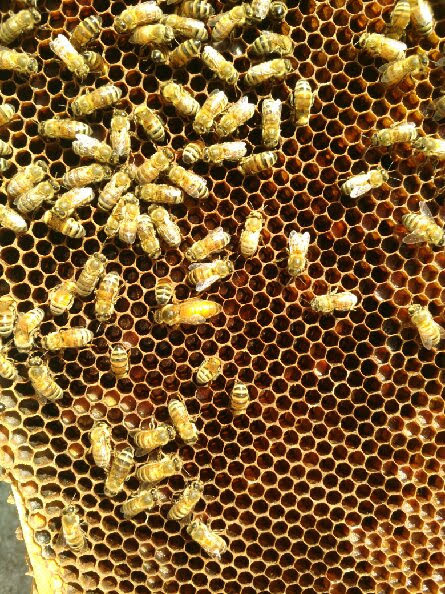
This is where VSH bees enter the discussion. VSH is defined as Varroa Sensitive Hygiene, an inheritable trait that results in worker bees identifying and removing brood containing the reproductive varroa mites. While general hygienic behavior can be found in many colonies to some degree, VSH is specifically targeted at interrupting mite reproduction under the cappings and therefore called a “heritable” trait. Colonies with this trait uncap and remove pupae where mites are breeding, directly reducing mite populations before they explode. I had the opportunity to observe this behavior firsthand in two of my hives this past year. On two separate mornings, as I often do, I walked past my hives following breakfast just to see what the day’s hive activities looked like. I watched to see if the entrance tasks seemed normal with bees actively bringing in pollen, having orientation flights, or functioning as they should. I wrote an entire article on the topic, “Observations at the Hive Entrance” published in the May 2025 issue.
On these two different mornings however, something stood out. I witnessed undertaker bees carrying halfway grown pupae out of their respective hives. I did not see mites on the pupae themselves, but the voluntary removal was encouraging. The math is straightforward; fewer reproducing mites mean fewer viruses, less stress on the colony, and a better chance of long-term survival. Raising VSH queens is not a one-time purchase or a shortcut that can be checked off a list. It is a management approach that develops over time and depends on observation, patience, and a willingness to make honest decisions. I have found that working a smaller number of colonies with more focus on VSH queen production shifts the emphasis away from constant corrective chemical treatments and toward steady incremental improvement of bees that perform well in my own environment. This article focuses on realistic considerations for raising VSH queens on a small scale by beekeepers where progress is measured hive by hive, season by season. Bees do not always cooperate with our plans. Still if the Asian honey bee species, Apis Cerana, has evolved effective mite defenses against varroa through intense grooming, detection and removal of brood infested with reproducing mites, there is no reason to believe our species of honey bee, Apis Mellifera, cannot be encouraged to do the same with thoughtful selection and management.

no different than any other queens I have raised.
Photo Credit: Richard Wahl.
VSH Defined
It took me some time to fully understand what VSH (Varroa Sensitive Hygiene) actually meant and to clear up a few common misconceptions along the way. VSH is not a plug-and-play solution where installing a “certified” VSH queen suddenly makes mites disappear. It does not create a mite-free operation. VSH is best understood as an aid to mite management rather than a replacement for it that still requires monitoring, judgement and vigilance. VSH is not a single gene, but an intricate set of heritable traits expressed through worker behavior. The queen carries the genetics, but it is the workers that do the work inside the brood nest. In colonies with strong VSH characteristics, workers can detect brood cells where varroa mites are actively reproducing. Those cells are identified through subtle cues; changes in odor, irregular brood development, or mite activity beneath the cappings. The workers uncap those cells during the pupal stage and remove the developing bee, disrupting the mite’s reproductive cycle. That interruption, more than anything else, is where the value of VSH lies.
Another trait commonly associated with VSH stock is mite biting or chewing behavior. Workers from some VSH lines will damage mites during grooming or when encountering them on adult bees. Under magnification, mites collected from these colonies often show missing legs or chewed body parts. Some VSH queens pass on strong hygienic removal, others stronger mite biting behavior, and in some cases both traits are present. An additional VSH characteristic that has been observed is a heightened sensitivity to brood abnormalities, which may explain some of the removal behavior I witnessed in my own colonies.

Photo Credit: Richard Wahl.
It is just as important to understand what VSH does not do. The VSH trait does not eliminate all mites, nor does it remove responsibilities of the beekeeper. Colonies headed by VSH queens still require regular inspections and mite monitoring so timely decisions can be made when actionable intervention is necessary. Think of VSH as a foundational step rather than a complete answer to the mite problem. For the small-scale beekeeper, this foundation can be especially valuable. Instead of relying solely on repeated chemical treatments, VSH allows the bees to shoulder more of the work themselves. That does not mean fewer inspections or blind trust in genetics. It means making deliberate management decisions to promote colonies that are headed in the right direction and being willing to discard or combine those that do not. This approach can be surprisingly rewarding, because you can watch individual colonies improve over time and see the results of your selections play out in your own bee yard. On occasion, I have pinched an inferior queen and combined the remaining bees with another colony. Even if that now queenless hive did not carry the traits I was looking for, the workers could still forage and contribute to the adopted colony for the remainder of their lifespan, assuming no disease or other underlying problems were present. Simply installing a VSH queen into a weak colony is like putting a bandage on a serious wound as it misses the point. VSH works best when paired with honest colony evaluation and management practices that support the bees’ natural defenses. In my experience, as VSH traits are reinforced over time, reliance on chemical treatments decreases.
Queen Selection
Before grafting tools ever come out, there’s a lot to be learned by simply watching what your bees can do on their own. This is where good note taking comes into play. Only by closely monitoring each colony’s characteristics can valid evaluations be made. I structure observations to note brood laying patterns, gentleness, hive productivity, tendency to swarm, overwintering success and queen lifespan. Not all of these observations will occur at the same time so I will focus on one particular area at each subsequent inspection. Natural queen replacement, whether through supersedure or well-timed splits, acts as an early sorting process. Colonies that recognize a failing queen, replace her efficiently, to keep brood patterns solid while mite levels are held in check, deserve a second look. I saw this in a hive several years ago. All Summer I was concerned about a queen not performing up to expected standards with less than stellar brood patterns. I seriously considered pinching her and combining the hive with another. But because this colony had been strong in the previous season and had other traits I liked I let it limp along. That queen survived the Winter with a resultant cluster not much bigger than my fist. Not far into the early Summer the hive superseded that queen and it again became one of my best honey producers the following season. This is not an argument for propping up every marginal hive or ignoring obvious problems. Colonies that honestly fail tend to reveal more than the ones kept alive by sheer effort. Queens that come out of survivor hives, particularly when paired with hygienic behavior, often make the most dependable colonies before you ever consider grafting larva. Splitting colonies with strong VSH, as well as other desirable characteristics, is the easiest way to improve your apiary genetics.
Of course, you cannot raise VSH queens without VSH genetics, and this is where many well-intentioned programs quietly lose their way. Placing a single “VSH queen” into a problematic apiary will not in and of itself be a solution for untreated, mite-heavy colonies. A better approach comes from starting with queens and colonies that have shown documented VSH characteristics. Choose USDA stock with proven VSH lines from reputable breeders who actively test and select bees that have proven they can live with mites rather than just survive with chemical treatments. Eight years ago, the last time I purchased a bee package, it was to incorporate a strain of bees with VSH traits. I have continued to spilt those hives with desirable traits and have seen continuous progress in decreasing mite loads and Winter survivability. When possible work with more than one source. Genetic diversity matters. This is why I incorporate swarms into my apiary whenever convenient. A large swarm nearly always is the result of a strong colony desiring more space. Once placed in a hive careful swarm monitoring will determine if the traits they carry are desirable. Even with established VSH lines genetic diversity can vary greatly. Names and labels of VSH lines are a starting point and come with no guarantees. It is up to you to sort out which colonies truly perform in your local conditions.

This is where prior patience pays off and leads directly to identifying breeder colonies for grafting purposes. Not every colony headed by a VSH queen deserves breeder status. Performance matters, not titles. A solid breeder queen should maintain low mite levels without treatment while maintaining a consistent brood pattern to build the colony population. Winter survival is a must without a lot of extra efforts on the beekeeper’s part. Ideally breeder colonies are watched through an entire season and into the following Spring. Regular monitoring with alcohol or sugar roll washes should be routine to determine mite loads. One of the clearest indicators of strong VSH characteristics is low mite counts. I have reached the point on some of my hives where a single oxalic/glycerin treatment using a method comparable to a product such as VarroxSan is the only treatment required each year. This occurs in the Fall after brood breaks, splits and green drone frame use in the Spring; all of which of course are not chemically based. When in doubt trust your instincts. If it is necessary to constantly “help” a colony along, it is not the one you want to graft from. The bees worth propagating are the ones doing the work themselves.
The Harbo Assay Evaluation Method
The Harbo Assay has been described in detail in USDA publications and extension literature. What follows is a brief description of how to apply its principles on a small scale. Developed by Dr. John Harbo under the auspices of the USDA, this method of breeding for mite resistant bees with queens that carry VSH traits was released to the public in 2001. It is a bit more hands-on and not something most beekeepers are used to, but the Harbo Assay offers another way to see whether your bees actually have Varroa Sensitive Hygiene, and are not just carrying the VSH label. Initially, Harbo’s Assay method required the beekeeper to add mites to brood cells. A later variation, instead of creating an artificial problem by adding mites, takes advantage of the mites that are already present in the colony. It resolves the question whether those mites are able to reproduce and whether bees are interfering with the mites.
To start the process, choose colonies with known moderate to heavy mite loads but not from a colony already under stress. From each selected hive pull a frame of capped worker brood that is around seven to ten days past capping for evaluation. Choose a standard number of cells in the 100 to 200 range to carefully uncap and inspect. You are looking for foundress mites and whether she has produced mite offspring. In colonies with VSH traits you will often find mites that failed to reproduce, along with evidence that workers have uncapped and cleaned out infested cells before the mites could complete their cycle. The Harbo scoring method of a frame uses a 0 to 4 scale with a score of 4 meaning no mites were found in the selected number of cells that were examined. A 0 means five or more mites were found in a minimum of 100 cells checked. Intervening rates of 1, 2, or 3 result in scores of 3-4, 1-2, or 1 mite present respectively. The higher the score is, the greater the resistance to mites. Colonies that repeatedly show suppressed mite reproduction, without you ever introducing mites, stand out as solid candidates for breeding or long-term retention. For the small-scale beekeeper, that’s the real value of the Harbo Assay; a meaningful insight into VSH characteristics using the bees and mites you already have, with minimal risk and a manageable effort. There are many internet sites that present a much greater detailed explanation of the Harbo Assay method.

Concluding
At its core, raising VSH stock is less about chasing a silver bullet and more about learning to listen to what your bees are already telling you. Varroa remains the defining pressure on our apiaries, but VSH gives us a way to push back that relies on selection, observation, and patience rather than constant chemical correction. When colonies are allowed to prove themselves, through Winter survival, brood quality, mite levels, and their own ability to replace failing queens, the best candidates for propagation tend to stand out on their own. This approach shifts the beekeeper’s role from fixer to evaluator, reinforcing traits that actually work under local conditions instead of propping up colonies that never quite get there. Progress is rarely dramatic, but it is real, measured hive by hive and season by season. In next month’s article, I take the next logical step and move from hive selection to the practical side of the drone’s contributions, queen grafting and how to turn proven breeder colonies into the next generation of VSH queens.
