

By: Joe Latshaw
Not how big, but how small can a cell building colony be and still do a good job?
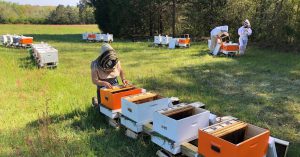
Queen rearing is my favorite part of beekeeping and always has been. It does not require all of the heavy boxes and equipment associated with producing honey, but I am still able to see all of the intricacies of the entire bee hive at work. There are perhaps as many queen rearing and cell builder systems as there are commercial queen producers. It has been my good fortune to visit with many queen producers and have the opportunity to speak with them about their systems. It is interesting to learn the details, the how’s and why’s of their systems. From those encounters I have developed a system that suits my operation.
Producing queen bees is resource intensive, especially the larger the operation becomes. A surplus of young bees and brood, or bulk bees and brood as they are called in the commercial setting, are collected from donor colonies. Such resources are a valuable necessity to any queen producer. The bulk bees and brood are used to stock cell starters, cell builders, bank colonies and mating nucs. All can place a great strain on the support system for resources. I think this hunger for resources stems from the belief that colonies need to be big, strong and populous to produce queen bees, especially the queen cells. For many years I subscribed to this train of thought, but quickly found I was too lazy to be a “good” queen producer with such a system. I did not enjoy managing 10-frame, three story deep cell builders or shaking bulk bees and collecting brood to boost them. So like any lazy beekeeper, I began looking for an easier method – without sacrificing quality.
Admittedly, good quality queen cells can be produced by brute force methods utilizing lots of bees. It has been successfully demonstrated many times over and it certainly works. Many large queen rearing operations rely on such systems, and they certainly work but devour resources. But if you look a little more closely at the entire process, there is a subtle beauty to the honey bees’ methodology. A little finesse opens up many possibilities. I prefer to use queen right cell builders as I think they do a nice job of producing quality cells, but the challenge for me has been getting them “just right” to produce quality cells over a longer period of time. The queens I produce are destined to become instrumentally inseminated breeder queens, so I need a system that churns out good quality queens over a 10-week period. My Ah-Ha moment for such a system came when I realized that a steadily growing average colony was a very good colony for producing cells. This point is important. The stage in a colony’s physiological development a couple of weeks or so prior to when they would naturally start producing cells on their own for swarming is an ideal colony for producing quality cells. Consequently, my next question was how big, or rather, how small could such a cell builder colony be and still do a good job?
More specifically, as the ratio of older adult foragers increases relative to the number of young nurse bees, the colony progresses more towards swarming.
A slight modification in the cell starter. Using a polystyrene nuc and a feeder rim, the newly grafted cells can be elevated slightly above the top bars. This works best when temperatures are warmer. During the cool Spring, put the cells down in the brood nest.
I decided to try five frame deep nuc boxes since I enjoy managing the lighter weight nucleus colonies that seem to grow quickly. I had plenty of boxes on hand and just needed to work out the details of managing them as cell starters and cell builders.
Before I get into the details, I should be clear that I still need some bees and brood for this system, but far less than traditional systems. My basic system uses a queenless deep, five frame starter hive. It is free flying which means the nuc is open and the bees are allowed to forage naturally. Some starter systems use “closed starter boxes” where the bees are confined while the cells are started. In my experience, a closed starter system requires more hands-on maintenance and attention. Therefore, I prefer to use a free flying queenless starter because I consistently get a high percentage of cells started in a queenless nuc. However, any queenless nuc is unstable and ultimately a drain on resources as there is no laying queen to regenerate the brood in the box. Once the cells are started for 24-48 hours, they are transferred into a queen right cell builder, the deep, five frame cell builders. Up to this point, my system is not all that different from traditional systems.

A top view of three newly grafted cell bars placed above the frames in the cell starter. After approximately 24 hours in the cell starter, I can pick up the three bars of started cells and transfer them to a cell builder or wait another 24 hours to transfer them.
Keep in mind, I am located in central Ohio and our optimal cell building period is May thru June. Cells can be produced on either side of this window, but that is the optimal time for producing high quality cells without a lot of difficulty. Starting in April, I carry extra nuc boxes on the truck with four drawn combs in them. While making the inspection rounds in the bee yards, I am looking for overly populous colonies that need some thinning down. When I find an overly populous colony, I go through it to locate the queen to set her aside and then pull three frames of younger brood and a frame of honey/ pollen. I put these frames in the nuc. The fifth spot in the nuc is left open for a grafting frame that I will add later. I then shake in another two to four frames of bees, depending on how many bees are on the frames. I want enough bees in the box to fill the empty space where the grafting frame will go. The bottom of the nuc is screened, so I put the top on and in the truck it goes. This point is important. Moving the cell starter to another yard ensures that all of the bees I put in the starter will stay.
At this time if you simply want to raise 20-40 cells once, maybe twice, you are ready to graft. You can use this cell starter to start and finish a batch or two of cells for you. The queenless cell starter is ready to accept cells as soon as I get home. It may only be an hour or two later, but the bees quickly realize they are queenless. By giving the cell starter cells soon after they are set up, it diminishes their tendency to start emergency cells on the comb.
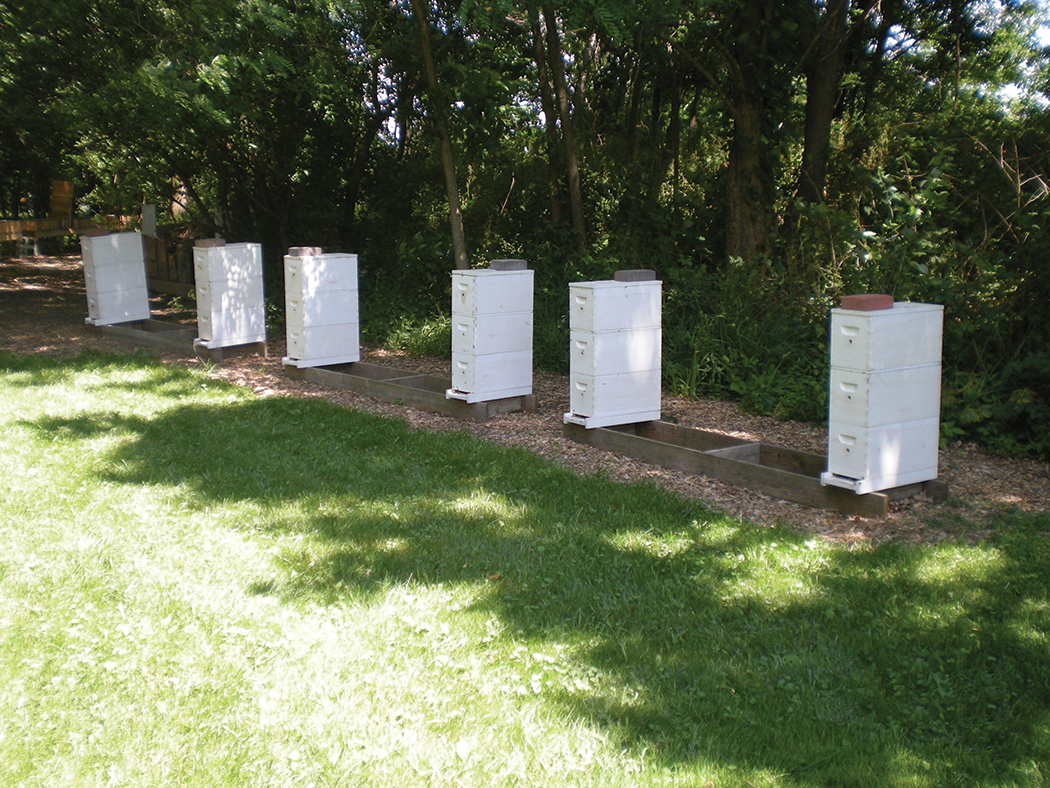
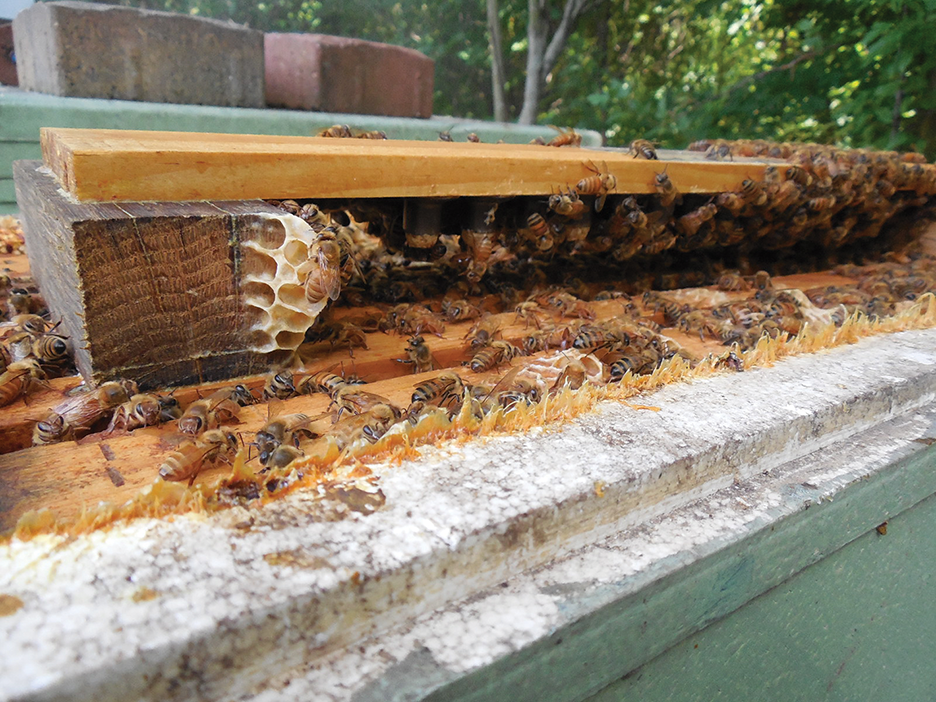
Cell builder nucs ready to make cells, bees, brood and honey. Note the cell builders are not heavily “bearded” with excess bees.
A slight modification on this system, again for the “lazy beekeeper” in me, is to fill the five frame nuc with frames, place a shim or feeder rim on top of the nuc, and then place the newly grafted cells on the top bars as shown in the pictures. This is only possible when the temperatures are warmer, and to facilitate this method I use polystyrene nucs that provide added insulation. By placing the cells on the top bars, I can quickly inspect and remove cell bars without much disturbance to the colony. For me, it is more about speed and efficiency.
If your objective is to raise successive batches of cells on a consistent basis then there are some additional steps to the system and this is ultimately where the concept of the “net gain” comes into play. Prior to the start of queen rearing season, I build up my
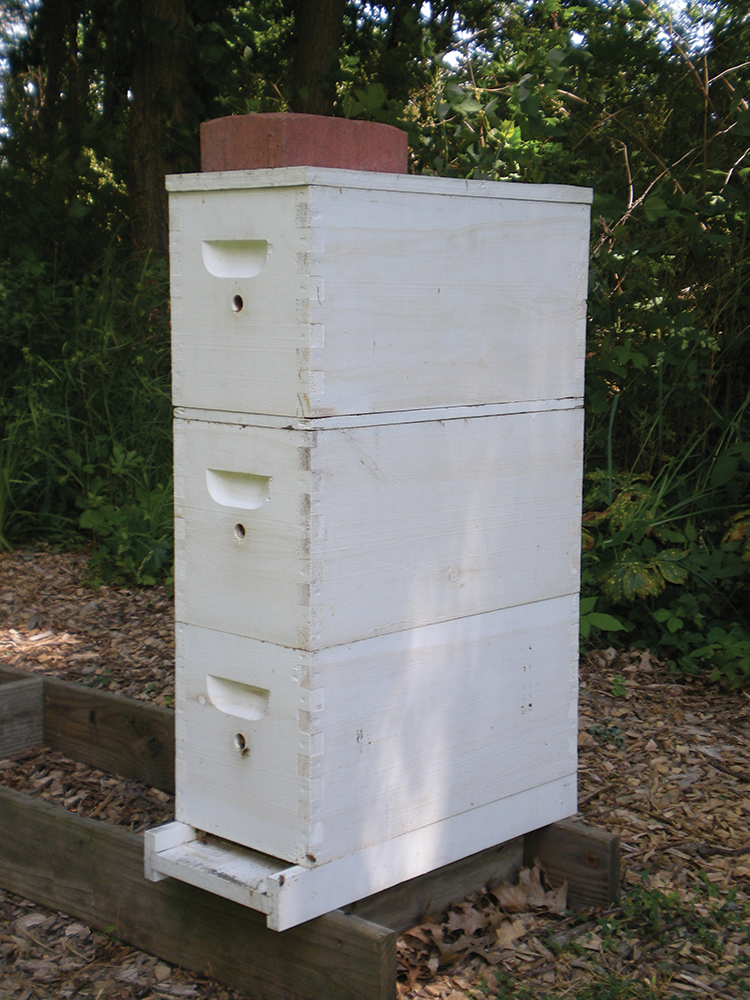
A queen excluder is placed between the second and third story to keep the cells safe in the top box. Screened bottoms are used to help with temperature control and vent holes are placed in each box to allow drones to move freely, especially out of the top box.
nucleus cell builder colonies to the point where they are three-story, five frame nucs nicely filled with bees. The system I use was developed over many years to accommodate my need for a steady weekly supply of queen cells. I typically run six cell builders and this will easily provide me with 150 or so cells per week. I can adjust the number of cell builders up or down, but generally work in multiples of “3”. Three cell bars fit on a grafting frame in the cell starter. One started bar of cells is then given to each cell builder. My goal is quality because in all of the years I have been raising queens, my records show that quality starts in the cell builder and pays dividends the rest of the queen’s life. The cells I produce are then destined to become instrumentally inseminated queens. Again, quality is important and the number of cells I produce each week is later tied to the number of queens I will have to sit down and inseminate a couple of weeks later. Once the system is up and running, it just keeps plugging along with a little time and management on my part.
Growing the nucs early in the season, in order to take advantage of some early queens, also requires a little care and attention on my part. The nucleus cell builders are fed and equalized in order to keep them all in a similar state of growth so that they can be managed collectively as a unit. In my case, all six cell builders should be at the same physiological state of growth. Colonies progress through the season at different rates, but with a little management they can be held in sort of a suspended state of constant growth. The target point I aim for is a young populous colony a couple of weeks before the initiation of swarming preparation. Once a colony initiates its own swarming development, it is not of much use to me as a cell builder. It is as if they have gone too far. Even if I allow them to swarm or even split them and rebuild them with brood and bees from another colony, the remaining bees still have a greater propensity to swarm again and will often do so. It is as if they have made up their mind and there is little I can do to distract them from the urge to swarm. In my experience such colonies are less than ideal cell builders.

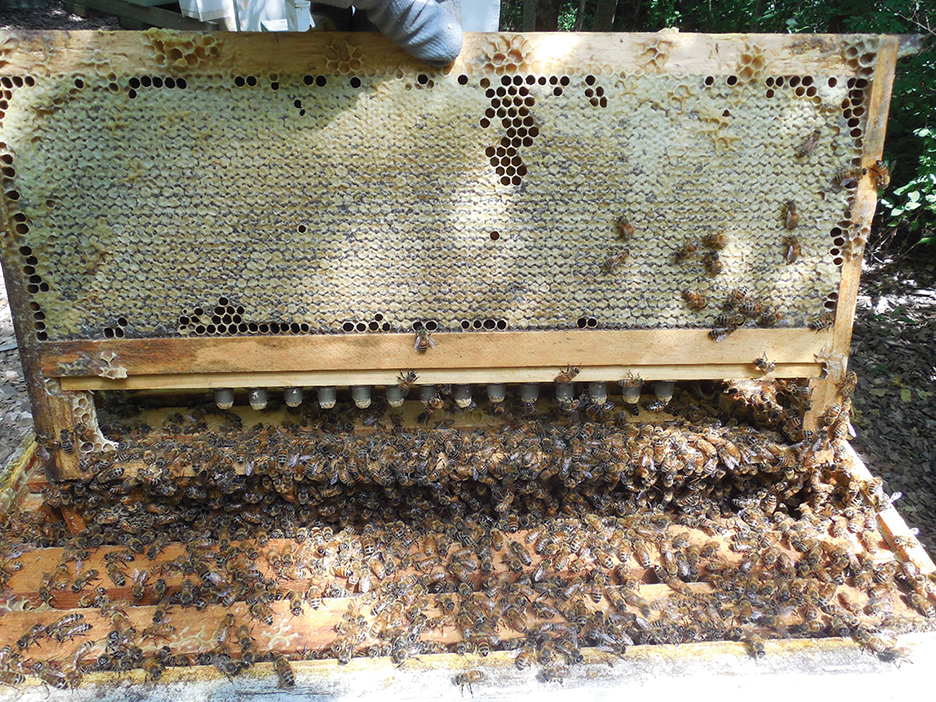
The population or density of the bees inside the cell builder is comfortable, but not overwhelming. This picture shows the top box where the started cells will be placed.
Keeping the cell builder from crossing over into that swarming impulse is key. Each season is different and each cell builder is different. There are a couple of primary factors that seem to “send them over the edge” so to speak. In the early Spring, temperature and incoming nectar appear to be the two main factors I contend with. The past couple of Springs we have had some cool wet periods punctuated by temperature spikes up near 90 degrees. This seems to drive me and the cell builders nuts! The best I can do is watch the forecast and make sure the cell builders have adequate room to expand on those warm/hot days. The warm days sometimes coincide with a spike in nectar availability if it is late enough that plants are blooming abundantly. It really is a balancing act to get the “goldilocks” scenario of just right. Screened bottom boards certainly help as I can close them if it is cold and open them when it is warm.
 As the cell builder colonies begin to fill out their space, this is where the management and “net gain” starts to add up. It took me many years of trying to figure out how to keep a colony just right for building cells over the course of our spring season. Rather than adding bees and brood as is common practice with other queen rearing systems, I need to remove bees, brood and honey with my system. But what bees, brood and honey need to be removed in order to keep a colony in a constant state of growth to maintain that sweet spot for producing cells? From my experience, the field bees are the so called “trouble makers” that cause the colony to age. More specifically, as the ratio of older adult foragers increases relative to the number of young nurse bees, the colony progresses more towards swarming. Therefore, my goal is to maintain a nice balance of foragers and younger nurse bees weighted towards the younger side.
In order to accomplish this delicate balance, my nucleus colonies are put to work raising cells just as soon as they are physiologically mature enough to do so, which appears to be when they fill 80-90% of their space in the colony. They are not packed or crowded but comfortable. They have the bees and the resources to care for their brood as well as some excess cells. To keep them at this point I begin managing the cell builders on a weekly basis. I want them to direct extra resources towards the cells on the cell bar and not their own cells on the combs.
One would initially think that a good nectar flow would be great for producing cells, but the opposite is true.
Again the cell builders are growing colonies, and as they grow they are managed according to their needs and growth. Some will grow faster than others and resources may initially be swapped back and forth between cell builders, but soon they will all be producing excess brood, bees and honey. To effectively remove the troublesome foragers, I visit the cell builders as early as possible in the morning to ensure that most of the field force is still at home so that I can accurately judge the population density inside the colony. Equipped with extra nuc boxes and drawn comb, I start at one end of the cell builder yard and work my way through the six cell builders, re-working them for another seven days of service. As I work through the cell builders, I remove extra frames of brood and honey, preferably from the bottom box or the outside frames of the second story. These areas are abundant with older foragers that are awaiting their foraging duties for the day. When the weather is warm and resources are abundant, the cell builders grow rapidly. Many weeks, the cell builders can spare two frames of brood and two frames of honey. This is approximate and subject to the condition of each cell builder. Early in the season, I use the excess brood and bees to start new nucs with a frame of brood and a frame of honey, so this effectively produces two new nucs per cell builder per week. If resources are light, I stimulate the cell builders with a light syrup and pollen patties in an effort to keep them growing and moving forward.
I

Three days after grafting, it looks like the cell builder is doing a nice job with the cells.
n our area of the country, black locust trees generally bloom the middle of May. One would initially think that a good nectar flow would be great for producing cells, but the opposite is true. A strong honey flow wreaks havoc on the cell builders. The bees are all consumed with hauling in their bounty, and rightfully so. The cell builders are overrun with nectar and cell quality suffers. At this point I find it is best to suspend cell building for a week or at least accept that I will have to work harder. I do my best to provide extra room for the deluge of nectar and maintain some sense of sanity in the cell builders. It is a great time to give them an extra honey super with drawn comb and maybe a little bit of foundation. I am just trying to appease their need for space until the nectar deluge subsides. A mild nectar flow is great for building cells as it has a stimulatory effect, but a flow such as the black locust flow can be counterproductive.
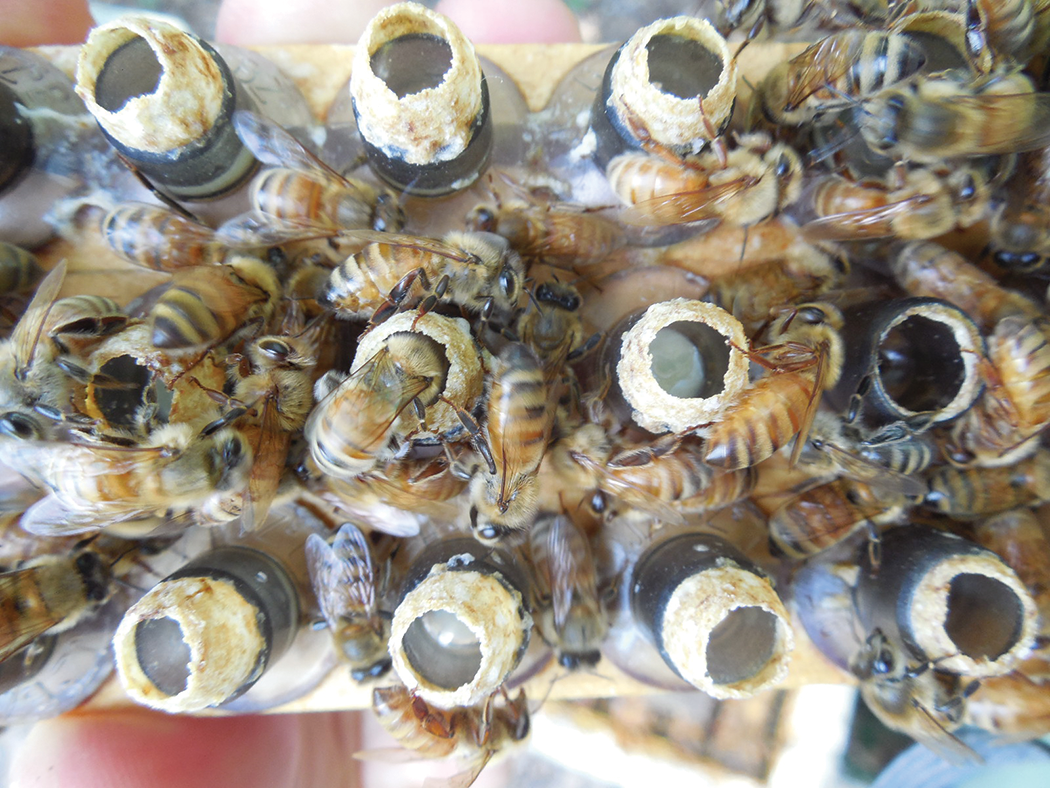
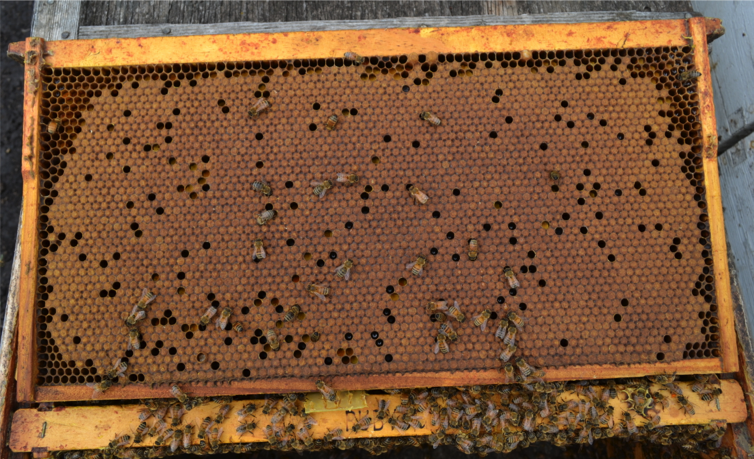
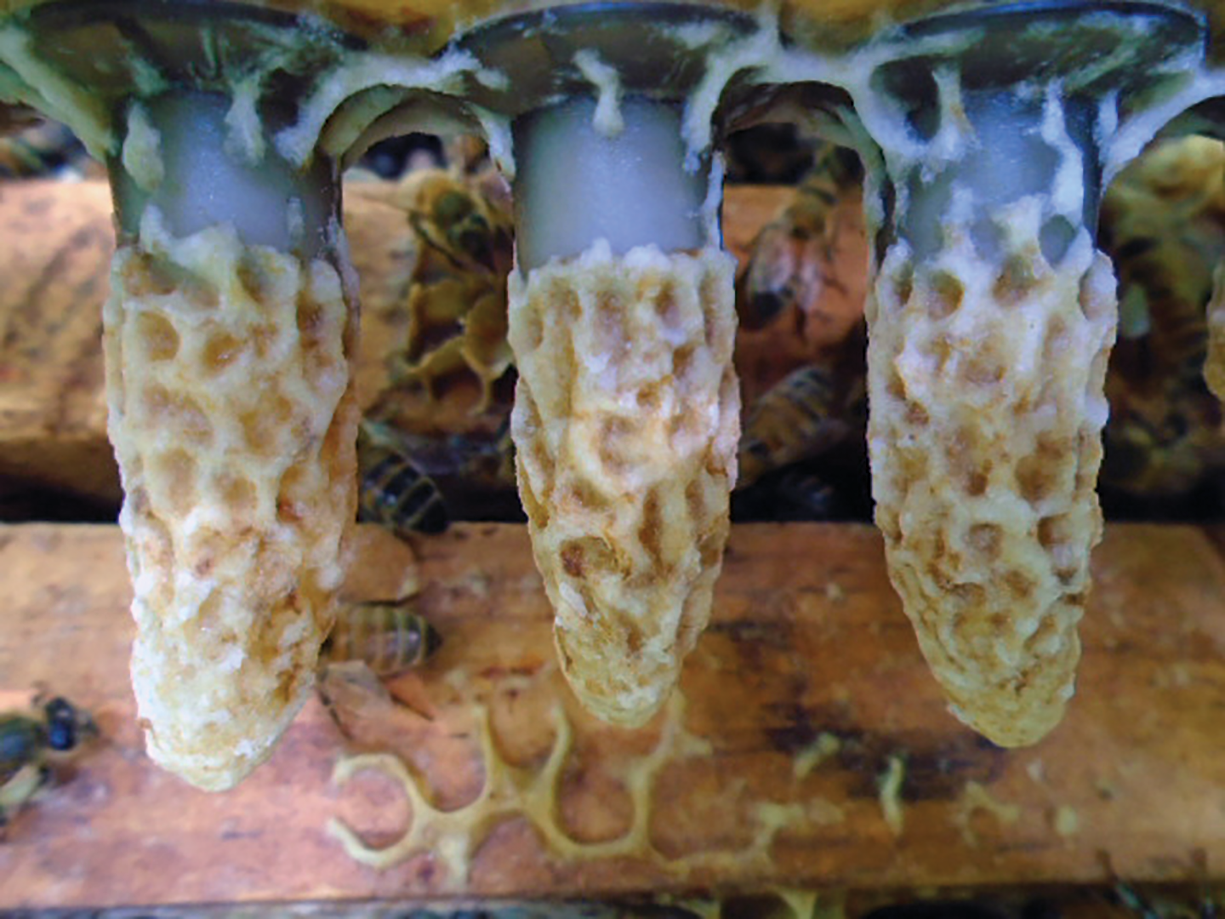
Five and a half to six days after grafting the cells are finished. Note the royal jelly fills the entire based of the plastic cell cup. These are well fed cells.
As I work through the cell builders, I rearrange brood and resources. Full frames of honey are moved to the bottom box on the outside, and sealed frames of brood are also moved down to the bottom box. They will then be in the proper place and covered with older foragers the following week. Drawn empty comb is then placed in the second story where the queen spends a good deal of her time. Foundation will not work at this point, most years. Drawn empty comb will keep things moving along more smoothly.
Since the cell builders are three deep nuc boxes tall, the middle box is well insulated from temperature extremes and the queen quickly fills the empty combs. Perhaps the most important part of this inspection is to remove any unwanted queen cells and to rearrange the third story where the cells are produced. The top box is separated from the queen right portion below through the use of a queen excluder. The top box is provisioned with a frame of honey on each outside wall followed by a frame of young open brood on each side and an open spot in the middle for the grafting frame. There is some debate as to whether open brood detracts from the quality of the cells, but in my opinion it is highly beneficial. Young open brood not only attracts nurse bees, but it also serves to encourage closer regulation of the temperature in that nurse bees attracted to the young brood help to maintain a more constant temperature and humidity level surrounding the cells.
Finished cells.
Frederich Ruttner explained it best when establishing queen rearing colonies. He stated that the bees needed to “learn” to build cells. Perhaps “conditioned” would be a better term, but in my experience, some colonies need to be transitioned into raising cells, but once they get in the correct mood or mindset, keep them working! Provided the cell builders have a continuous supply of grafted cells to work on, their rogue cell production should be minimal. If not, something is wrong and they may be too far gone with the idea of swarming. Once I get into the weekly routine of working the cell builders I can give them started cells about every four days. In my experience, cells are sealed approximately 5.5 days post grafting. This varies slightly depending on colony conditions and between cell builders, but the idea is to keep the cell builders doing what they are designed to do, build cells. In addition, by confining the cell builders to a relatively small space with vigorous queens, you are effectively generating excess brood, bees and honey from the system to establish additional nucleus colonies throughout the queen rearing season. Happy grafting this season!

If you would like to see how the quality of your queens compares to other queen rearing operations, NC State Apiculture Program and their Queen Quality Clinic offer some great services to beekeepers! Above is a comparison for a group of “banked” Inseminated Queens (from later in the season) I submitted for analysis. The weight was relatively low due to banking the queens, but their thorax and head width, which do not change with egg laying status, were great. At the time when these queens were submitted, the “global averages” of 682 queens sampled by the Queen Clinic were Weight = 195.9mg, Thorax width = 4.47mm, and Head width = 3.55mm. These queens surpassed all of the global averages.