by Julie Finn
My kids and I have made a LOT of rolled beeswax candles.
It’s kind of our thing.
My kids have homemade rolled beeswax candles on their birthday cakes. They’re the tea lights that I put under my essential oil warmer, and the tapers that we have on the table for our “fancy” family dinners.
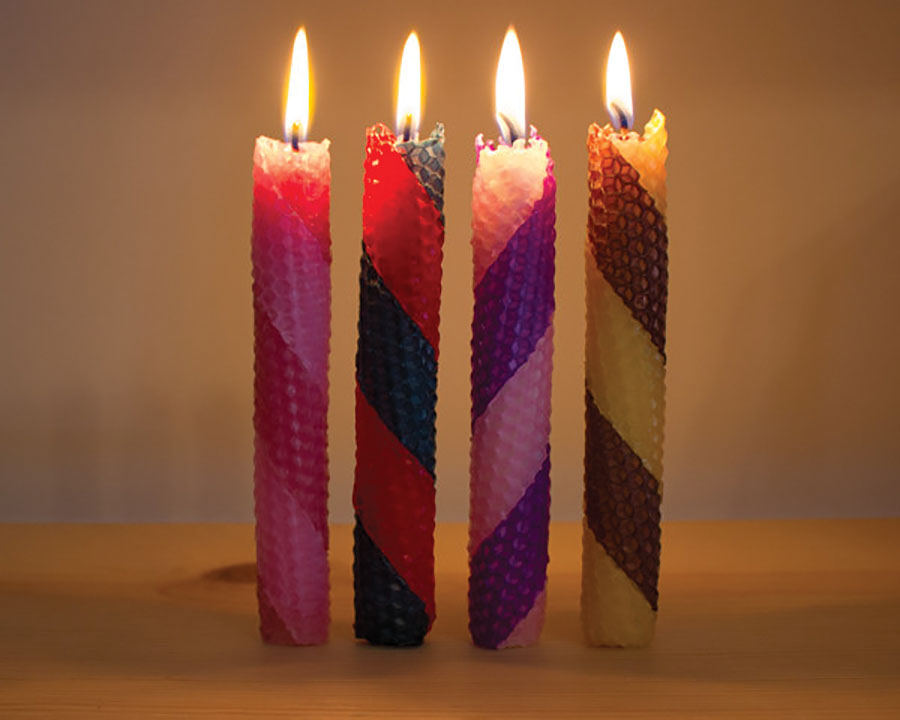
You mostly make rolled beeswax candles in single colors, or perhaps by wrapping two different-colored beeswax sheets together. This method that I’m going to show you, however, is a little different: it relies on a regular candle as its base, with colored beeswax stripes laid on top. It’s an especially nice look when you want something festive, such as the red and green of Christmas, or the pink and more pink of Valentine’s Day.
And here’s how you make it!
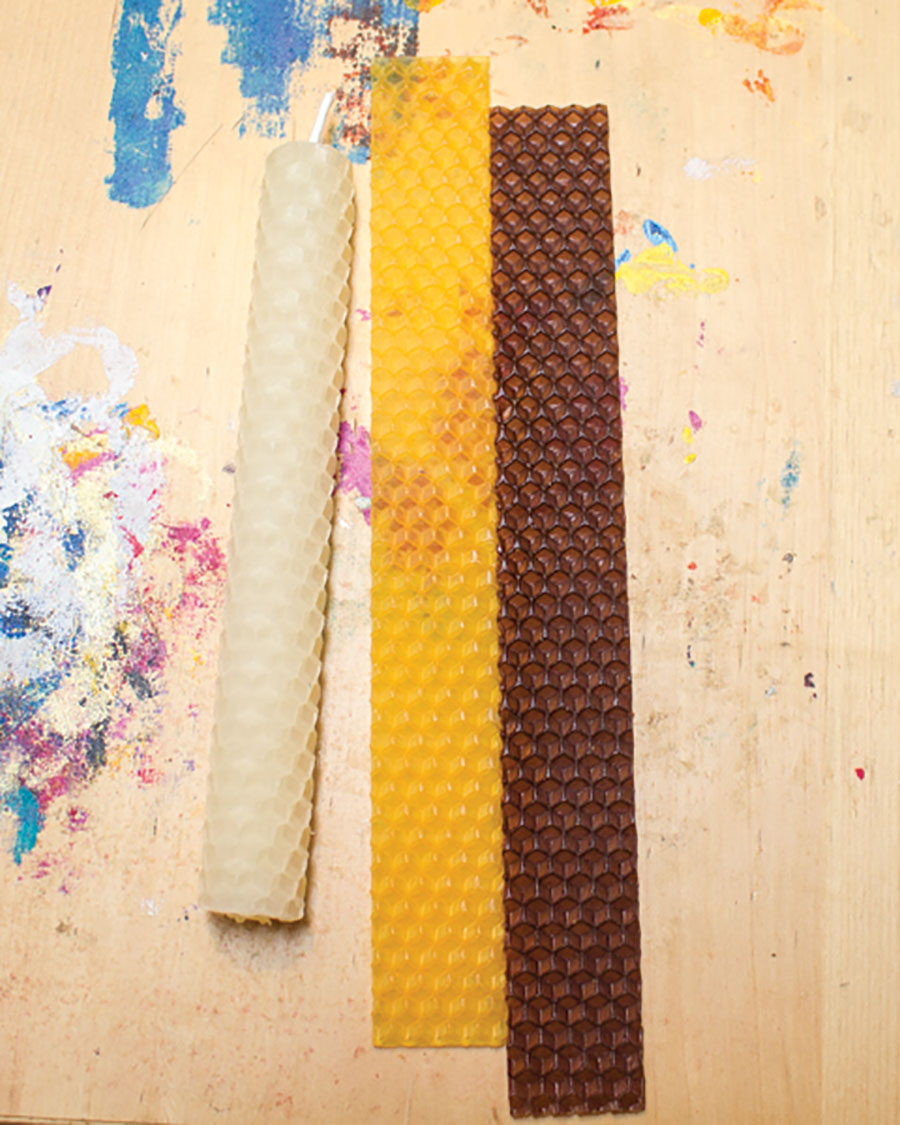
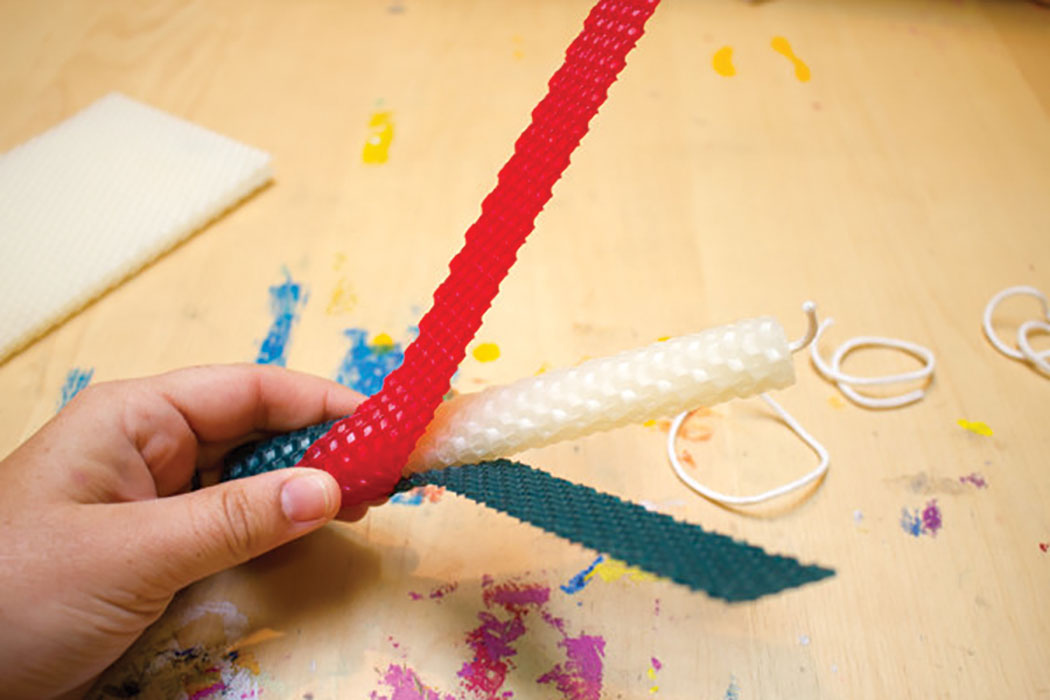
1. Choose and cut your beeswax. For this project, you’ll need a light-colored piece of beeswax foundation that’s 4″ wide by 6″ tall, and two pieces of colored beeswax foundation that are 1″ wide by 8″ tall.
To cut beeswax, first square it on a gridded cutting mat. Take a look at it at your beeswax sheet–see the way that the hexagons line up? In one direction, they line up in a straight line, but in the other direction, the line is staggered. The straight line always goes ACROSS the candle. If you line up the sheet so that the straight line goes up and down, the candle will be impossible to roll smoothly.
Use a ruler as a straight edge, and an x-acto knife to make the cuts.
2. Make the base candle. I find that the rolled beeswax sheet is much more malleable if I first warm it up for a few seconds with a heat gun or hair dryer. Next, lay the sheet out sideways on your surface, with one edge against the table edge or another area that will help you keep it aligned.
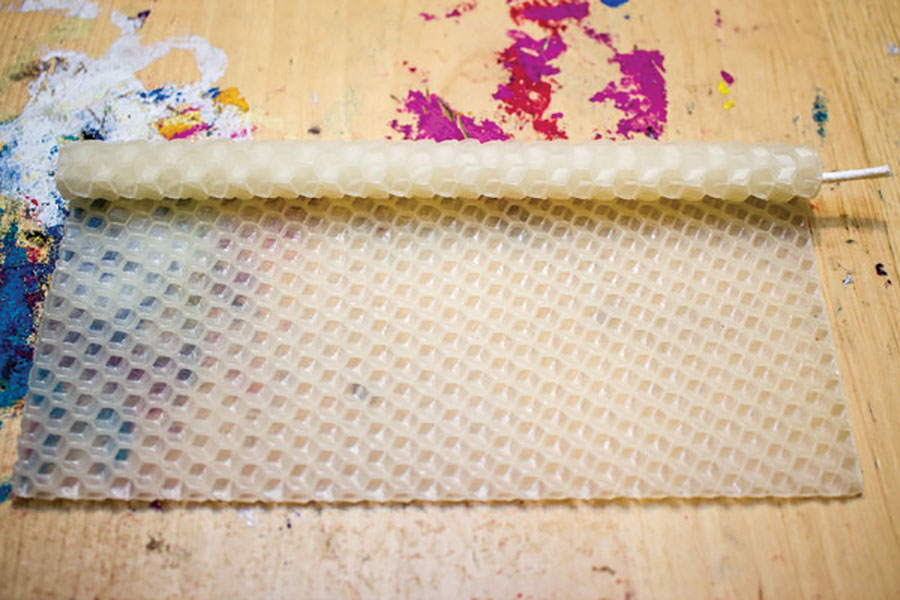
Press a candle wick into the far edge of the sheet, then roll the sheet around that wick.
Once the wick is set, rolling the candle the rest of the way will be easier. Gently smooth the edge of the finished candle and press it down so that it attaches.

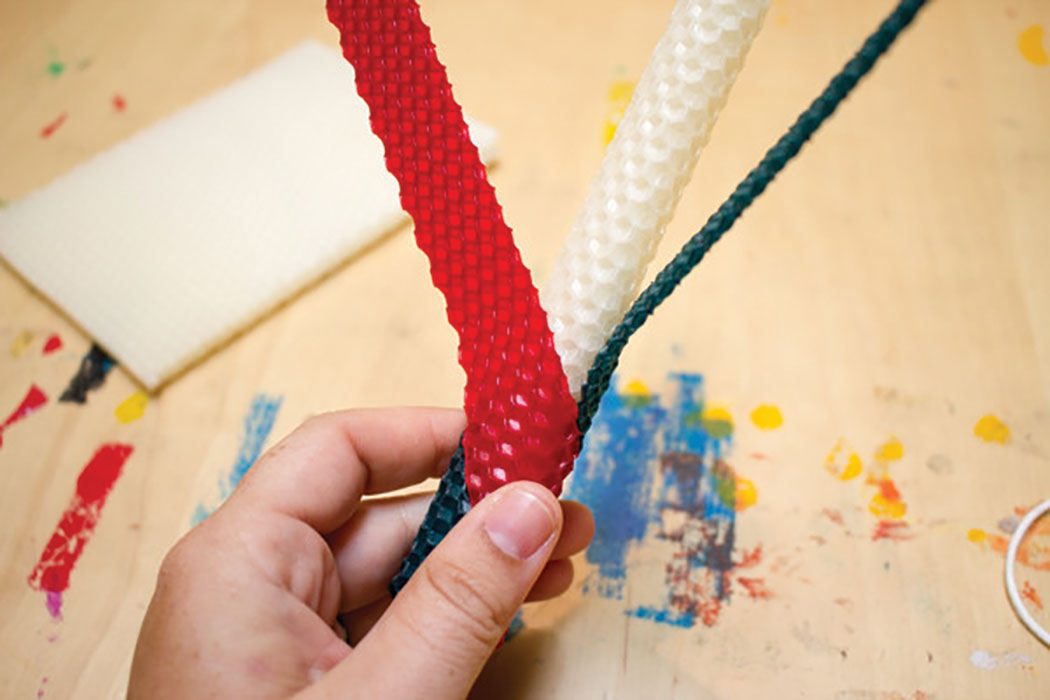
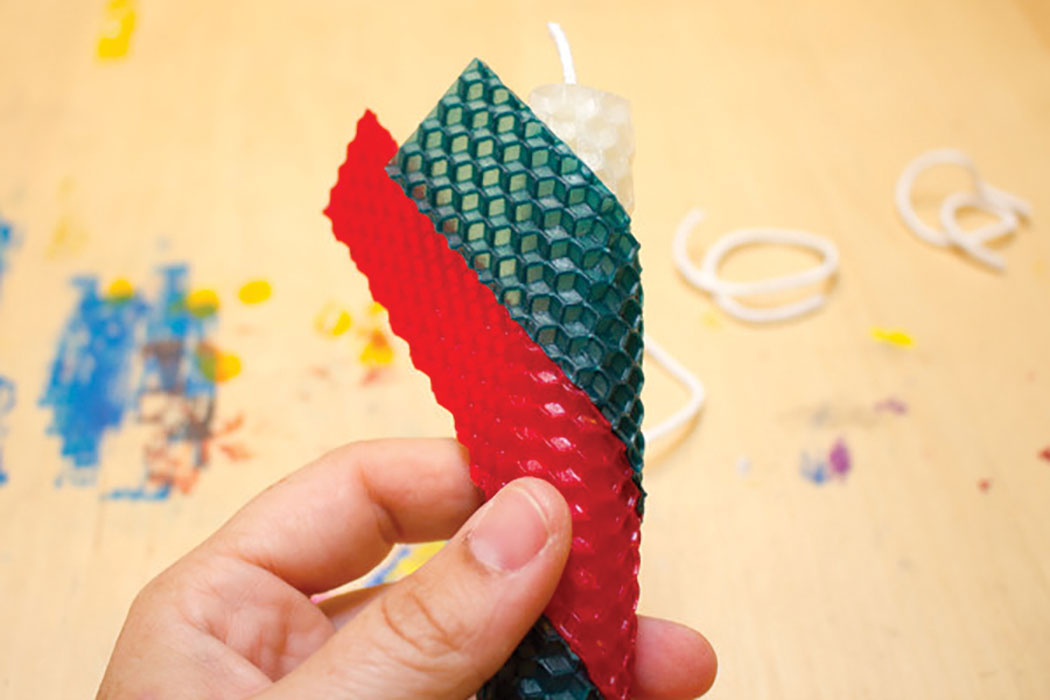
3. Prepare the stripes. Butt up the two strips of rolled beeswax to each other, with one a little higher than the other. If possible, warm them with a heat gun or hair dryer, then press the sheets together at their edges so that they’ll stick together.
4. Roll the stripes onto the candle. If you know how to calculate the dimensions of a right triangle, you’ll know that you’ve already got the measurements for one side of the triangle and the hypotenuse, and that information will help you figure out that you need to roll these strips onto the candle at an angle of between 33 and 45 degrees. You don’t want to roll your candle on top of your gridded cutting mat, because it will get wax on it, but the angle guides on your mat can help you see how to place the stripes.
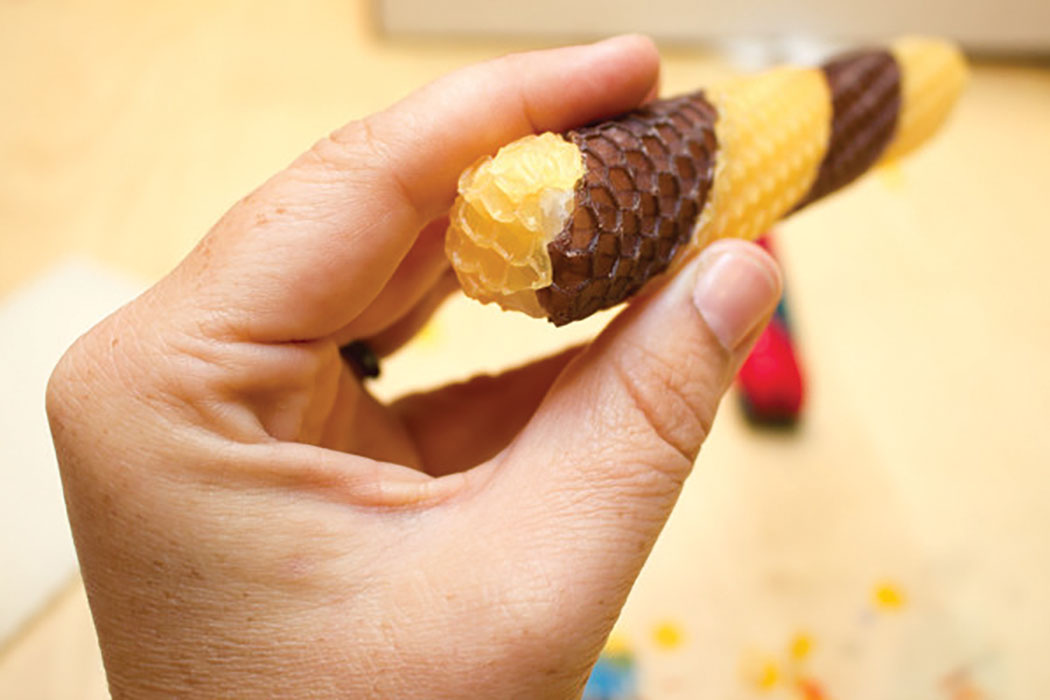
Hold both strips together at that angle, and begin to roll them onto the candle. If you’ve got the angle correct, you will see that the strips meet themselves as they go around, so that you can’t see any base candle peeking through. If you don’t have the angle correct, however, don’t worry–just gently unroll the strips and try again.
Continue to roll the stripes up the candle. Wax is pretty forgiving, so don’t be afraid to do a little futzing to keep the stripes in the right place.
When you get to the top of the candle, you can either use your x-acto knife to cut off any excess wax, or you can leave it if the points that stick up look symmetrical.
At the bottom, again, you can either cut off the excess wax from the stripes, or smooth them over the base candle.
This method will result in a candle that will fit into your conventional candleholders. You can change the dimensions of the candle, of course, but then you’ll have to recalculate your right triangle.
Julie Finn is a writer, crater, Zombie preparedness Planner and homeschooling mom of two kids. These instructions were taken from www.craftingagreenworld.com.