


 By: Peter Sieling
The 1901 edition of ABC of Bee Culture features a woodcut with the caption “How to sit on hive-cover”. You might want to check it out if they didn’t cover that at your Intro to Beekeeping class. Back then, the beekeepers sat on hive covers while working their bees.
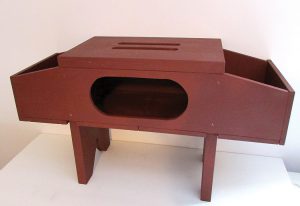
 The 1910 and 1920 editions of ABC and XYZ of Bee Culture show a photo of a hive-seat, described not just as a “great convenience” and “very handy”, but as “almost indispensable” to professional apiarists of that era. A hive-seat doesn’t just save your back; it contains compartments for various tools, your record book, and smoker fuel. The smoker hooks on the side. The handle on top makes it easy to tote around all day.
If I were designing a modern hive seat, I would include a longer compartment to fit a modern bee brush and other tools. But this old seat has a folksy, primitive furniture look. Even if I don’t use it in the bee yard, it has other uses in the home, garden, or honey house. It would also make an attractive plant stand or a gift for that Special Someone’s birthday.
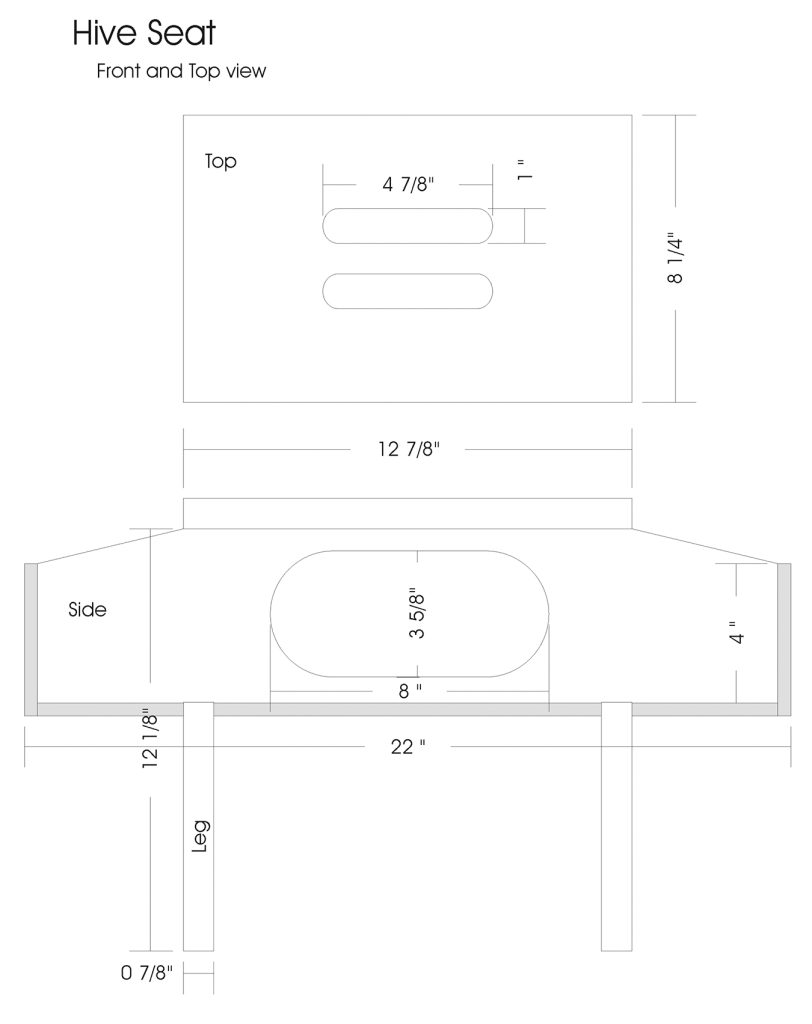
 The original hive-seat measures about 22 inches long by 13 inches high. The top and legs use 7/8” thick lumber. The sides, ends and bottom are made from 3/8” thick wood. Standard 4/4 lumber, usually sawed to a plump inch, will easily plane to 7/8”, but 3/4” lumber will also work. The lumber should be inexpensive, light weight, and easy to nail; species like poplar, pine, basswood, aspen, cedar, and cypress are all suitable. If you don’t have easy access to lumber, I’ve put together a tulip poplar kit. Ordering information is at the end of the article.
Instructions:
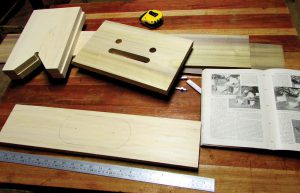
I estimated the dimensions based on the proportions in the illustrations but they can vary to suit the builder. Some parts can be cut to their exact size. Others should be left oversize and trimmed to fit as you go. That will reduce the chance of cutting something the wrong size.
- Surface the top and legs to 7/8”, and the sides, ends, and floor to 3/8”.
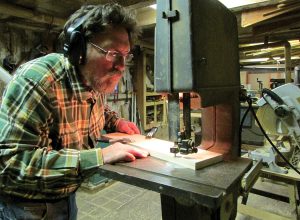
- Rip the legs to 7½” wide and crosscut to 12-1/8”. Two styles of feet are included in the drawing. For the V-style, drill a ½” hole in each leg, then lay out the legs and remove the waste portions with a jig saw or band saw. The half inch hole is optional. The second style is a semicircle and is cut out with a jig or band saw.
- Cut the 3/8” sides to 21¼” long by 5” wide.
- Crosscut the top or seat to 12-7/8”. Rip to width – 8¼” should be equal to the width of the legs plus the thickness of the two sides.
- Mark and cut out the handles in the seat. Drill the four 1” holes for the ends, then remove the waste wood with a jig saw. Round off the sharp edges with sandpaper.
- Mark the tapers on the sides and cut with a jig or band saw. Mark and cut out the oblong hole in one side. Clean up the saw marks with sandpaper.
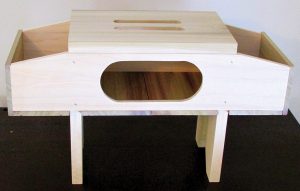
- Assemble the legs, sides, and top. I used pocket screws to attach the legs to the seat so there are no visible fasteners on the top. That’s partly aesthetic and partly practical; if the nails work loose, they could catch and tear trousers. If you don’t have a pocket screw jig, use 2” finish nails. For attaching sides, I used 1½” staples. You can also use 1½” finish nails or the same nails you use for nailing top bars to side bars on frames.
- Cut bottom pieces to fit. Nail in place with frame nails, staples, or brads. Cut and fasten the ends.
- Finish any way you want or leave it unfinished. I used old fashioned milk paint, but boiled linseed oil is a traditional clear finish that beekeepers likely would have used one hundred years ago. Apply with a rag, wait five or 10 minutes to soak in. Add a second coat if desired.
 That’s it. Add some queen cages, a couple pens, markers, duct tape, a small pair of scissors, a bee brush, and a hive tool. Chop up the leftover scrap lumber and stuff it in the center compartment for smoker fuel. You’re ready for Spring.
Materials:
Number Description Dimensions
1 Top 7/8” x 8 1/4” x 12 7/8”
2 Legs 7/8” x 7 1/2” x 12 1/8”
2 Sides 3/8” x 5” x 21 3/4”
1 Bottom (center) 3/8” x 11 1/8” x 8 1/4”
2 Bottom (ends) 3/8” x 4 3/16” x 8 1/4”
2 Ends 3/8” x 4 “ x 8 1/4”
You can buy a hive-seat kit at www.makingbeehives.com. Cost is $29 plus shipping. NYS residents add 8% sales tax. If you prefer, order by phone at 607.566.8558. VISA, MasterCard, Discover, and PayPal accepted.

Peter Sieling sells cabinetmaking lumber and keeps bees in Bath, NY. His books are available at makingbeehives.com.

