
By Ed Simon
After working hard all Summer, it’s time for something just for fun.
 It’s time for some frivolity. You have worked hard, become frustrated and then recovered. Now let’s build something just for the fun of it. Whirligigs are the lawn ornaments that move or react to the wind.
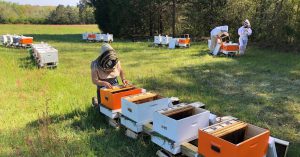
A whirligig can also be an attention getter for the fairs or flea markets where you are selling your honey and can also be sold to gardeners as lawn ornaments.
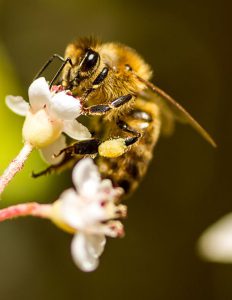
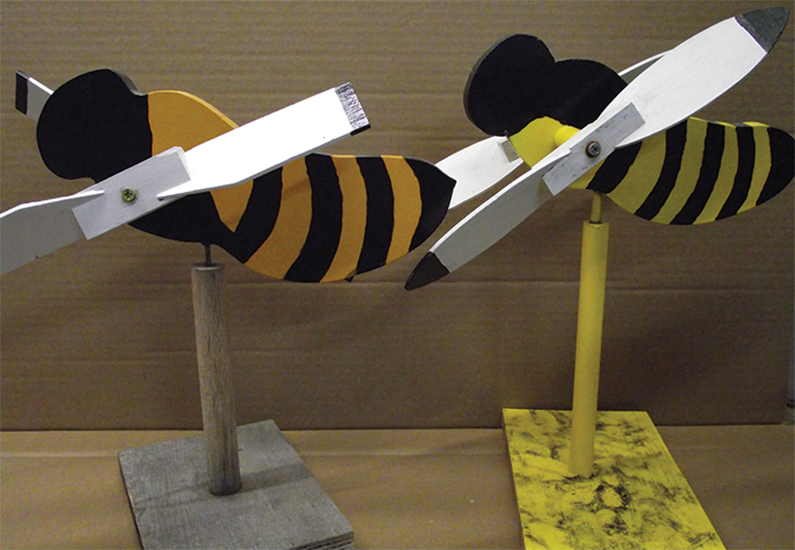
This bee shaped whirligig is easy to build and will delight oldsters and youngsters alike. It is not meant to be an exact replica of a bee, but a stylized version. However, no one would have difficulty recognizing it as a bee.
Parts
1. ¾” x 6” x 12” Lumber – Bee body (1)
2. 5/8” x 4” Dowel – Wing support (1)
3. ⅛” x ??x?? – Wing (4)
4. ¾” x ¾” x 3” – Wing hub (2)
5. ¼” Copper tubing – Wing hub bearing (2)
6. ¼” Copper tubing – Rotational pivot bearing (1)
7. ¾” x 6’ x 6’ – Stand base (1)
8. ¾” Dowel – Whirligig support (1)
9. #8 – 1¾” Screw (2)
10. Washers
11. ¾” x 6” x 6” Lumber – Stand base (1)
12. 1” x ??” Dowel – Standoff (1)
13. Long finishing nail (1)
Construction
The bee body will be made followed by the wings and then an indoor stand to display the whirligig.
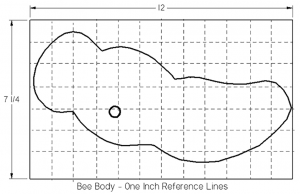
Step 1: Cut out the bee body (part 1)
Using the attached drawing, sketch the drawing on a sheet of paper. The lines on the drawing are at 1” increments. You can make a larger or smaller bee just by changing the spacing of the gridlines.
Hint: If you have a computer handy you can scan the attached drawing into the computer and then use an image editor to expand it to the size you need. Print it and use this printed output as the pattern.
Step 2: Cut out the bee body
When you are happy with your drawing, cut it out and trace the bee body on to a board. Cut sand and shape the body to your satisfaction.

Step 3: Drill a ⅝” hole for the wing support.
Hint: Only drill through the bee body until the centering point of the drill bit shows. Then turn the bee body over and complete the hole from the opposite side using the centering point hole as a guide.
Note: Be careful to drill the hole perpendicular to the hive body
Step 4: Make the wing support (part 2)
Cut part 2 from the ⅝” dowel. Then drill a pilot hole in the center of each end of the part 2. These pilot holes will be used for screw alignment and mounting the wings onto the wing support.
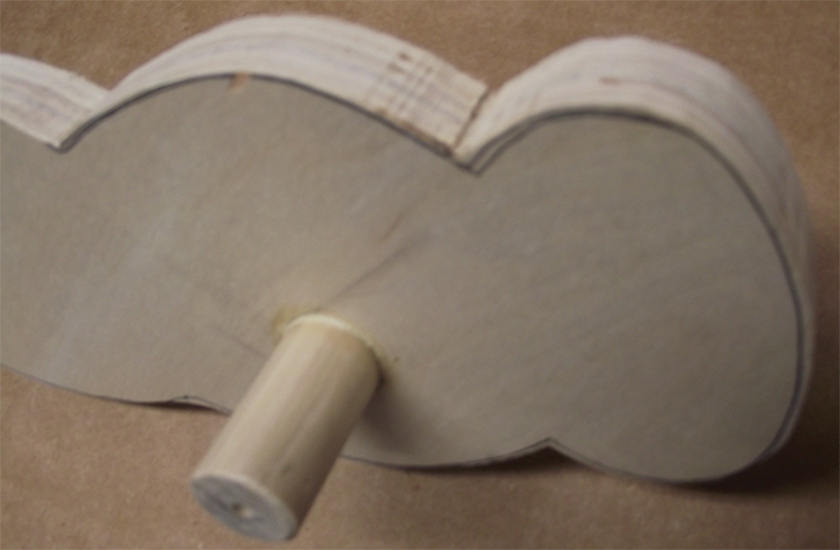
Step 5: Install the wing support (part 2)
Glue the wing support in the hole drilled in step #3. Be sure the support is centered in the bee body and the amount of support on each side of the body is equal.
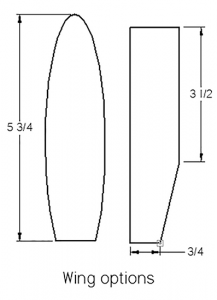
Step 6: Make the wings (parts 3)
Using the same technique, you used for step 1 to draw the bee body, draw the four wings on to ⅛” thick wood. You can design your own wings. A couple design restrictions need to be adhered to. First the wing width must not be wide enough as to hit the bee body. At the same time, it must be large enough to catch the wind. Cut the four identical wings out and sand them.
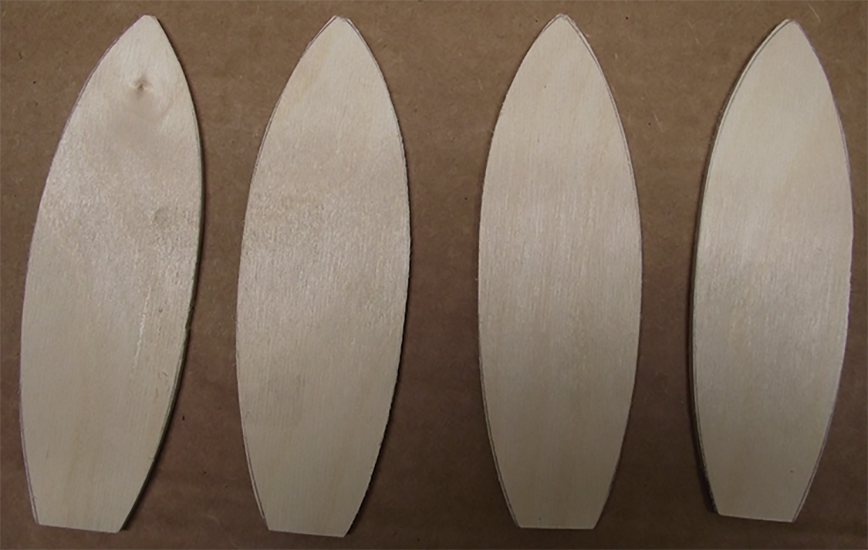
Hint: An easily obtainable source of free thin wood is a paint stirrer. Most home improvement stores will give them to you.
Hint: Align and clamp all the wings together and then sand them to shape as a single unit.
Recovery: If your design of the wing does not work, you can try again. The wings are separate and removable pieces until you finally glue them in place.
Step 7: Make the wing hubs (parts 4)
This is the most challenging part of making the whirligig. Cut a ¾” x ¾” x 3” piece of lumber. Make sure the grain runs the long way in the block of wood. Using the opposite corners as guides, cut a 1” deep slot in the end of the hub. The cut must be wide enough to allow a wing (part 3) to slide in and at the same time be tight enough to hold it in place. Continually test fit the wings to ensure a snug fit.

This is important: Now at the opposite end of the hub, perform the same cut. But, But, But, connect the corners that were not connected in the first cut. This will position the wings 90 degrees in relation to each other.
Repeat this step for the second set of wings.
Step 8: Add the wing hub bearings (part 5) to the wing hubs
Drill a 15/64” hole in the center of the wing hub.
Using ⅞” pieces of ¼” copper tubing (part 5), force it through the hole you just drilled. The extra 1/8” section of the tube will be positioned toward the bee body and keep the wing hub from rubbing against the wing support.
Step 9: Assemble the wing unit
Fit the wings into the slots in the wing hub. Do not glue the wings on to the hub at this time. You may find that you have to redesign your wings so they will spin freely on the assembled bee.
Hint: You may have to use paper shims to hold the wings in place so they can be tested.
Step 10: Test assemble the bee
Using the screws as axels and washers as bearings, add the assembled wings to the wing support. The wings should be able to rotate easily and not touch the bee’s body. The copper tubing that extends from the wing hub and a washer minimize friction and wear.
Hint: You can use a hair drier as a wind source to see if the wing design provides enough surface area to spin the unit.
Step 11: Finish the wings
Once you are satisfied the wings will spin freely, remove the wing assemblies from the bee and glue the wings (parts 3) into the wing hubs (parts 4). Align them carefully so they are straight. To ensure they are solidly attached you should put some small brads through the wing hubs into the wings.
Step 12: Reassemble the bee
Put the wings back on the bee. This is so the rotational pivot alignment in the following step will have the correct weight distribution.
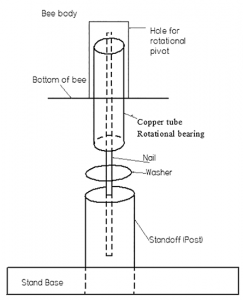
Step 13: Locate the rotational pivot (part 6)
The bee’s attitude is influenced by the positioning of the rotational pivot hole. The bee can either be flying up, down or level depending on the position of the pivot.
1) Tack a small brad into the top of the bee’s body.
2) Hang the bee from this brad. The bee will tilt using the brad as a pivot point. Move the brad along the top of the bee until the bee assumes the attitude you want.
3) Draw a vertical line from the brad to the bottom of the bee
This is the alignment needed to keep the bee facing into the wind with the correct attitude.
4) Drill a 15/64” hole in the bottom of the bee aligning it with the mark you made showing the center of gravity. Make the depth of this hole a deep as you reasonably can.
Note: The bee will rotate around this hole. The larger cross section of the bee is used to keep the whirligig pointed into the wind.
Step 14: Add the rotational bearing (part 6)
Cut a section of ¼” copper tubing and force it into the hole. The length of this tube needs to be longer than the depth of the hole and it must extend far enough below the bee, so the bee can rotate without hitting anything. It does not have to go all the way into the hole. This Tubing acts as a bearing and reduces the wear, tear and friction on the assembly when the whirligig rotates.
Note: The tubing can be shortened after the bee’s final assembly and the bee is tested on the stand.
Whirligig Stand
The stand is a separate item that is not needed for the bee to work correctly. It also eases the painting and testing of the bee. The stand can be used to display the bee indoors. It can even be attached to a railing outdoors.
Note: I attached the stand base to a patio railing with electrical cable ties which worked great.
Note: The dimensions listed are only suggestions. The base must be large enough to hold the bee in position without tipping over and the length of the standoff must allow the wings to spin freely.
Step 15: Make the stand base (part 11)
Cut the stand base from a piece of lumber that will be large enough to keep the bee from toppling over.
Mark the center and drill a 1” hole at the mark.
Step 16: Make the whirligig support (part 12)
Cut the support to length. The support must be enough to allow the wings of the bee to spin freely. On one end of the support drill a pilot hole and insert a long headless nail (part 13). This nail is the rotational pivot point for the bee.
Note: Don’t forget to add the thickness of the base when calculating the length of the support.
Note: After inserting the nail into the support, I ground the head off the nail.
Step 17: Finish the whirligig support (part 12).
Insert and glue the support (part 12) into the hole in the base (part 11) and allow it to dry. Add a washer over the nail. This will contact the bottom of the rotational bearing and prevent the support from wearing away.
Step 18: Test the bee for rotation
Slip the rotational bearing of the bee over the nail on the stand. The nail top should not hit the wood of the bee. If it does, then shorten the nail. The wings should also spin freely.
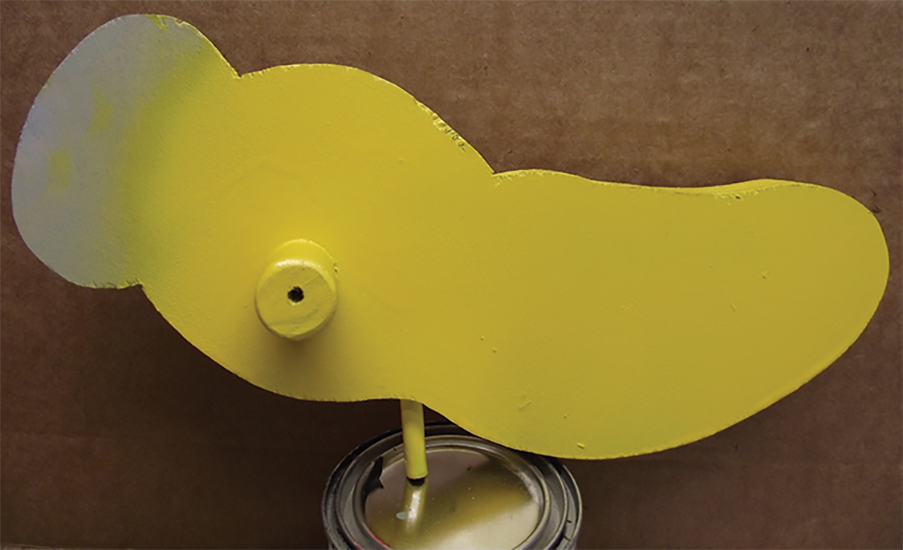
Step 19: Paint the bee and the stand
Disassemble the bee and paint it with outdoor enamel.
First paint the bee with an enamel wood primer. After it dries, spray the bee body where yellow is needed. Trace or faintly draw the stripes outline on the bee and fill in the stripes with black enamel.
Reassemble the bee after you have completed the painting.
Hint: Use the stand to hold the bee while the paint is drying.
Hint: John Deere Yellow or a Canary Yellow spray paint works exceeding well for the yellow stripes. Use gloss enamel paint for a shiny finish.
Usage
A whirligig needs a stand to position it, so it can catch the wind to twirl its wings and rotate its body. When placed in a garden it can be directly attached to a post or tied to the top of a fence.
Conclusion
At a sales event this is an eye-catching display that will catch customers attention. Use this type of display to help you get the reward you deserve for your beekeeping skills. If you make two or more of these bees you have the start of a swarm and extras can be given to friends or used as door prizes at your bee meeting. A smaller version can be made to sit in your office or den.
Get a copy of Ed Simon’s book Bee Equipment Essentials with detailed drawings, construction hints and how-to-use instructions for dozens of beekeeping tools and equipment from www.wicwas.com. Ed can be contacted through SimonEdwin41@gmail.com.