By: Claire Kimmel
Still Learning.
It is a long desired hobby for my husband, but I have had much opportunity to be involved. After an unusually warm Winter, we had an unusually erratic Spring. Swarms were plentiful; we ended up catching seven and a half from our six hives. It is the half a swarm that became interesting.
-
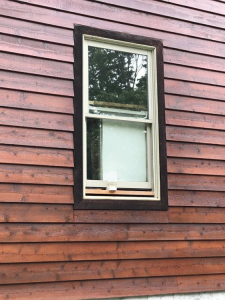
- The outside view of the hive box. The matte board is dark inside but white outside. It slides between the hive box and the window of the bedroom. The bottom gap is the space between the floor/landing board and the window sill. The next gap is the entrance for the bees.
-
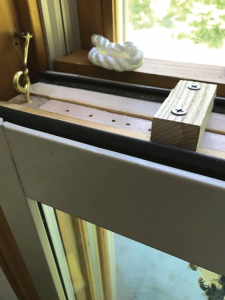
- This is a detail shot that includes the hook and eye that secures the hive upright and the short block of wood that connects it together at the top. These holes drilled for air flow are now covered by the wax of the comb.
On May 1st we noticed the little cast swarm huddled under the electric meter reader. It was about a third the size of a normal swarm. Then on the 2nd we heard weather predictions that the night time temperatures would be around 35 degrees by the 5th. Even if we put the cast swarm into a hive box, they would not make it through that kind of cold. We feel a special bond to our bees, and it grieved us to think of this little family freezing to death. But we are not skilled enough to do what experienced beeks would do, even if we knew what that was.
My husband says I am crazy, and I suppose he is right – what I did on May 3rd will prove it!
Like most beekeepers we have wanted to have an observation hive, traveling down many youtube and google rabbit holes about how to make one. Because we are radical re-cyclers (some might say borderline hoarders?) our basement is full of “Useful Things.”
I started with 2 windows. They are double paned, 22½” x 31”, wooden inside and aluminum outside. Placed together they would not have had enough space for bees. So I made some wood strips almost an inch thick and an inch wide and screwed these to the two sides and the top of one of the windows. When I laid the second window on top of this, it seemed like a good space for bees, but how to connect them? The aluminum cladding was on the outside of my new box, and I did not feel confident trying to drill through aluminum. So I made two wooden feet of the same inch thick wood, and used them to connect the windows on the bottom and also extend out a few inches. They thus served to create the space needed for an outside entrance to the hive. I cut two short blocks of wood to connect the top side of the windows together. I had to close the back opening on the bottom to keep bees out of our bedroom, so I screwed in an inch square strip along the bottom of the back window. Now for a floor/landing board. We had a two inch thick board that was 7” wide. Here’s is where I just got lucky, because instead of cutting it the size of my new hive, I decided to cut it the length of the window opening. I cut out a groove on the underside for the window sill trim to fit into, and then attached the whole window box to the left side of the big board, screwing it on from the bottom. This gave me 8” extra on the right side on which I put another inch square strip to keep the bees out of my bedroom. We also stuffed a washrag into the small space still open.
When I put this box onto our window sill, I could close the window down onto the legs and have an opening for the bees to the outside and a sealed space into the bedroom. The groove under the landing board worked well, but was not sufficient to keep the hive in place. There were several attempts to secure it that did not work, and one that finally did. I had an old hook, but could not find an eye the right size. I also needed some rope to block off the space between the two regular windows when opened slightly for the entrance to the hive box. These two things are what I went out and bought at the hardware store for under $10.
-

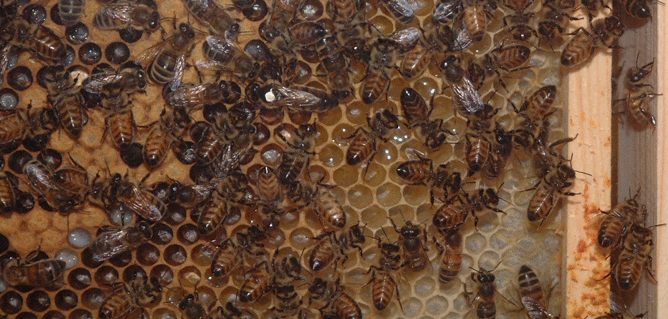
- This is what the comb looks like today.
-
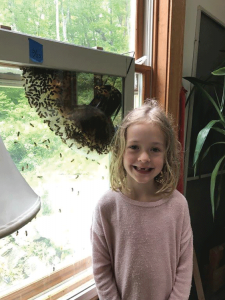
- Author’s granddaughter. What you are seeing in the top right corner of the hive box is a reflection of the large telescope I have by the window on the adjoining wall.
By the time I had done all this, it was early evening, and I needed to catch the swarm. My first effort with a cereal box funnel to the entrance and sugar water with Honey B Healthy did not work. A friend, who had just caught the big swarm for his beeyard, happened to come by, and he suggested that I put the hive box on the ground next to the swarm and see if they would just go in. To my utter amazement, they did! I guess it was the sugar water? After dark, my husband and I blocked off the entrance and carried the whole thing to the east facing window in our bedroom. I am happy to report that they were warm and cozy during that 35° night.
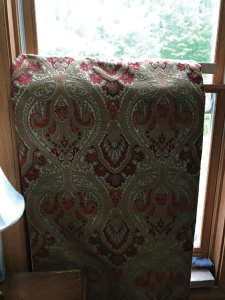
We have made some improvements. A piece of matte board and a sewn curtain have replaced the old sheet we hung for dark in the hive. The rope nicely replaces the towel we had stuffed into the bedroom window gap. I am still trying to figure out ventilation, wishing I had drilled holes in the wood before the hive was full.
But mostly it is the bees who have been amazing to watch work.
For four or five days they just huddled in the southern top corner. Then they began making beautiful comb. The precise positioning of the hexagons, a delicate little egg laid in each, guard bees lined at attention, the queen slowly making her way around her domain, waggle dances, new larvae, wax scales on the underside of bees, and clown pants full of pollen are just a few of the things I’ve been able to observe at my leisure with a magnifying glass and without my bee bonnet. My six and three-year-old granddaughters were delighted to watch the “ladies” at work without fear of being stung. We are able to open the window at night to change out the sugar water in the feeder. Because the hive is on the second floor of the house, we don’t have to worry about a bear getting into it (a big problem in the mountains). Now the comb is full of capped brood, and I hope to watch bees being born in a few days.
-
- A sunny morning view.
-
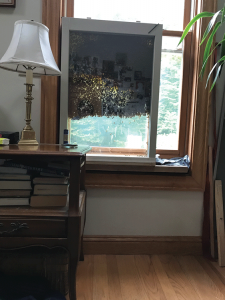
- Covered when not being observed.
There is no way to know at this point if our little experiment will succeed. At the very least, I hope the hive will become strong enough to send out some swarms of its own. Honey is not an object, and there is no way to get the hive box open without destroying the hive. But it has been a great experiment and learning tool with a little group of bees that would have surely died in the cold. If I had a chance to do it again, I would not use reflective double pane glass because photos are so hard to get. I would also drill a series of holes in the wooden spacer strips for more ventilation. Otherwise, it has all worked so very well. Here is to hoping the bees will stay healthy and happy; there is so much more to learn!