

By: Ed Simon
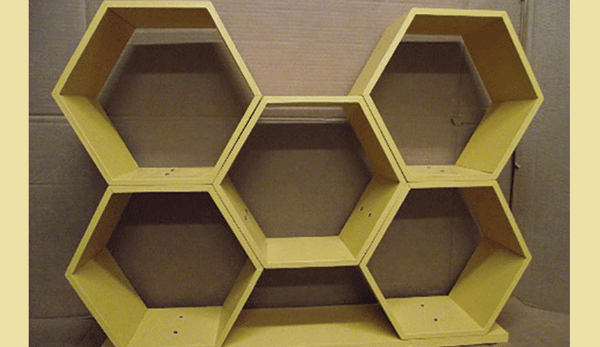
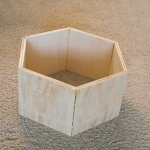
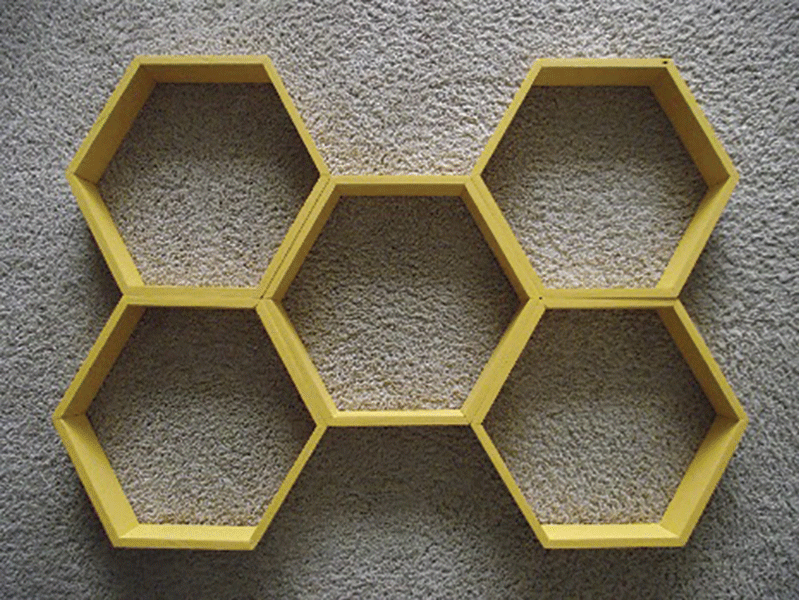
The Bee Shed in Rochester, MN was looking for display shelving to be used when selling honey and hive products at flea markets and other events.
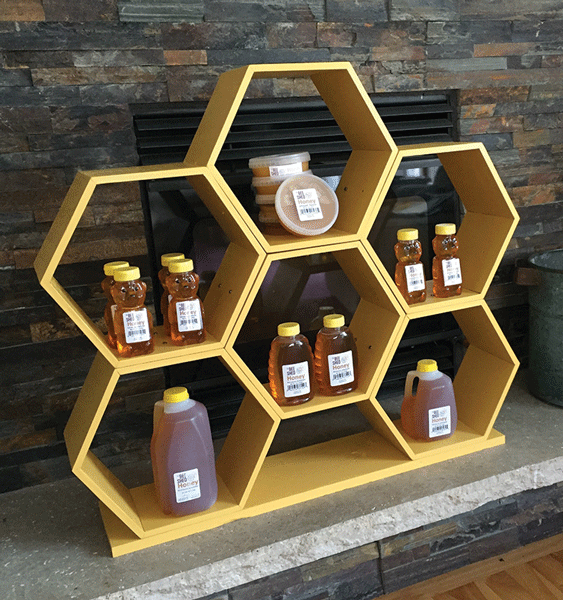 They decided that a bee cell would be the most eye-catching form for this display. The cell shape is instantly recognizable and immediately produces feelings of hard work and industry.
Once the hexagon shape was decided on, an additional requirement was added. The display had to be adjustable by size, that is, the number of cells used had to be variable to adjust for different space requirements.
Parts
½” or 7/16” – Plywood paneling (Cell sides)
I used 2’ x 4’ handy panels.
1” x 8” x ??’ Pine board (Base)
½” Veneer edging
Construction
In this article, we will make an individual display cell.
Since each cell is identical (a regular hexagon) they can stack together like bee cells on a frame. The size and quantity of the cells is dependent on your needs. You can either glue the sides of individual cells together for a rigid assembly or use fasteners to hold them together. Using a fastener gives you the flexibility to arrange your display to any desired size. In this construction, each cell has six sides. That means, unlike real bee cells, there will be a double wall between common cell sides.
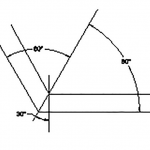
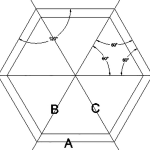
Note: Angles AB and AC are 60-degree angles. Because most saws can only make a maximum 45-degree cut, we will make 30-degree cuts. This is the 90-degree complement of 60-degrees. See step #2 for blade positioning.
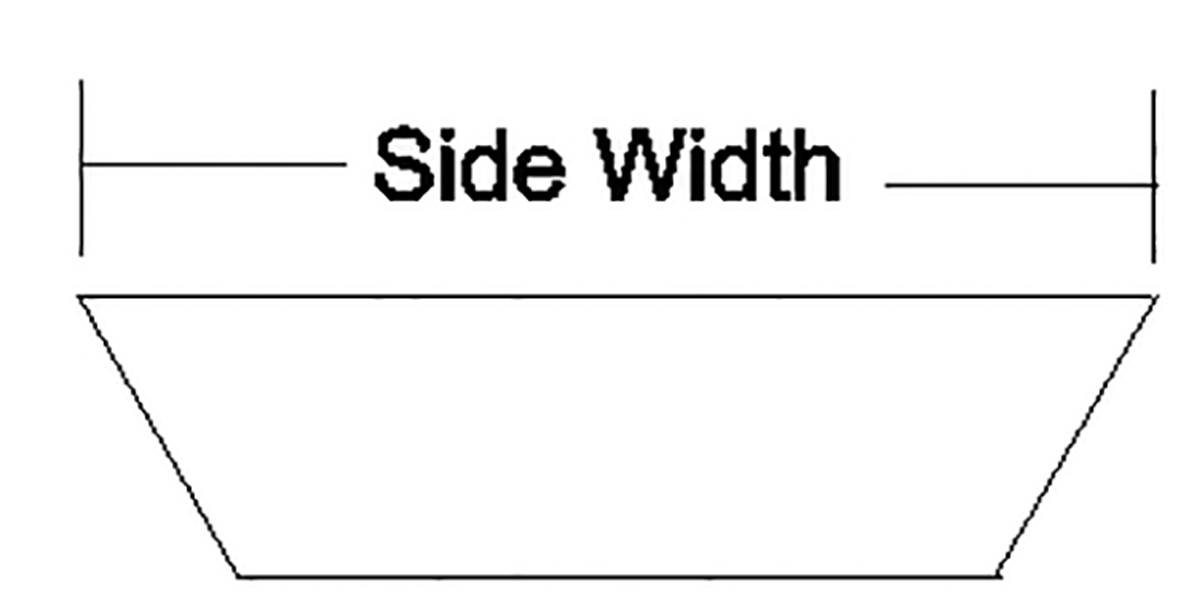
Note: Measurements are not provided in the drawings. The measurements in the text are for reference only. You should develop all the measurements for your own situation. Although it sounds difficult, it is very easy. All the angles are 30-degrees and the outside edge of each segment is the same width. For my display, I chose 7 inches as the outside edge width. I also used 7 inches as the depth of each cell. The 7-inch depth along with a base board provided for display stability.
Hint: Before you start making cells for a display, I suggest you take the time to make a single cell prototype. This enables you to adjust the dimensions to your liking and it also provides a jig that can be used to hold and align the cell sides in place during assembly. Without this aligning jig, it is difficult to keep the sides in position while the glue dries.
Note: I made my jig out of the standard 1” x 8” pine. The ¾” thickness of the wood helped hold the sides in alignment while building the prototype.
Note: For overall alignment purposes of each cell, the distance to opposite corners is exactly twice the width of a side.
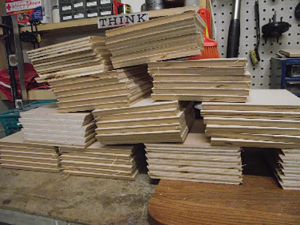
Step 1: Cut the plywood panels (part #1 above) into 7 ⅞” wide strips each 4’ long.
This initial cut that will allow easier handling and cutting of the bevels in the next step.
Note: The 7 ⅞” wide strips are for a 7” side. The extra width will be trimmed off when the 30-degree angles are cut.
Note: I cut three 7 ⅞” wide strips each 4’ long from each 2’ x 4’ panel. Each strip was then able to be cut into six 7” sides for a total of 18 sides from one 2’ x 4’ panel.
Hint: If you are using a 4’ x 8’ sheet of plywood, some home improvement stores will cut wood to a manageable size for you at no extra cost. I can no longer manipulate a 4’ x 8’ sheet of plywood, so it comes in handy to have the sheets cut to smaller sizes.
Step 2 – First 30 degree Cut: Cut a 30-degree bevel on one edge of the 4’ panels. Make sure the bevel is cut in the correct orientation. See the diagram for the alignment needed.
To cut the strips correctly:
- Set the saw bevel angle to 30 degrees.
- Set the saw blade to the correct height to cut the panel.
- Set the rip guide on the saw to cut the angle.
Note: If only one side of the panel is good, then make sure the good side of the panel is either up or down depending on whether you want the inside or the outside of the cell to be smooth.
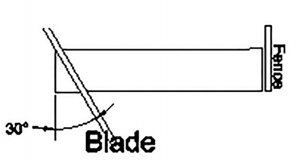
Explanation: This step will cut the bevel on one edge of the panel. The next cut will cut the bevel on the other edge at the correct width for the side of a cell.
- Cut one edge of all the panels with this saw setting.
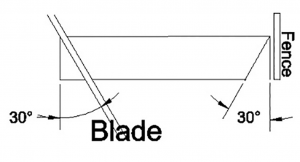
- Set the saw up for the cutting the second beveled edge.
- Move the rip fence to a position where the cut will make a 30-degree bevel at the correct orientation and width.
Caution: Measure from the tip of the blade at the panel thickness height to the rip fence. This will be the width of your cell side
Now make a test cut on some scrap wood to validate your settings. Change settings as needed to achieve the correct side width. Repeat step #5 until you are satisfied.
Cut the second edge of all the panels with this saw setting.
Caution: Make sure the orientation is correct for each panel. If the good side was up for the first beveled cut, then it should be up for this cut.
The result should be a trapezoid shape when looking at the end of the strip of plywood.
Step 3: Cut the panels into the length (cell depth) you need for your display. I made mine seven inches. You need six sides for each cell being built. If you have extra sides, hold on to them. If during assembly you find a flaw, you may have to substitute one.
Step 4: Sand the edges to remove any ragged/splintered wood. It is easier to do it now than to clean the edges after the cell is assembled. Leave the beveled edges un-sanded except for removing splinters.
These edges will be smoothed out after the cell is assembled.
Note: You want the cell edges to be as sharp as possible without being dangerous.
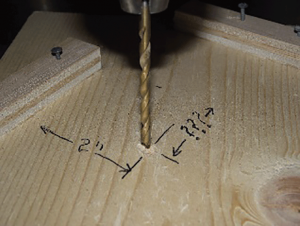
Step 5: Drill two 5/32” mounting holes in each cell segment.
Space the holes 2” inches from the front and back edges and centered between the beveled edges. These holes with this spacing should allow the cells to be positioned and attached in any order or orientation.
Hint: Make a simple jig so the holes will be positioned correctly and align up with its counterpart in a sister cell. Using a positioning jig and drilling the holes now will ensure the holes match up in any combination of cell positioning.
Note: If you are going to glue the finished cells together then this step is unnecessary.
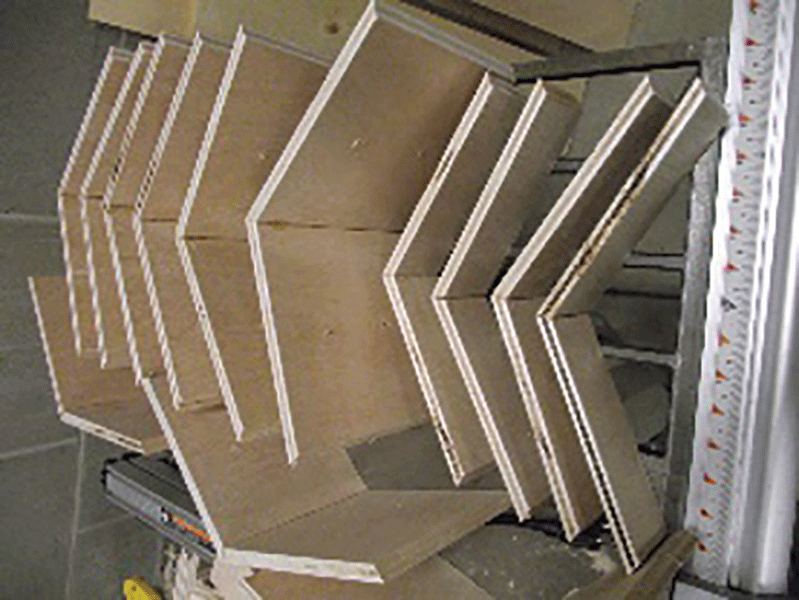
Step 6: Glue two of the sides together to make a wide “V”.
Jig Recommended: This is where the jig comes in handy.
Add glue to one beveled edge on each of two sides. Then place the two sides on the outside of the jig with the glued edges touching and in alignment. Then strap the sides in place. After a couple of hours, the glue will have dried enough to very carefully remove the straps and then set the assembly aside to completely dry. Three of these assemblies are required for each completed cell.
Note: Use bungee cords to keep the segments aligned.
 Hint: Place a piece of waxed paper at the glued edges, between the jig and the sides This will prevent the glue that leaks from the joint from binding with the jig.
Step 7: Glue three of these assemblies made in step #6 together to make a cell. The 30-degree bevels should allow the six segments to make a complete cell (hexagon).
Hint: To align (square) the final assembly, the opposite corners should measure exactly twice the width of a single side.
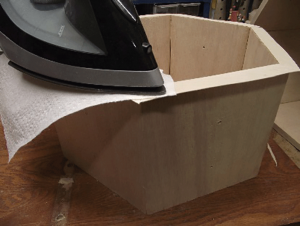
Step 8: Add the veneer edging to the front of each cell. The easiest veneer to use comes with the glue already applied. This glue is activated by heat. Cut the veneer to length and shape with scissors. Then iron it to the front edge of each cell. After it cools, trim the excess width from the veneer.
Hint: Use a paper towel to protect the iron’s surface.
Step 9: Sand the cell. Now is the time to make sure the corner edges of the cell are smooth. Splinters tend to release some very emotional expletives.
Step 10: Temporarily assemble your cells on top of the pine board (part #2), into the usual (standard) configuration you will be using. When in place drill two 5/32” mounting holes from the bottom cells alignment holes into the base. This provides stability for the display.
Step 11: Stain, paint or varnish the individual cell and the base.
If you need to have flexibility in your display, you can use shortened nails as pegs to hold the cells in alignment.
Step 12: To make aligning pegs from nails, cut an 8d common nail to a length of ⅞” (less than twice the thickness of a side) and then remove the rough end with a file or a grinder. These stubby nails when slipped into the holes drilled in Step #5 and Step #10, will hold the cells in position.
This step is not needed if you are going to glue the cells together.
Note: Using a small bolt and nut would make a sturdier display.
Wall Display
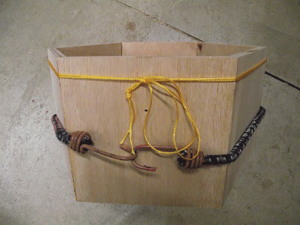
 There will probably be unused sides or sections of left over plywood. You can use these “SCRAPS” to create a neat wall display. This will look nice hanging behind your booth at the next flea market.
The steps to make a wall display are the same as the original display except for the depth. I made the depth 2½” to keep the display light in weight and the shallow depth keeps the product to the front of the cell so light could reach it easier. I also glued all the cells together so they would hang nicely.
Conclusion
An eye-catching display increases sales dramatically. Use this type of display to help you get the reward you deserve for your beekeeping skills.