Roy Hendrickson
I realize that a percentage of those reading this article are, for whatever reason, committed to a mite control agenda absent of any form of chemical treatment. That’s your choice, and I completely understand. However, you have to realize that any attempt to overwinter mite/virus infested colony(s) is almost certain to fail. With that thought in mind, perhaps your best option would be to locate replacement packages or nucs at the earliest opportunity. I would also suggest you brush up on Varroa sampling and treatment procedures. That might go a long way toward staving off a future disaster. One final thought. Does anyone really believe that any replacement package or nuc they purchase will arrive absent any form of mite control?
Queens
Varroa notwithstanding, Winter preparation actually begins; take your choice, in July or August. How many times have you read or heard that being discussed at the local club meeting? Actually it’s my belief that Winter preparation really begins with the queen, starting in late May or the early part of June. In the central and northern latitudes mid to late Spring, the primary swarming season, is the best time to rear and work with queens. Why, because prosperity reigns supreme. In most areas spring pollen quality is second to none. Nectar is plentiful, and honey bee colonies are rapidly expanding their populations. Consequently there is an over abundance of young nurse bees. As a result, queen cells, be they swarm or supercedure, are of the highest quality. The same generally holds true for beekeeper initiated cells.
The benefits of having colonies headed by young queens should not be underestimated.
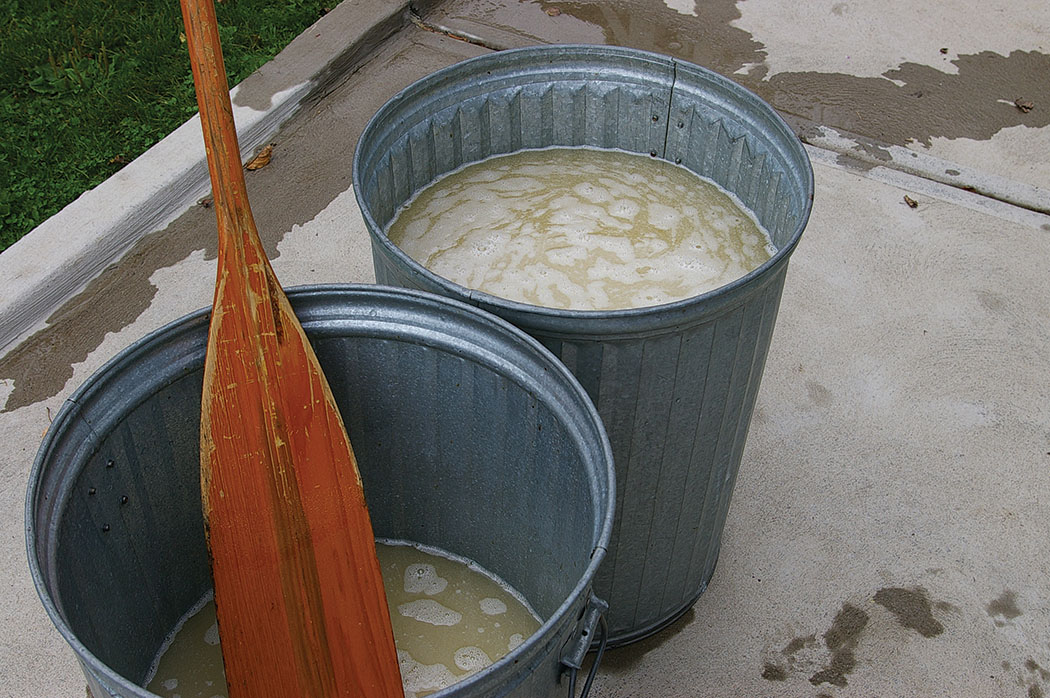
Mixing syrup.
Food Reserves
The second requirement for successful wintering involves the food supply. Since top insulation has been integrated into the over-wintering equation, an abundance of stores is absolutely essential. Heat retention as a result of the top insulation will allow a colony to rear more brood earlier in the season than non-insulated colonies. In northern latitudes late Winter-early Spring feeding is not generally feasible. Therefore it’s imperative that the necessary Winter stores be provided prior to the onset of cold weather.
If you’re located in an area with a well defined fall flow Mother Nature will generally provide the necessary Winter stores. Moving colonies to pick up a Fall flow is another possible solution. The last option is to produce feed honey on standard production colonies, and use that honey to supplement the food requirements of colonies short on Winter stores, Summer splits for example. This plan would work well in areas that feature secondary honey flows of lesser quality honeys, honey that otherwise might be difficult to market. Absent these alternatives, traditional feeding is the only resort.
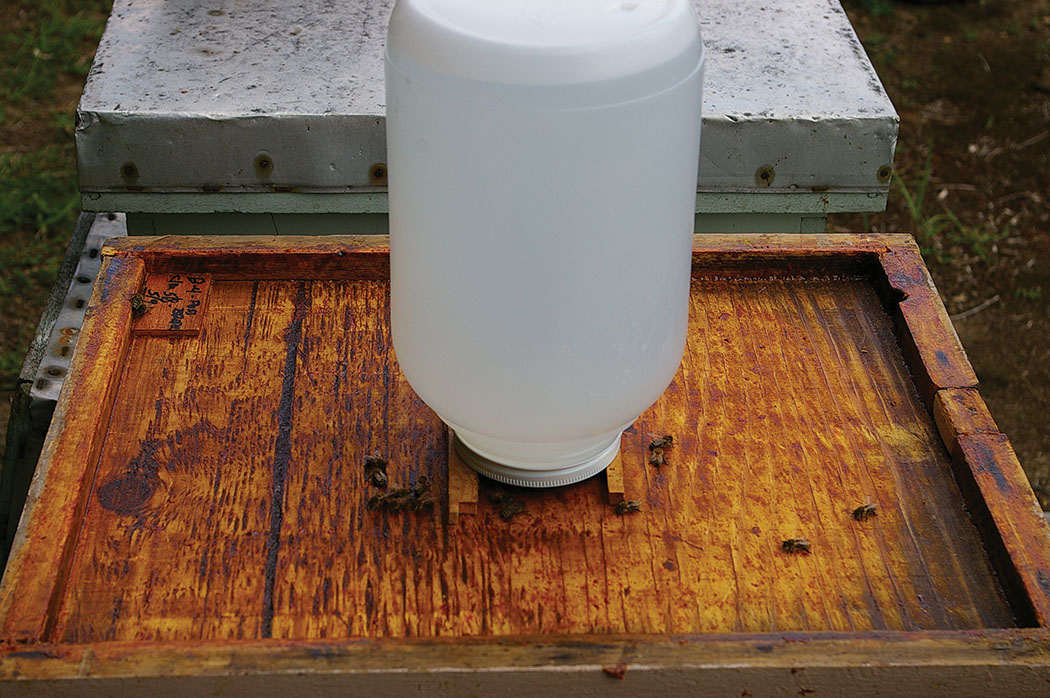
Gallon jug, elevated to allow bee’s full access to feeder jug holes.
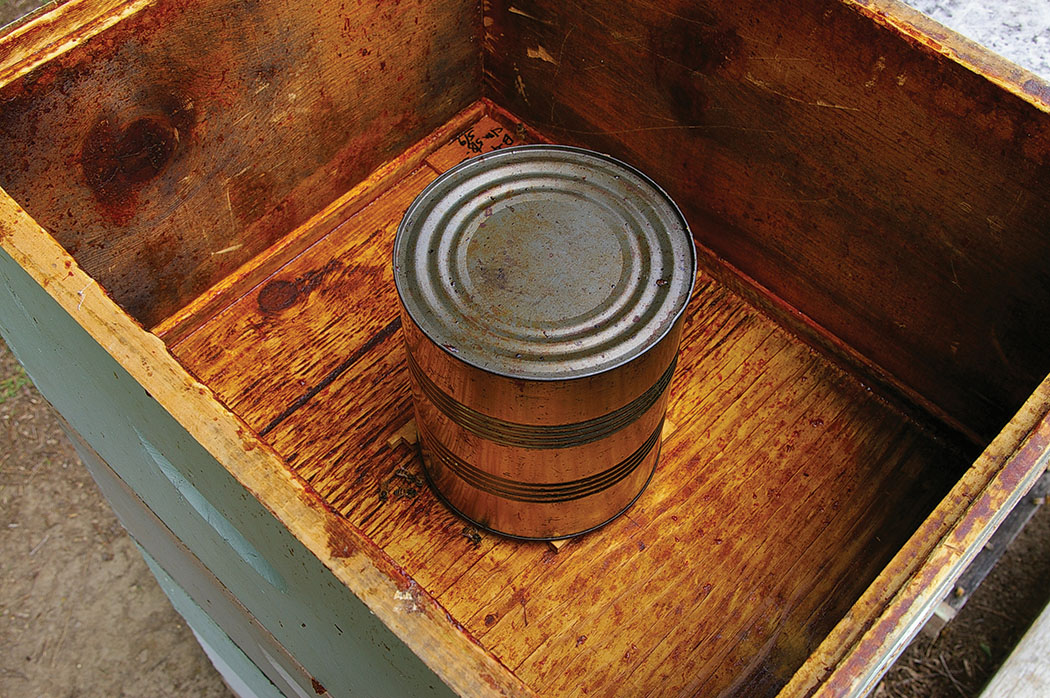
Hive body protects friction top feeder can from the elements.
Syrup Formulas
Sugar syrup formulas are simply ratios of sugar mixed with water. In general there are two basic mixtures, thin syrup consisting of equal parts sugar and water, and thick syrup featuring a two to one ratio of sugar to water. Thin syrup is the basic spring and summer feed. It’s primarily used to stimulate early season brood rearing, and to allow the colony to maintain its strength through periods of nectar dearth. Heavy syrup is used to augment the winter food supply, to prevent overwinter or early Spring starvation.
For small quantity mixing purposes, sugar and water are almost identical when compared on a weight to volume basis. For example, by volume a four-lb (64oz) bag of sugar measures out to approximately eight 8-oz measuring cups. Fill that same 8-oz measuring cup with water, the water also weighs about 8-oz. Therefore a four lb bag of sugar when mixed with eight cups of water would yield roughly eight lbs of 1:1 syrup. The same bag when mixed with four cups of water would yield about six lbs of 2:1 syrup. For larger quantities simply convert water volume to a weight based mixing formula using eight lbs per gallon as the conversion basis. For specific sugar weights and the compatible water volumes refer to the table.
1: 1 Mixtures:
8 lbs of sugar into 8 lbs or (1 gallon) of water
25 lbs of sugar into 25 lbs or (3 gallons + 1 pint) of water
2: 1 Mixtures:
8 lbs of sugar into 4 lbs or (2 quarts or ½ gallon) of water
25 lbs sugar of into 12 ½ lbs or (1 gallon + 2 quarts + 1 cup) of water
Depending on the amount of syrup required, the mixing vessel can be whatever is handy, a bowl or pot, a five gallon bucket, or my favorite, a 20 gallon garbage can. To mix any type of syrup, run the predetermined amount of hot tap water (130° to 145°) into the mixing vessel, and then add in all the sugar before you start the mixing process. Stir intermittently until the sugar is dissolved. No additional heat source should be necessary. Once dissolved the syrup can then be poured or pumped into the feeders or holding containers for transport to the bee yard.
Emergency Feeding
Since early Spring weather patterns and the corresponding honey flows are relatively unpredictable, the specter of early season emergency feeding is always present. The simplest way to solve this problem is to transfer frames of honey from overly heavy colonies to those in need. The same holds true for weak colonies with an excess of stores. Assuming there are no brood disease issues, don’t be afraid to use the leftover honey from Winter deadouts. Colonies in weak to average condition should have at least one frame of feed honey placed adjacent to an outside frame of brood. Strong colonies should have frames of feed honey placed on both sides of the active broodnest.
Absent these options, granulated sugar poured around the center opening in the inner cover will keep the colony alive, but will probably not sustain continuous brood rearing. Candy boards and fondant patties both have merit. However the additional cost and the extra time and effort required to make up or prepare these products somewhat mitigate their value. An easier alternative might be a Winter feed patty. (Available through several bee supply outlets.) These are concentrated sugar patties specifically designed for cold weather feeding. Some are straight sugar; others are a mixture of sugar and pollen substitute. For emergency feeding purposes, I would place the emphasis on the sugar only patty.

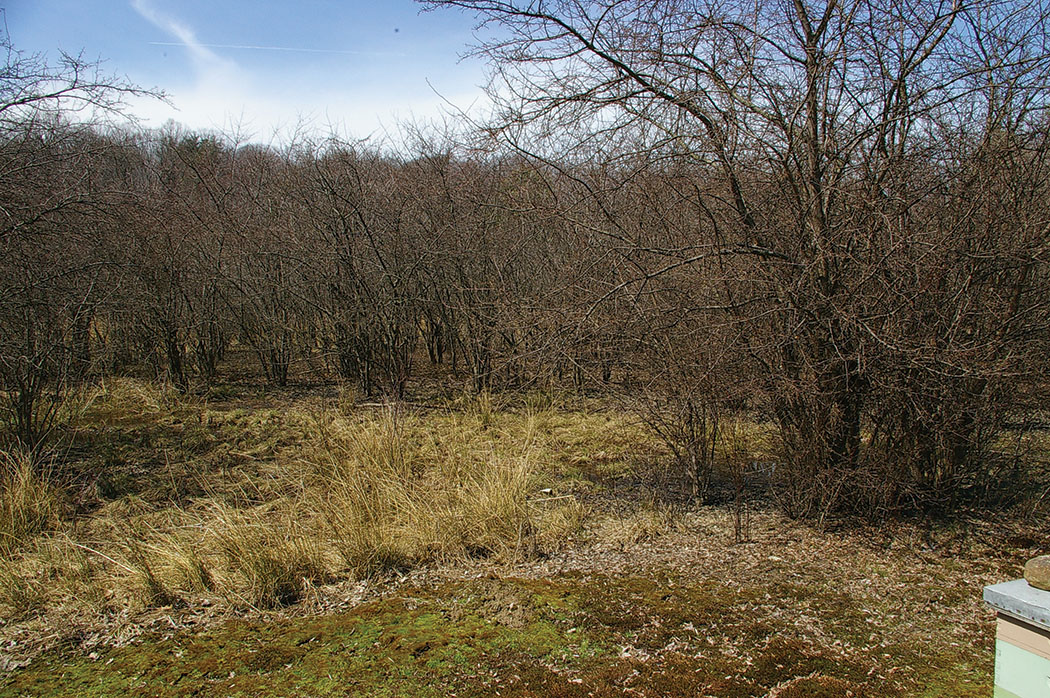
Thick young woods, an ideal natural windbreak,
looking northwest.
Windbreaks
When it comes to overwintering success, the importance of good windbreaks is second only to adequate food reserves. Colonies that are under constant wind stress simply do not overwinter very well. The further north you are located the greater the potential for damage. Perhaps the most interesting aspect of wind stress is that it’s a very manageable condition. In many instances the solution lies within easy reach. If there isn’t a good natural windbreak nearby, the materials needed for a man-made windbreak are probably already on hand, simply awaiting assembly or repositioning.
Early growth crabapple, another excellent windbreak, again looking northwest.
In wooded or hilly territory good natural wind breaks generally aren’t too difficult to find. When necessary consider temporarily relocating an apiary to take advantage of a good natural windbreak. The following Spring the process is reversed. The Summer or home location becomes the split yard for Spring management purposes. In due course all the colonies are moved back to the home location prior to the honey flow. The two locations compliment each other, honey production is maintained and overwintering success is improved.
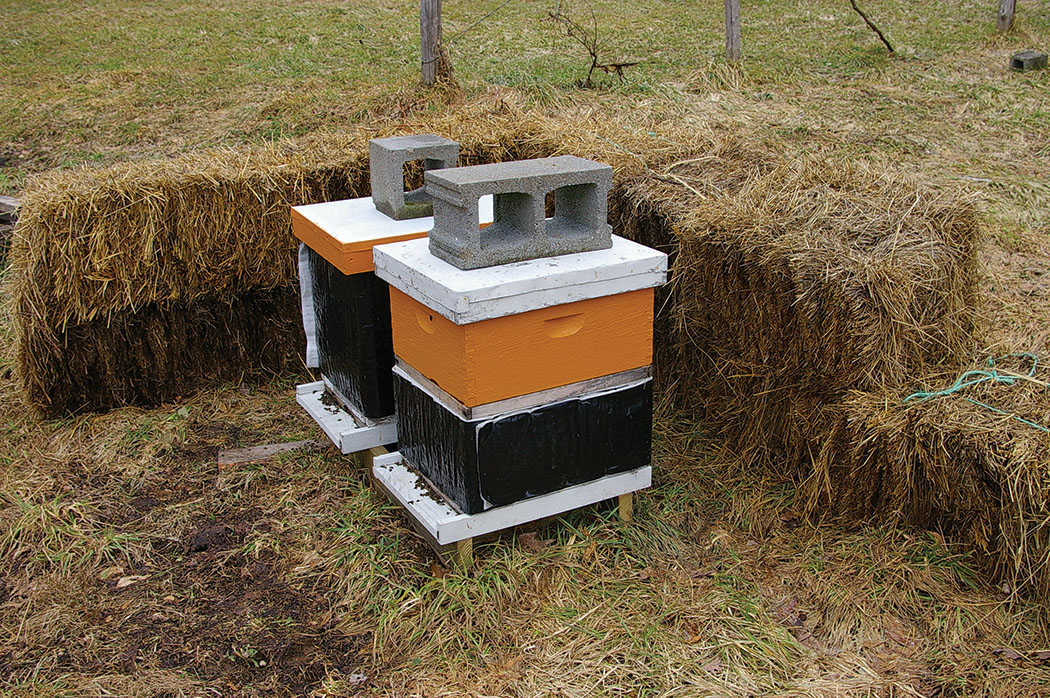
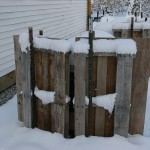
Absent a satisfactory natural windbreak, man made windbreaks become the order of the day. Any apparatus that knocks down or diverts the prevailing Winter winds will add significantly toward overwintering success. If available, a few well placed bales of hay or straw make excellent windbreaks. I use a couple of old aluminum storm doors. The doors are placed lengthwise behind the exposed colonies and held in place with short lengths of old water pipe, re-bar, or metal fence posts. They’re not very pretty, but they work extremely well. My favorite man-made windbreaks are old shipping pallets. I cut the pallets in half and use deck screws to attach pieces of scrap plywood. In use, they are held in place the same way as the storm doors. Their big advantage is the ease of placement. I run two hives to a pallet and I place these accordingly at one or both ends of each pallet depending on the primary wind direction.
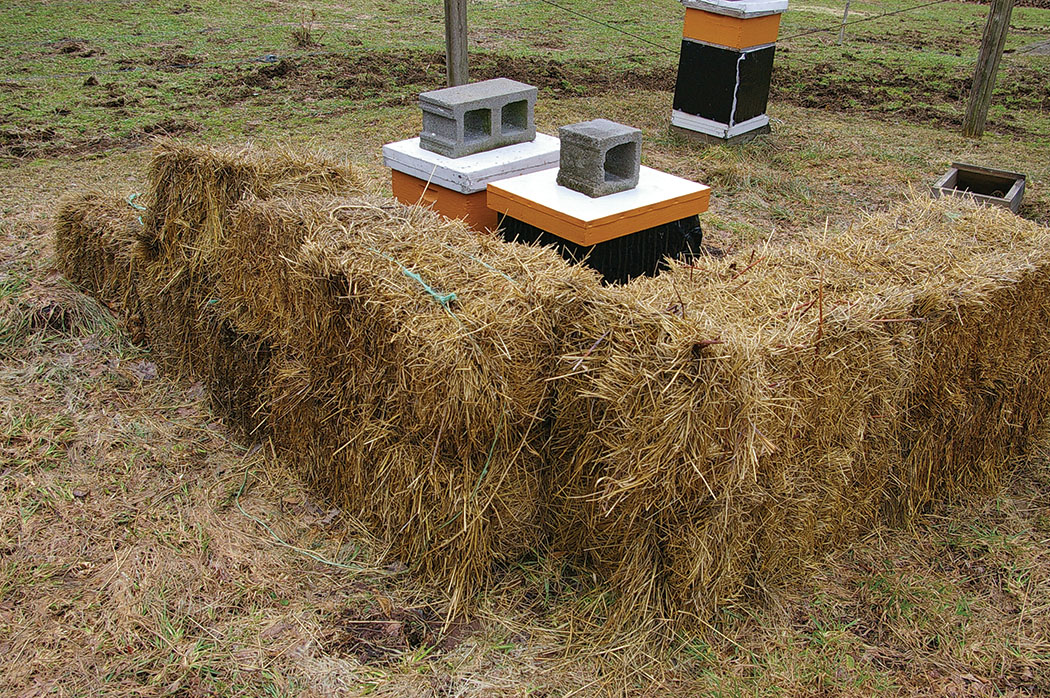
Bales of hay protecting from the west and northerly winds.
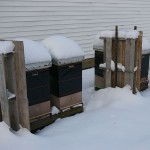
Colony Protection
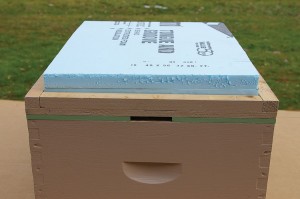
The last factor in the overwintering equation is colony protection, primarily top insulation. In cold climates top insulation has at least five identifiable benefits. First, the insulation traps a portion of the heat given off by the overwintering cluster, thereby preventing any frost or ice buildup that might occur without insulation. Similarly, the combination upper entrance/ventilation port allows the warm moist air to vent, virtually eliminating any condensation buildup on the underside of the inner cover. Third, the retained heat allows the cluster to expand thereby increasing its ability to access the stored food reserves. Colonies protected by top insulation are much less likely to cold starve during the depths of a long cold Winter. Fourth, the upper entrance allows for easy outside access whenever the weather warms enough for a cleansing flight. And last of all, top insulation allows the colony to rear more brood in the cold of early Spring than would be possible were insulation not present. If possible allow the colony to benefit from the top insulation until average daytime temperatures reach the 55 to 60° range.
Top insulation can be applied a number of different ways depending on the specific outer cover configuration. Since the vast majority of smaller beekeepers use a combination inner cover-outer cover assembly, the most practical application is to place the insulation between the two covers. I would recommend two inches of high-density Styrofoam of the type commonly sold in big-box lumber stores. Buy the one inch thickness, and cut two pieces the exact size of the inner cover, inside of the raised border. The insulation should rest directly on the surface of the inner cover, not on the raised border. Use woodworker’s glue (Titebond II) to glue the two pieces of Styrofoam together. To prevent the bees from chewing a hole up into the insulation, cover the center hole with a piece of window screen or eight mesh hardware cloth. For rigidity and durability purposes you can apply duct tape to one or both sides of the screen. Once the insulation is in place, the outer cover is returned to its normal position over top of the insulation.
-

- Shipping pallets with attached plywood protecting from the westerly winds.
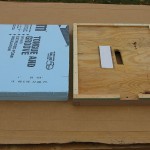
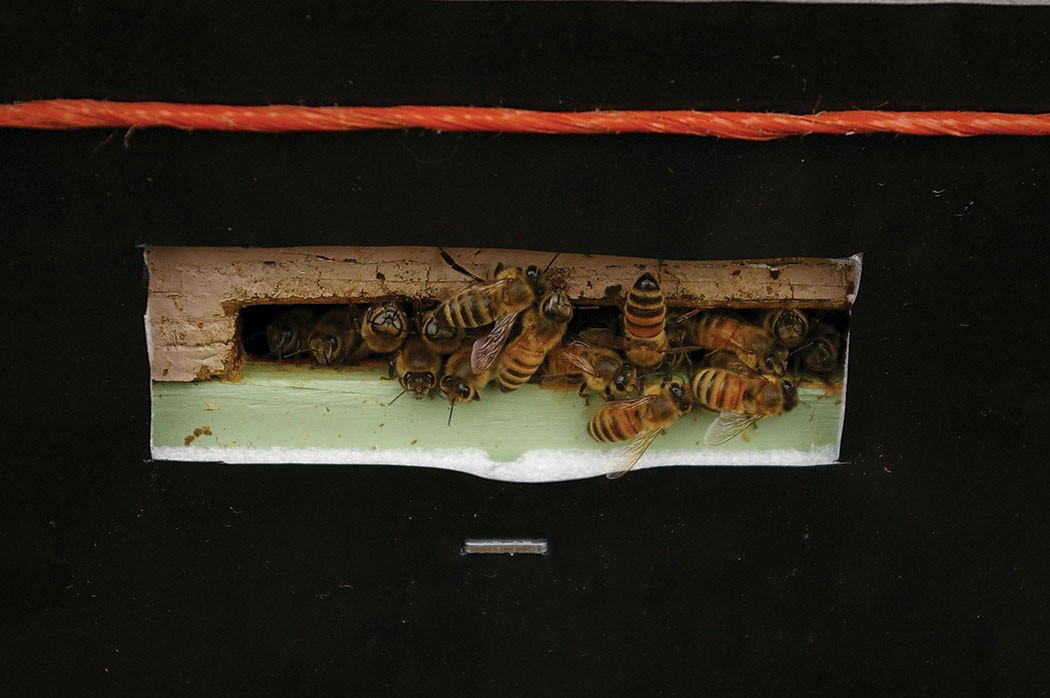
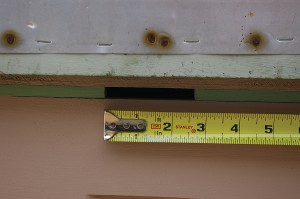
Creating the combination upper entrance/ventilation port can be a bit tricky. Nowadays virtually all commercially manufactured inner covers have a raised border on both sides. Select the side with the thickest border, and add an additional strip of wood to increase the border height to 3/8 of an inch. Now locate the center line on one of the short sides of the cover, and remove a 2¾ inch section of the 3/8 inch border. This opening will serve as the combination upper entrance/ventilation port. In use, this side is turned down so that the bees have direct access to the outside. If you were to shine a flashlight into the opening, you would be looking directly at the top bars of the uppermost brood box. Do not allow the outer cover rim to obstruct the upper entrance. If it does, either cut a notch in the outer cover rim, or add another layer of Styrofoam.
For those operating in the more northern latitudes, it may be prudent to consider some form of colony wrap. For years I used 15 lb. roofer’s felt to great advantage. In late Winter and early Spring the black tarpaper absorbs the sun’s heat. When combined with top insulation it increases the cluster’s ability to move and maintain contact with the stored food reserves. However, the roofer’s felt of yesteryear is long gone. Today’s product simply doesn’t hold-up very well. And it’s a real pain to cut new wraps every other year or so. As a result, I’ve switched to the Colony Quilt wrapping material supplied by B&B Honey Farm in Houston, Minnesota. This is a plastic based wrap combined with a thin layer of insulation. It’s durable, easy to cut, and easy to apply. Although the cost is somewhat higher than roofer’s felt, I believe its money well spent.
-
- Inner cover in the Winter position, with top insulation in place.
-
- Final assembly, snow will cover the bottom entrance throughout the Winter.
-
- Outer cover is returned to its normal position over top of the top insulation.
-

- The colony needs unobstructed outside access to facilitate cleansing flights.
-

- Colony Quilt temporarily held in place by ½ inch staples and clear packaging tape.
-
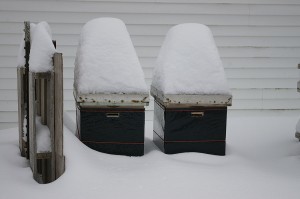
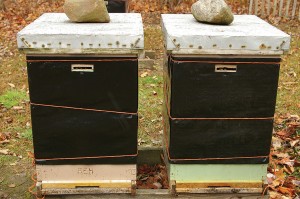
- The depths of Winter. No problem for a properly prepared colony!
This product provides a colony with far better weather protection than roofer’s felt, including a degree of wind protection. However, it’s not a suitable alternative for a good windbreak. In use the pre-cut wrap can be temporarily secured with a couple of half inch staples or clear packaging tape. I use plastic bailing twine as a means of overwinter security.
In summary, there are an infinite number of variations on the Winter preparation theme. Don’t be afraid to experiment. The development of a comprehensive overwintering strategy fitted to your specific situation is a very worthy endeavor, and one that will pay big dividends the following Spring. Good Luck!
Roy Hendrickson keeps his bees through very tough Winters in Chardon, Ohio.