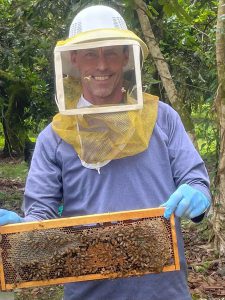
By: Bob Binnie
Successful beekeeping in any form is fifty percent science and fifty percent art. In other words, fifty percent science and fifty percent “skill acquired by experience” (Merriam- Webster). Producing nucs, which in this case means nucleus of a colony, and creating good ones that any beekeeper would be pleased with could certainly be considered both a science and an art. While every beekeeper has their own reasons for making nucs, we have three that are especially important to us. And of course, the first one is about money.
#1. Diversifi cation of Income
If someone plans to make a living simply as a honey producer, they will need the wherewithal to ride out the bad years and, yes, there will be bad years. Bills need to be paid regardless and outfits on a tight budget may not be able to afford this. Along with pollination, selling bees can be a way to attain income even in a year with low honey production.
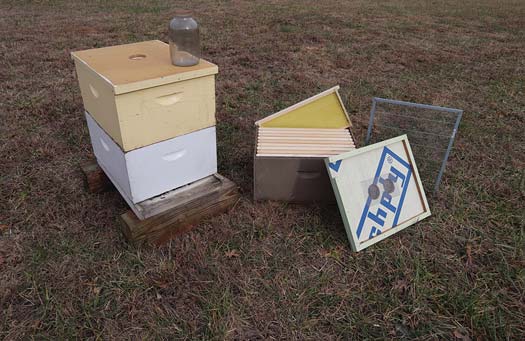
Phase 1 – Two story colony and extra equipment needed.
#2. Comb Rotation
We feel that comb rotation is very important and although it doesn’t happen when producing package bees, it automatically happens when colonies have to generate new comb to replace brood and stores taken to create nucs. Very old brood comb has been shown to contain excessive levels of pesticides, heavy metals, and fungal and bacterial spores that can be detrimental to a colony’s wellbeing. On top of that, the cell diameter in old, heavy comb will have shrunk from the accumulation of these materials along with the fecal matter and cocoon silk left behind by each merging bee. In a three-year fi eld study at the University of Georgia, Jennifer Berry compared new comb to old, dark, heavy comb for brood rearing. It was shown that, “On average, colonies with new comb produced a greater area of brood, a greater area of sealed brood, and higher weight of individual young bees.” Also, “Bees reared in old comb may weigh up to 19% less than bees reared in new comb”(Berry, 2001).
The take home message here is:
Colonies full of dark, heavy comb will have
smaller bees and less of them.
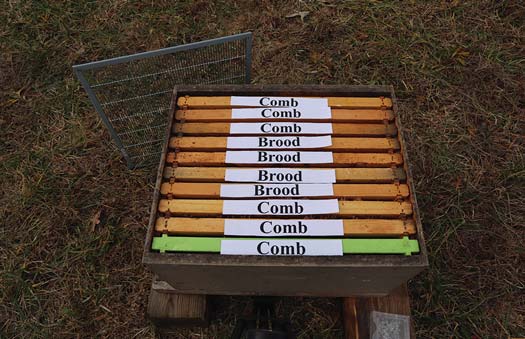
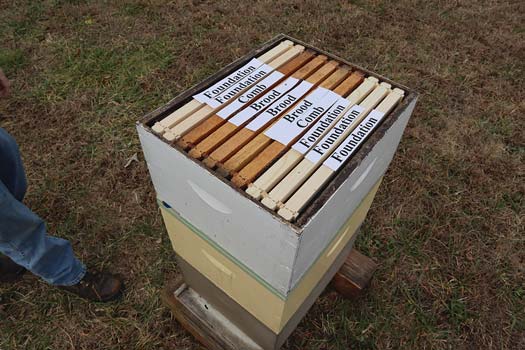
Phase 1 – New first story with brood and comb.
To be clear, we are not advocating the production of nucs as an opportunity for unloading old junk combs. Producing nucs each year will continuously cycle out comb and, if done mindfully, an accumulation of old comb can be avoided. For us, this factors into the overall equation.
#3. Swarm Control and Colony Equalization
Honey bee colonies are like rabbits. If they are healthy, they will reproduce. Sometimes over and over. Swarming can be a honey producer’s worst nightmare and it can be minimized by strategic population reduction. Although there are a number of management techniques for reducing swarming, here is an important fact that new beekeepers should know and remember: A colony that peaks in population before the main nectar fl ow begins is much more likely to swarm than a colony that does not. This was explained to me almost 40 years ago by Delmar Smith, a retired beekeeper from Central Point, Oregon. Delmar, who was instrumental in my becoming a commercial beekeeper, had been involved with keeping bees successfully in the Rogue Valley for nearly 60 years and had for a time operated two thousand colonies with just one helper. He reportedly made large crops of honey
and told me that it would have been impossible for two people to operate successfully at that level without a thorough understanding of how
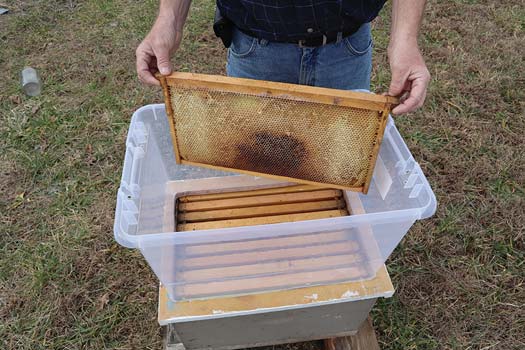
Phase 1 – Homemade shaking funnel with 23¾”L x 13½”H ‘Sterlite” tube from Home Depot and plywood base.
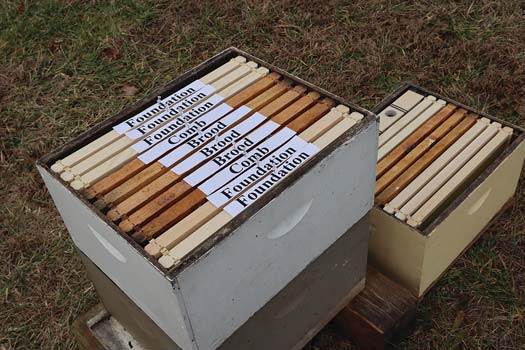
Phase 1 – Nuc as temporary second story above queen excluder and temporary third story to right.
population growth cycles affect swarming behavior. He counseled that in the spring a healthy colony having four frames of bees, given ample space and favorable conditions, would achieve peak population in seven to eight weeks and, furthermore, with an understanding of this a beekeeper could calculate when and to what extent to split a colony for minimal swarming and maximum honey production. I have never forgotten his ideas on swarm control and honey production and try to utilize them in our overall management strategy. Enter nuc production. Although predicting timing with bees and the weather can be a crapshoot, when breaking up a colony for nuc production, we take into account the date and environmental conditions and leave what we feel is the
right number of frames of bees and brood, whether it be four, fi ve, six, or whatever, for that colony to peak just after the Spring nectar fl ow starts. For a new beekeeper, ability to determine this comes with practice (trial and error) and constitutes the “art” side of beekeeping. A beekeeper’s calendar starts in August Nuc production is of course based on the assumption that there will be strong, healthy colonies to work with in the spring. If necessary, mite treatment, heavy feeding, equalization, and requeening should have all occurred going back as far as August and September of the preceding year. I submit that a beekeeper’s calendar actually begins in August, and that what we do then sets the stage for success in Winter, Spring, and beyond. I came to this conclusion before mite problems existed and believe this concept is even more important today. In other words: If you don’t treat your bees right in late summer and fall, you may not have any good colonies to work with in the spring.
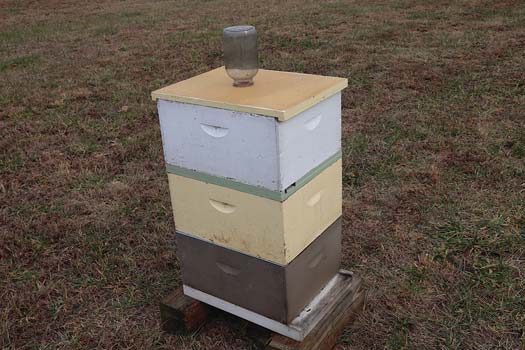
Phase 2 – Nuc set above second screen divider board.
Additionally, we feel it is important to check all colonies again in late winter and early spring and…
● Boost small or struggling colonies with a frame of sealed brood taken from stronger ones, possibly several times. This equalization (making the same) also keeps strong colonies from getting too big, too fast, i.e., swarm control.
● Check mite counts again and address if necessary.
● Feed colonies that are light on food, perhaps several times. Colonies heavy with stores are prefered for splitting so distribution of food to both the nuc and colony will not be an issue.
The Double Screen Board Method
There are many techniques for making nucs and all of them have their pros and cons. The one described here addresses many important factors including locating the original queen, rapid nuc development, and good queen acceptance, but does need extra equipment including a queen excluder, an extra brood box, and a double screened divider board which is listed in most bee supply
catalogs as a “Double Screen Board” or “Snelgrove Board.” We did not invent this technique, and many versions have been used through the years. We produce five frame nucs with our variation, and although it can be implemented on single brood box colonies, the use of two brood box colonies is described here.There are three distinct phases to this method of nuc production.
Phase One
1. Seperate the two brood boxes, set them aside, and place an empty box on the bottom board or pallet in the original location.
2. While watching for the queen, remove frames of brood and adhering bees from the original two boxes and install them in the center of the new box until the desired number is reached. Place frames of drawn comb and stores on each side of the brood until the box is full.
3. If the queen was spotted during this process she is placed in the bottom box and the queen excluder is installed.
4. If the queen was not spotted shake ALL the bees off of the remaining frames and equipment into the bottom box and then install the queen excluder. If, by chance,the queen is spotted during this process, place her in the bottom box, stop shaking, and install the queen excluder. Either way, we are now sure the queen is in the bottom box below the queen excluder, which is the goal.
● For shaking purposes, one may choose to use an empty box as a funnel to contain the flurry of bees being shaken into the box below. We use a plastic tub with the bottom cut out attached to a
plywood base for a funnel. Although it sounds like a contradiction, shake vigorously but gently and avoid slamming the bees onto the frames below to avoid injury.
5. Place one of the two original boxes on top of the queen excluder. Install three frames of brood in the center with a frame of food on each side and fi ll the remaining space with frames with foundation.
● This second story box containing brood is queenfree and contains our future nuc. If available, we like to use two frames of sealed brood to assist with quick expansion and one frame of open brood in the center to attract young nurse bees.
6. Place the remaining original box in the third story position and fi ll with a division board feeder (optional), all original frames not containing brood, and frames with foundation. Install the hive cover and leave the hive overnight which allows time for the bees to come through the excluder and equalize across the brood before dividing.
7. When working a large number of colonies, put the remaining frames of brood (if there are any) in a “brood holding box” which for us is simply a box, a lid, and a screened bottom board without an entrance. If there is danger of the brood overheating on a hot day, avoid direct sunlight and either leave the lid cracked or use a screened lid for extra ventilation. On a cold day, make sure there are enough bees to keep the brood warm. When working a smaller number of colonies this box may not be necessary.
● Here exists another opportunity for equalization. When weak colonies are encountered, this extra brood can be used to either fi nish a nuc or boost the mother colony to ensure that the entire yard will be ready for feeding, supering, or any other management procedure simultaneously. Extra brood can also be transported to the next yard for continued work.
Phase Two
1. Return the next day and remove the top two boxes and queen excluder. 2. Place what was the temporary third story box in the second story position and, if needed, feed with the division board feeder.
3. Install the double screen divider board on top of the second story and place the queen-free box with brood (the new nuc) on top.
● A “double screen” divider board is used because, while allowing heat to rise from below, the space between the two screens will not allow the queenright bees in the mother colony to physically
share pheromones with the queenless bees above. Absence of queen pheromones is important for queen or queen cell acceptance. This space will also prevent the lower and upper queens from
attempting to fi ght through a single screen. 4. Introduce a caged queen or queen cell in a cell protector, install the hive cover, and feed.
● Feeding is helpful because gorged bees will accept a new queen more readily and it hastens the nuc’s development. We like using a feed jar positioned in a hole in the hive cover (we have migratory lids) because it can be refi lled with minimal disturbance and prevents drowning bees which happens when using a division board feeder in a small nuc. Avoid robbing behavior if possible because it would greatly affect queen acceptance across the board. In other words, don’t dribble when feeding and don’t leave frames exposed any more than necessary if there’s not a honey fl ow.
Phase 2 – Phase 2 complete.
Phase Three
1. Return after two weeks when introducing a caged queen, or three weeks if a queen cell is used, and check for a queen and brood.
● We wait this long so new brood is old enough to judge the queen’s performance.
2. If all looks good, harvest the queen and fi ve frames which should be three to four frames of brood in all stages and the rest food. Install in a nuc box for sale or transport.
● When using a nuc for our own purposes such as increase, requeening, or fi xing bad colonies, we simply leave it in the full size box and use it accordingly.
3. Unless nuc production is repeated (it can be done over and over), all leftover frames of comb and bees are distributed among the colonies, and honey supers are added if a nectar fl ow is coming. Good queen and queen cell acceptance Worth mentioning is that leading up to phase two, for
us, something important is happening, or not happening, as the case may be. With many nuc production methods, emergency queen cells will be started within eight to 24 hours unless a queen is immediately introduced. Once these cells are started and the older they get, the less inclined the bees will be to accept a queen or queen
cell given to them. This fact is often overlooked and is of concern to us because when installing hundreds of ripe queen cells, it may have taken us more than eight to twenty-four hours to prepare all the nucs needed. Depending on the weather, it may have taken several days. With this procedure the emergency cell problem is eliminated because the nuc being created will not view itself as queenless until it is separated by the double screen board and until then will not build emergency cells no matter how old it is. And because two practiced beekeepers can perform phase two on a colony in about one minute, we have the advantage of installing a lot of queen cells or queens in one day without worrying about emergency cells that have already been started. This method also accomplishes something else that is often overlooked in the pursuit of good queen acceptance. When the the nuc is placed on top of the double screen board, older forager bees will return home to their original entrance. With the absence of these older bees, which are more aggressive in all ways (they are generally the ones that sting you), the remaining young bees will accept the queen or queen cell being introduced much more readily. Because the bee-to-brood ratio has been reduced by this exodus of older bees, a “screened” divider board is used so heat rising from the mother colony can help keep the new brood nest warm. This extra warmth will also help the new nuc expand quicker and because it is in a full sized box, it can grow beyond fi ve frames without preparing to swarm before harvest. What has been accomplished with this system? With this system, large colonies are reduced for swarm control and small colonies are boosted and equalized for simultaneous management procedures. Used comb is rotated out, new foundation is rotated in, and all equipment is handled for possible inspection, scraping, repair, or replacement. A nuc is produced, it’s growth rate enhanced, and odds for good queen or queen cell acceptance are increased. And although any beekeeper can experience benefi ts when using this system, it can be especially helpful for those that are not yet skilled at fi nding queens. At fi rst glance, this all may seem complicated and time consuming, but when considering all that is being accomplished, we view it as quick and simple and it all happens automatically whether making one nuc or one thousand.
Bob Binnie and his wife run a commercial honey and bee
operation in northern Georgia. they bottle the best sourwood
honey in the state.
References
1. Berry, J.A. 2001. Effects of comb age on honey bee colony
growth and brood survivorship. Journal of Apicultural Research
40(1): 3-8