Part 8 – What Have I Learned?
By: James Masucci
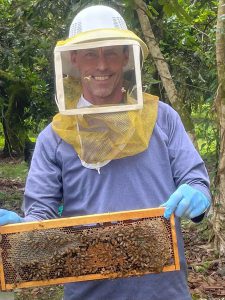
It’s been a year and a half since I retired from my day job and started focusing on beekeeping full time. I have since bought a bee truck, built a honey house and done many splits to expand my operation. I was talked into writing these articles, to help other beekeepers who were thinking about doing the same thing. These were never meant to be “how to” articles, but rather “learn from my experience”.
In general, I’ve gotten a lot better. There is a big difference dealing with 200 hives than dealing with 80 hives. I imagine people with 500 hives say the same thing compared to 200. It’s about efficiency and planning. So, what have I learned?
Have a plan:
I heard a seminar by John Miller where he said, “know what you are going to do and know what you are not going to do”. This is good advice and much more profound than it sounds. For example, I have always built my own hive equipment. I have a friend who repurposes crate lumber and I can build deep boxes for $5.00 each. That works well when you need to build 30-50 or fewer. But when you want to double in size from 100 to 200+, that’s a lot of equipment to build. The workload from that expansion also increases, but the hours in a day stay constant. Think carefully, where do you want to spend your time? For the first time, I ordered deep and medium boxes AND ordered assembled frames. Due to the timing, the time it saved me was well worth the cost.
A corollary to this lesson, what is your business model? I decided to be a stationary beekeeper. No pollinating and no chasing nectar flows in neighboring states. I sell nucs, local honey and raise queens to supply my own colonies. Sounds easy enough. Until I took too many orders for overwintered and Spring nucs and had a larger than expected Winter kill. Hmmm, all of a sudden, I didn’t have the production hives that I wanted and ended up producing 20% less honey than I wanted to. It took some thought and some calls to some commercial beekeeper friends of mine for me to come up with a strategy. First, don’t mess with the production hives. Instead, make a lot of timely, Summer splits in a way that doesn’t impact honey production (but, not enough equipment…). Those splits are dedicated to my nuc business and replacing colonies that don’t survive. But this is just an example. Everything you do with your bees impacts your operation. What’s your focus and what’s secondary. You will, ultimately, need to choose.
Plan your outyards. When beekeepers first start to expand, usually they aren’t choosy about where their bees go. A friend has some property an hour away, so they put a couple hives out there. Now, expand to twenty yards. The amount of time wasted in the vehicle, let alone the gas burned is incredible. So think about this up front. I also have criteria for new yards. I need easy access (not the case in my “hobby” loop), I want at least 10 hives with no potential neighbor issues, and it must be within 15 minutes of one of my loops (without going farther).
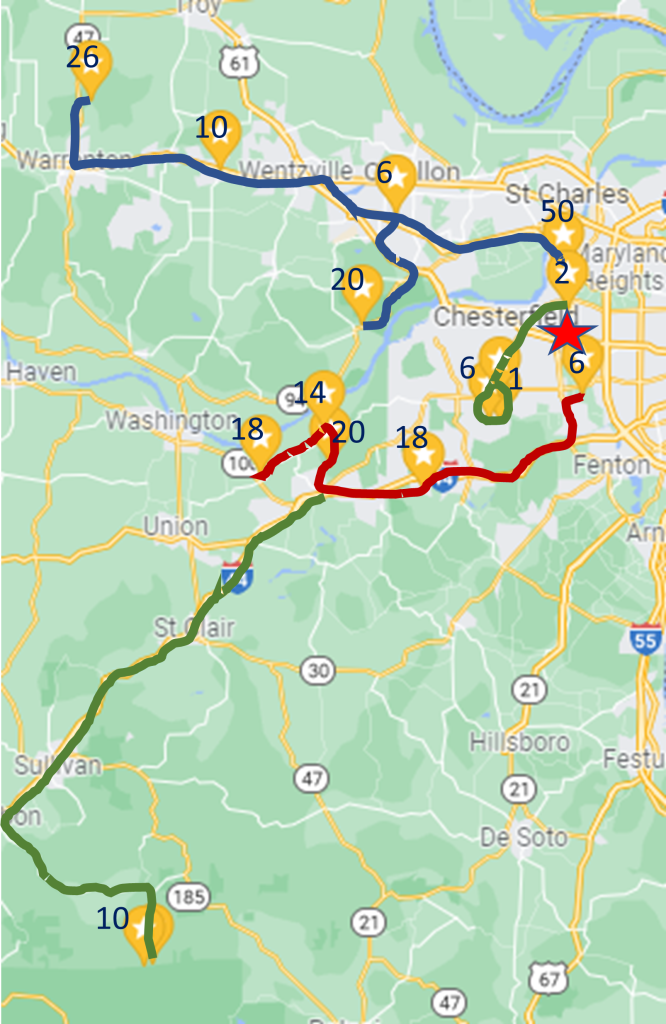
Picture 1. Plan your outyards. My three outyard loops: locations of yards are starred with number of hives in each listed. The green loop represents my hobby years with relatively few hives and a lot of travel time. The red line is my start into “serious” beekeeping. The blue line is my latest loop.
I now have three loops of yards (see picture 1). The northwestern loop (blue) consists of four yards and 120+ colonies, the southwestern loop (red) of four yards and 70+ colonies and the local loop (green) consisting of four yards and 26 colonies. It’s now time for me to “edit” these loops by asking if the time is worth the harvest? Most yards averaged two supers per hive. One, however averaged three and one averaged 0.5. I will put more hives on one and delete the other. By evaluating the health and harvest at each yard, you can adjust the size and improve your efficiency.
Have the right equipment:
The more hives you get, the more efficient you need to be. Having the right equipment greatly improves efficiency. In the name of efficiency, you want to make one trip per day to your home base. That means you carry everything you need for the day to your yards and return when all the work is done. Every time I need to return to get more equipment/supplies, it’s a waste of hours. For me, getting a bee truck was phenomenal (see picture 2). Just being able to collect all my honey supers for one loop in one trip was worth it. I also can carry totes of sugar syrup for feeding, scores of boxes and other equipment for splitting and a myriad of other things. I don’t drive the truck every time I go to the bees, but when I need it, it’s invaluable. I also put on a lift gate, which allows me to load things and move them on pallets, greatly minimizing the number of times I need to lift what I’m moving. In addition to bee equipment, I can now buy pallets of sugar, loads of lumber and other things too big for a pickup truck.
But, along with all the pros to having a bee truck, there is also a learning curve. On one honey getting trip, I had two load shifts. In fact, there used to be four deep boxes of honey in the empty column seen in picture 2. They came off on a turn in the highway. Fortunately, on the side of the road and there was no traffic incidents associated with it. Needless to say, drive and load carefully. Also, loads are higher than on a pickup truck. Both of my brand new garage doors on my brand new honey house are dented due to me not accounting for that.
Design your honey house correctly:
I’ve already written about my honey house plans. Now that it is functional and I’ve been through extractions, there are learnings there as well. First, make the walls, and garage doors, as TALL as you can. Because if you have a flatbed and you have it loaded up with stuff, eight feet is just a little too short (and doors get dented). I have 10 feet walls and eight-foot-high garage doors. I wish the doors were two feet higher.
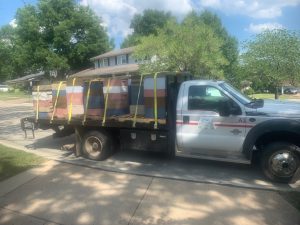
Picture 2. How nice to collect a route of honey in one shot. My bee truck has greatly increased my efficiency by allowing me to make single trips to my outyards.
For space needs, plan for the busiest time of the year and build as big as you can. Even if you have a lot of empty space during most of the year, you will be happy for the space during extractions. Picture 3 shows my building towards the end of my extracting. I had five pallets of supers, some pallets of empties, my extractor and decapping tank, buckets of honey AND I need room for the pallet jack to maneuver. Now add some pallets of sugar, bottles and other equipment and I am at capacity. Far sooner than I expected. You can never have enough shelving. I need space for bottles, a space for clean bottles, a space for filled bottles, a space for lids, a space for buckets of honey, a space for tools, a space for mite treatments and the list goes on. This is beyond the open floor space where you put extra boxes, feeders and supers. Another gem from John Miller, “plan for your first expansion while you are building it.”
Spend the money on the right equipment. The less you have to lift, the longer you can be in the business (i.e. healthy back). I have a pallet jack, dolly and hydraulic cart. All of which help me move things with minimum lifting.
On the electric front. Many circuits, many outlets. Make sure to have overhead outlets. It was wonderful extracting and never stepping on a cord and being able to hose down the floor without worrying about getting the cord wet. I put in a refrigerator, which is necessary for cold drinks and lunches. I also have a stove and microwave.

Picture 3. You can never have enough space. Plan for your busiest time of
year and account for the ability to maneuver the pallet jack.
HVAC. I air conditioned the bottling room (16 x 16 kitchen) and I am very glad I did. Missouri Summers are hot and humid and being inside a tin box can get very uncomfortable. Even when not bottling, the bottling room can be refuge from the heat. That being said, a large exhaust fan moves a lot of air in the extracting room. That and two floor fans do a good job in making the room bearable. But, make sure you put a screen around the inside of the exhaust fan. The number of bees that fly into it is amazing. I learned the hard way to make sure your windows are big enough to take an air conditioner. I got 24-inch windows, figuring I just needed them for light. I went to put in an air conditioner to cool things off while extracting and it didn’t fit. Learn from my mistake.
Plumbing. Having an epoxy floor and floor drains make cleaning up a snap. I have both cold and hot water hoses in the extraction room. Hose everything down, squeegee it into the floor drain, then mop it up. The biggest hassle with this is storing the hoses. The slop sink in the extraction room is also a must. I am always covered in honey, now I can wash it off before spreading it all over the place. I also have a bathroom with shower and washer/dryer. I don’t regret any of them. I use the washer/dryer to wash both cleaning rags and my bee suits. It makes the honey house a self-sustaining unit and doesn’t require me to bring anything home.
Find your work-life balance.
We are in this business because we love it. We are building a business because we want to. That situation makes it very tempting to spend all waking hours on your bees and business. Be very cognizant of what you are sacrificing when you go overboard on this endeavor. Your family needs you to be around. You need to maintain your network of friends. Beekeeping is, typically, a solo venture. Where will you get your social interaction? Maintain your piece of mind. It’s great when your hobby can become your career. But if you burn out, you lost both.