


By: Leo Sharashkin
Using Local bees, And An Appropriate Hive.Unconventional? Perhaps.
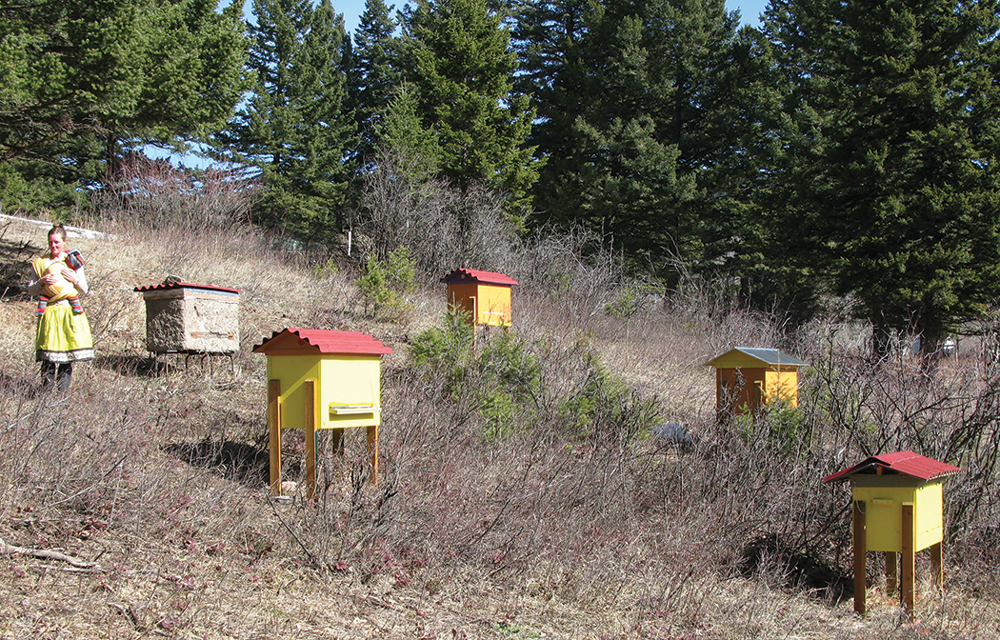
This treatment-free apiary near Bozeman, MT, has Layens hives spread to minimize bee drift for better bee health. “After switching over to Layens hives, I was able to overwinter my bees successfully for the first time in my six years of beekeeping.” – Jeff R., MT.
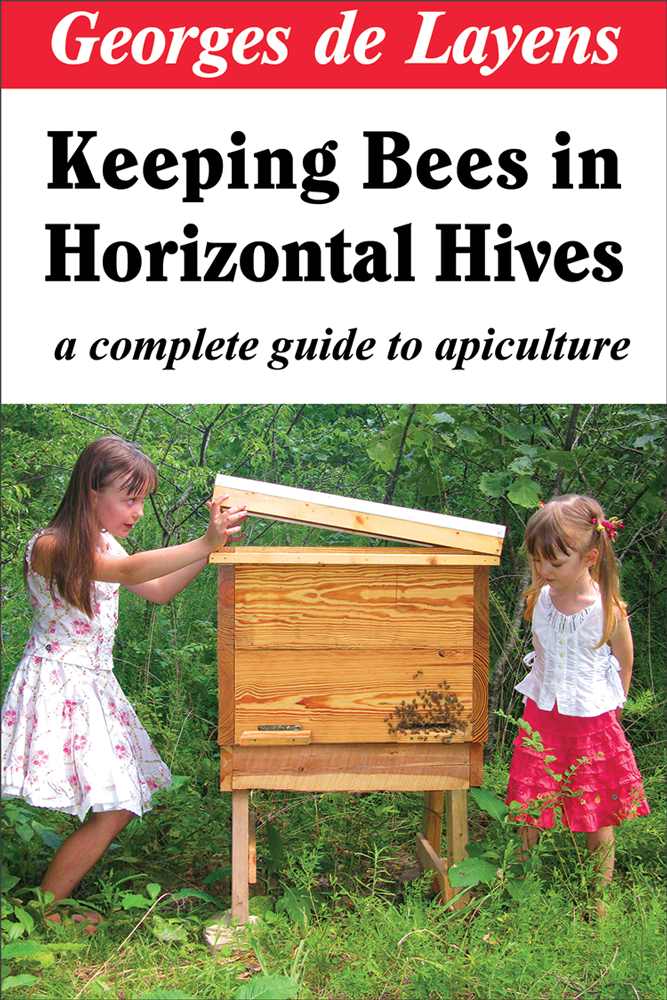
“Keeping bees requires little effort, and barely any capital to get started,” wrote Georges de Layens in Keeping Bees in Horizontal Hives: A Complete Guide to Apiculture. Europe’s leading beekeeping authority, he certainly knew what he was talking about. Following his methods with my 40 hives, I witnessed that keeping bees can indeed be simpler than growing tomatoes, but most beekeepers’ experiences are quite different.
“My mother spent $5,000 on her seven hives in the first few years!” Alan told me, his voice trembling with emotion. A typical scenario: you attend a beginner beekeeper’s class, buy equipment and protective gear, order bee packages, install them in the hives, treat against parasites and disease, feed in the Fall and then . . . they do not survive the first Winter. You buy more bees the following Spring and the cycle repeats itself. Faced with high bee mortality, mounting costs, and modest returns even many expert beekeepers hang it up.
What gives? Historical records show that a hundred years ago farmers commonly had multiple hives in their backyards. Bees required hardly any care and yet produced a honey crop five seasons out of six. Eva Crane documented that in many beekeeping systems harvesting honey was the only task a keeper had to perform. Why does it sound like science fiction today, and many experts recommend looking into your hives every two weeks?
Georges de Layens emphasized that sustainable beekeeping rests on two principles: using local bees and keeping them in appropriate hives that are gentle on the bees and the keeper alike, and require minimal management. De Layens spent two decades developing and perfecting a hive – now bearing his name – and a system that allows you to manage your colonies reliably with two or three hive visits per year.
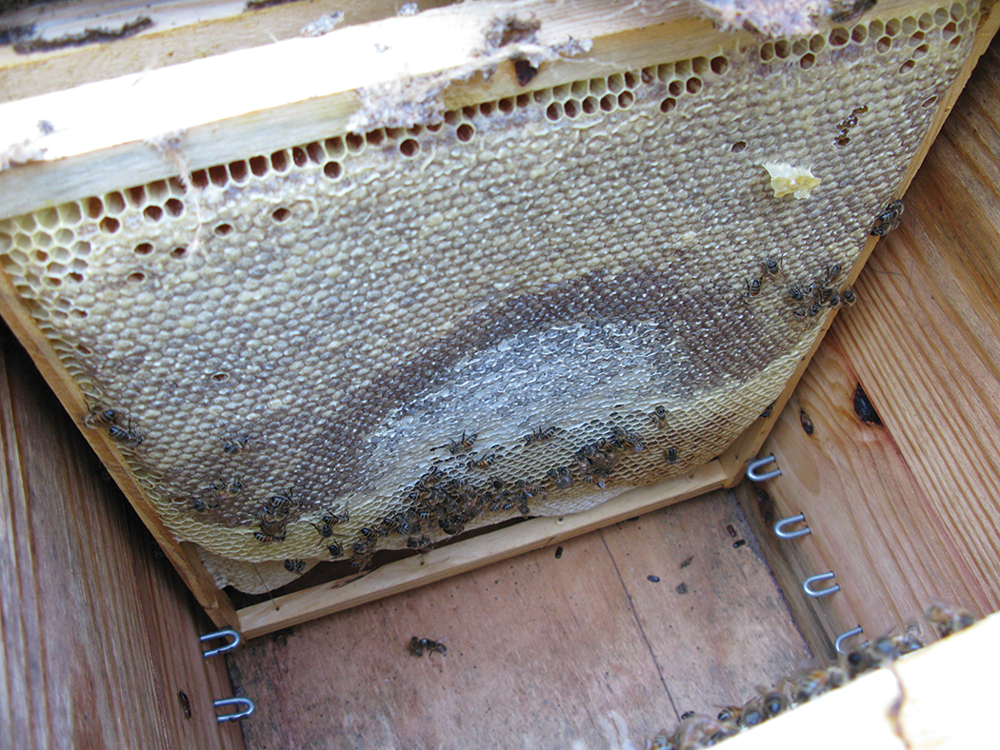
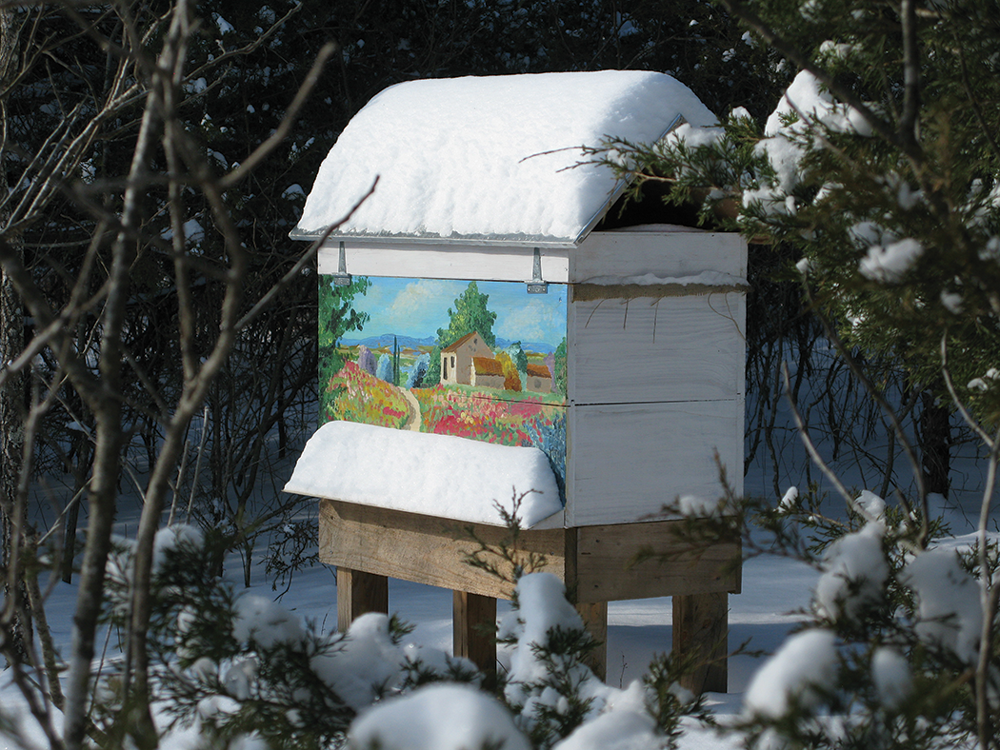
Layens hives mimic bees’ natural habitat in trees – honey on top, empty cells for the wintering cluster below. When you pull honey in the Fall (late October in southern Missouri, Zone 6), honey frames away from the brood nest are fully capped and almost free of bees.
The Layens hive and beekeeping method became one of the most popular in Europe. There are some 2.6 million hives in all of the U.S. Just one European country, Spain, smaller than Texas, uses over one million Layens hives today.
The Layens hive is a horizontal hive holding 20 large frames (13” long by 16” deep) on one level. (The number of frames can be smaller or greater depending on your local honeyflows.) It is loaded with frames during the spring inspection and then opened in the fall for honey harvest. If you think this is not feasible, consider this: Jean Hurpin, a prominent French beekeeper and author, founder of France’s largest beekeeping magazine L’Abeille de France, modified the Layens hive to enable management with one hive visit per year. He writes: “Layens hives are wonderfully suited for remote outyards. In the yards that I visit only once per year, I always find the bees in excellent shape with the hives full of honey, harvesting which becomes my sole task.”
After keeping bees in Layens hives for several years and having read his brilliant book, I felt compelled to make it available in the English language. Now that is has been released, I am very happy to share one of the chapters with you.
I certainly do not expect everyone, like myself, to switch over to the Layens hive system, but I do feel that every beekeeper can greatly benefit from this knowledge as it expands our understanding of what is possible in beekeeping, and the range of choices we all have.
“We cannot improve beekeeping by going farther and farther away from the bees’ natural tendencies,” wrote de Layens. “Instead, pick the hive model that is best suited to your locale, populate it with local bees, and the results will speak for themselves.” I fully agree.
Managing horizontal hives
A natural beekeeping classic, de Layens’ book is full of advice applicable to any hive system.
A chapter from Georges de Layens’ book Keeping Bees in Horizontal Hives: A Complete Guide to Apiculture (500 p., 250 ill., Deep Snow Press, 2017).
Long experience has taught me that one should never stray from the following three principles, which constitute the bedrock of any good beekeeping:
- Big hives.
- Big frames.
- Enough room in the hive to always allow the queen’s egg-laying to proceed uninterrupted.
In this way, you will: 1) minimize natural swarming; 2) produce as much honey as the location will allow; 3) build up a strong population by fall. All three points are very important for an apiary’s future.
My neighbor farmers have long applied this simple method to their apiaries, which consist of horizontal hives. These procedures have been used in my apiary for twenty years now, and for fifteen years in theirs, and this simple approach is becoming increasingly popular throughout France.
The apiary
My hives are in the woods, about two miles from my home. They’re arranged in two rows, down a path shaded by large trees. The hives are placed in pairs atop stands, 16” off the ground. This allows me to handle them much more conveniently, without stooping – and, when they’re kept higher off the ground, they’re less susceptible to excess humidity during the Winter.
The apiary is surrounded by wooden pickets connected by four strands of barbed wire – the most economical form of fencing. There’s a stream near the apiary that always has water in it, and the bees need only fly a hundred yards or so to reach the meadow.
Based on my own observations, in comparing various apiaries, I’ve concluded that the bees in an apiary shaded in a forest tend to swarm less often than one kept in full sunlight.
It is important not to arrange the hives in a straight line, but rather as irregularly as possible. This arrangement keeps the bees from returning to the wrong hive after foraging, and allows the queens to find their own hive more easily when they return from their mating flight, thus leading to fewer orphaned hives.
The equipment
My equipment is extremely simple, and can all be transported in a wagon.
- A wheelbarrow with a frame box placed on top, large enough to hold twenty frames or so. This wheelbarrow and frame box are used to hold any frames I’ve just removed from a hive, or am planning to put there.
- Two frame boxes large enough to hold 50 frames each, for moving full or empty frames from the apiary to the house or vice versa.
- A good smoker.
- A bucket with a tight-closing lid, and a long kitchen knife for trimming and removing bits of comb when repairing irregularly built comb.
- A chisel for easily detaching frames. To use it, simply slide it in between two frames, then use it as a lever to detach any frame, even one stuck fast with a lot of propolis.
- A small broom made of several goose feathers, for sweeping bees off comb.
Notes on inspecting hives
You should get used to visiting your hives without regard to what mood the bees are in, since waiting for an ideal day each time you need to inspect would waste too much precious time. The bees may be quite easy to work with one day, and more difficult the next. In any case, with a bit of experience and a lot of smoke, you can always get the job done. I’ve managed to harvest honey in October with neither me nor my assistant being stung a single time.
When opening a hive, the most important thing is not to remove a single frame until you’ve smoked heavily for a bit, from the top, in between the combs. Then, you can move quickly.
When I’m driving the bees off the frames, I never brush them outside the hive, onto the bottom board, but always back into the hive. In this case, they fall to the bottom of the hive; a few will fly away, but they’ll soon return to rejoin the other bees.
While I’m working, I always use an assistant, who smokes the bees while I’m busy; I’ve found that two people working in this way can easily do the work of three or four people working separately.
When Winter ends, novice beekeepers are often in too much of a hurry to inspect their colonies. This is a mistake – you should never disturb your bees while they’re at rest. Instead, wait until they’ve been actively working for a week or so. If you inspect your hives too soon after a long, harsh winter, some colonies may be found to have no brood, and a novice beekeeper may assume that they’ve become queenless, when in fact the queen simply hasn’t begun laying eggs yet. However, if you haven’t left enough honey for wintering (40–44 lb), some colonies may be running low on provisions, and you’ll have to feed them.
Here’s the easiest way to feed a colony in spring. Using a saw, cut several slices from a sugar loaf. Uncover some frames and, after soaking a sugar slice slightly in water, place it on top of the frames, then cover it with some thick fabric to prevent heat loss.
There’s another very simple way to feed bees: dissolve 17 lb of sugar, while heating, in 1 gal of water. Once the resulting syrup has cooled down, use a thin-spouted burette to pour it, from a certain height, into the cells of some well-built comb, in a frame laid flat on a table. Then, cover the frame with a sheet of paper, turn it over, and fill the other side as well.
It’s not a bad thing if a bit of old honey remains in the hives when main honeyflow begins; when this old honey is put through the extractor along with the new, it will contribute greatly to good, quick crystallization.
General inspection of the hives
Before going further, I should mention that my horizontal hives have two entrances, one on each end, and the brood nest is always at one end of the hive, instead of in the middle – either to the left or right, facing one of the two entrances, with the other entrance always kept shut. Since I believe that division boards are of no use, I haven’t used them in my hives for a long time now. But I have saved a few of them to use when transferring a colony or installing a swarm in a hive, in order to force the bees to build exclusively within the space I’ve given them.
I position my wheelbarrow, carrying the box full of frames, behind each hive, and arrange all of them as follows.
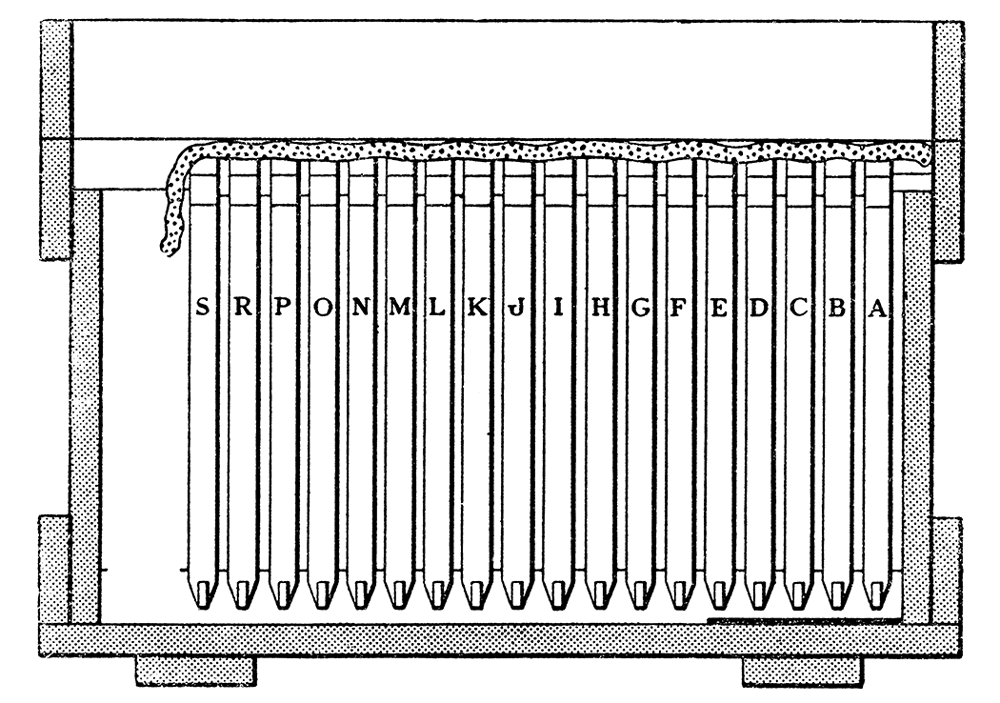
Figure 1. Laynes hive after the harvest in the Fall.
Let’s take, for example, a colony that wintered on 18 frames (fig. 1). I begin my inspection with frame A, the one closest to the hive wall, near the entrance. I remove it, then continue down the row until I come across the first frame with brood – in this case, frame D. So at this point, I’ve removed the first three frames (A, B, C), which contain various amounts of honey, and placed them, along with their bees, at the other end of the hive (fig. 2); these three frames will be replaced by three dry-comb frames with worker cells (U, T, S – to the right in fig. 2), which I’ll take from the hive itself or from my box of reserve frames. If you don’t have any extra frames available, you can use frames with foundation instead.
But before putting the empty frames U, T, and S in place, I check the condition of the brood in frames D, E, F, G, and H (fig. 1). I leave these frames where they are, then remove, for example, frames I and J, which contain no brood but a lot of honey, and move them up against frames A, B, and C (fig. 2), and, in their place, I insert two worker cell frames, P and R (fig. 2). The remaining frames – K, L, M, N, and O – are left where they are, and I add more new frames until the hive is entirely filled.

Figure 2. Laynes hive loaded with frames after the Spring inspection. See text for details.
So when the procedure is complete, the hive looks like this (fig. 2):
Three empty frames of drawn comb S, T, U
Five frames of brood and honey D, E, F, G, H
Two drawn comb frames, empty or with some honey P, R
Five empty frames of drawn comb K, L, M, N, O
Five frames containing various amounts of honey J, I, C, B, A
Of course, all of these instructions aren’t absolute in terms of the number and condition of the frames that are moved – this all depends on the size of the colony and the amount of honey found in the hive. However, the general order the frames should be put in is always the same, and can be summed up as follows.
In Spring, the brood frames should be surrounded by frames of drawn comb that are either empty or containing only little honey (or none at all), so that the queen will not run out of room for laying eggs, right up until the period of the main honeyflow. Meanwhile, the frames containing a lot of honey should be moved to the far end of the hive – the end furthest from the brood.1
I arrange all of my frames in this manner each Spring, giving the queen plenty of room to lay. Most of the old honey, if any remains in the hive by the time the main honeyflow arrives, will be put through the extractor along with the new honey.
Between the first inspection and the honey harvest, all that’s necessary is an occasional stroll through the apiary to make sure the bees are working normally.
Robbing is no threat to remote outyards, as long as you’re keeping local bee races. The only case when you’ll need to keep an eye on your colonies is when you’re forced to feed them – and this should never happen, assuming you leave them enough honey in the Fall.
If, during one of these external inspections, you find a colony whose bees are exiting the hive with pollen on their legs, and bustling around the bottom board as if worried – and, at the same time, the bees seem to be working sluggishly or irregularly – then you can be almost certain that the colony has become queenless, or has a drone-laying queen. If this is the case, give the colony a frame with brood of all ages, or a queen, or a swarm.
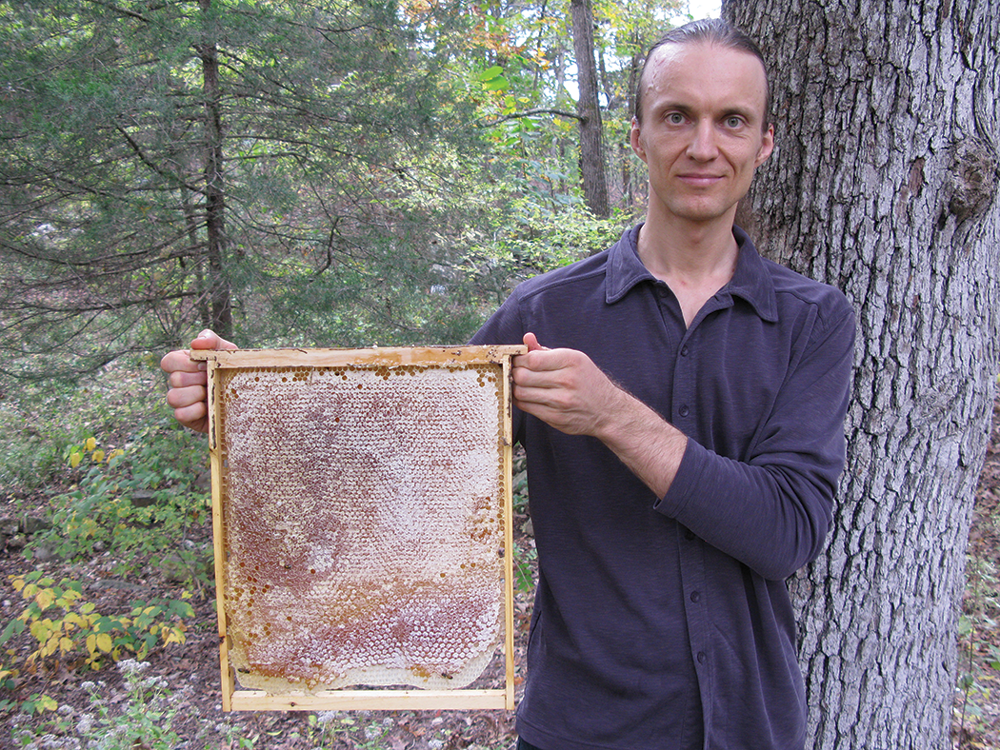
Layens hive advantages – no heavy lifting, all frames the same size, large combs for strong Spring buildup and good overwintering.
In the Spring, it’s very important to check the brood’s condition carefully. If the brood is in tightly arranged patches, then the colony is in good shape: its queen is probably fertile, and its future is bright. This holds true regardless of how strong or weak the colony seems, or how much brood it contains.
If, however, you find that the brood is scattered, then the queen can’t be doing well. In most cases, the hive will replace its queen and eventually be in good shape for wintering and for the following season.
You may also discover that a colony is orphaned, or has a drone-laying queen. If this is the case – and it does happen from time to time (if not every year, in a large apiary) – then you can eliminate the now worthless colony using the simple method described below. But save this procedure for a nice day when the bees are highly active, which clearly indicates that there is nectar in the flowers.
Move the hive to the edge of the apiary, remove all of the frames, and brush the bees off onto a bottom board placed on the ground, in the sunlight. The bees will fly away, and, unable to find their old hive, will seek out the hospitality of the colonies surrounding their former home. The honey this orphaned hive contains can go toward the purchase of a replacement colony.
If you’re not able to carry out this procedure on the same day, you should greatly narrow the hive’s entrance for the time being to avoid robbing.
The best way to replace queenless hives is to set aside funds from honey sales for buying replacement colonies, since, by buying your colonies from other keepers, you’ll be constantly introducing fresh blood into your apiary. However, if you have multiple outyards at some distance from one another, you can also keep a small apiary of colonies in fixed-comb hives near your home, or moveable-frame hives with only a small number of frames inside – this apiary will be used to produce natural swarms for you to collect. This breeding apiary will allow you to fill in the gaps in your outyards as they arise.
The honey harvest
To obtain honey that is of high quality and has a long shelf life, you should only extract it from the combs when they are almost entirely capped. This means that I harvest late in the year, in September. Of course, this means that my sainfoin honey is mixed with honey from Fall flowers – but since, in order to find buyers easily, I have to sell my honey at roughly the same price set by local honey suppliers, and since the honey I produce using an extractor is infinitely superior to theirs, this blend of honey from various flowers presents no real problem. In any case, it’s convenient to harvest in the Fall, since by this time of year there are fewer bees in the colonies, which makes the entire process go more quickly.
When harvest time comes, I make my way to the apiary with all of the necessary equipment, just as in Spring. I harvest at around four or five in the afternoon, and finish up around dusk. My method allows me to harvest a dozen or so hives in two hours.
I open each hive and remove the frames one by one, starting with the one that is furthest from the brood nest. If this first frame contains a lot of honey, it’s a sure sign that there’s a lot of honey in the hive. I usually remove between eight and 10 frames from a hive that contains 20 frames and is heavy. Note, however, that even if the colony possesses less honey, I’ll still need to remove the same number of frames – the only difference is that only a third or a quarter of these frames’ surface will be taken up by honey, instead of the entire surface. Once you have a bit of experience, I recommend lifting the hives from the back and, by comparing their weight, deciding whether to remove a frame or two more or less. In any event, I leave at least 38 lb of honey for wintering. Depending on where you are your bees may need more.
Once the surplus frames have been removed, I typically cover gaps between the remaining frames with metal strips folded into a V shape (or with small wooden slats), then cover the empty portion of the hive with more slats, being careful to leave a 3/16” gap between them to allow the vapors emitted by the bees during the winter to escape. Finally, I spread a wool blanket or some straw on top of the frames and slats.
Wintering
Stationary Layens hives Winter great – thick warm walls provide ample insulation, big frames make honey continuously accessible to the wintering cluster, and a narrower nest minimizes heat loss.
As you probably noticed, I prepare my hives for wintering simultaneously with the harvesting procedure, which allows me to avoid returning to the apiary until the following Spring.
On the day when I finish these procedures, I place a mouse guard in front of each hive entrance located on the same side as the frames; the other entrance is always kept shut. As for the frames I’ve run through the extractor, I don’t leave them in this same apiary for the bees to clean; instead, I place them in another apiary near the home of a sharecropper on my property.
But if you don’t have enough space to store the frames during the winter, you can put most of them back into the hives. For example, you can leave 18 of them in a 20-frame hive, covering the last frame with wool blanket or straw as shown in fig. 2; the extra space allows any humidity – so harmful to bees – to escape through the roof during the Winter.
Sometimes I’m forced to harvest my honey earlier in the year, at a time when the honey has been only partially capped. In this case, I pass the frames through the extractor without uncapping them, to extract the uncapped honey only, which I use to make mead. Then I uncap the capped cells and extract the honey from them as usual.
I’ve tried just about every kind of knife for uncapping cells, but the one that has the most advantages is one that looks a lot like a drawknife used in woodworking: a curved blade, 3/8” shorter than the length of frames, with a handle on each end, allowing it to uncap easily, and not too tiringly, since it can be held with two hands. The knife should be heated before use.
Two hive visits per year
All in all, managing an apiary throughout the entire beekeeping season can be reduced to the following two main procedures: 1) the Spring inspection, when the hives are filled out with frames; and 2) the Fall harvest and preparing the colonies for wintering.
In these few pages, I hope I’ve shown how you can achieve, as simply as possible, a profitable average return over a number of years which, individually, may be more or less favorable – and how you can manage multiple apiaries in little time and with low risk.
The advice I’ve given here is not meant for those who are just beginning to keep bees – but an intelligent beginner won’t take long to learn how to handle hives and the bees in them. And it’s beginners like these – novices who have grown into true beekeepers – that I’ve had in mind while writing this chapter.
How many farmers, priests, teachers, and even business owners would like nothing more than to manage bees on a fairly large scale, but are prevented from doing so by their many other responsibilities! Many of them may even have a few colonies near their homes, but balk at the idea of establishing larger apiaries when they consider all of the complex procedures that would constantly occupy them throughout the bee season – not to mention the daily monitoring that beekeeping manuals assure them is indispensable.
If you want to have a productive apiary, without it pulling you away from your other pursuits, then the advice I’ve given will allow you to increase your revenue prudently, steadily, and almost risk-free, and allow this country to reap the harvest of honey from its abundant nectar plants – a precious resource that would otherwise go to waste.
Get the Layens book and save $20
You can get a copy of Georges de Layens’ book Keeping Bees in Horizontal Hives: A Complete Guide to Apiculture. Order online at www.HorizontalHive.com.
1You should use the spring inspection as an opportunity to add some frames to the hives – frames primed simply with some old pieces of comb glued firmly to the top of the frames. These frames should be placed at the far end of the hive opposite the one where the brood is found, and should be interspersed with frames already built out with comb. Add two or three such frames to each hive. This will ensure that the bees build the comb regularly within the frames.
Dr. Leo Sharashkin is editor of Keeping Bees With a Smile, a comprehensive book on natural beekeeping, and Keeping Bees in Horizontal Hives: A Complete Guide to Apiculture by Georges de Layens. Dr. Leo is a regular contributor to Bee Culture and other major publications, and teaches natural beekeeping at his apiary in southern Missouri and around the country and internationally. His apiaries are entirely composed of survivor stock obtained by catching wild swarms, housed in a variety of horizontal hives, including the Layens. His website (including free hive plans): www.HorizontalHive.com.