by William Powers
Because I had a good year in collecting swarms, performing removals from buildings, and by making my own splits, I found myself in need of an additional twenty supers. After discussing the situation with my wife, and revealing the increasing cost of buying supers, she concluded that: 1) I have a semi-heated shop, 2) I have tools for the job and 3) I have dreary Winter days that need to be filled with non-couch potato activity. Therefore, I should buy wood and build the supers myself. Here is how I simplified making supers and added some built in protection for the lower grade lumber I used.
STEPS TO SIMPLER SUPERS
I determined that by reducing the number of fingers in box joints, and securing the corners with framing nails driven into pre-drilled holes on the vertical plane, construction time is reduced. Joint strength is not compromised with this technique. A side benefit is that the nail heads serve to protect the wood from splitting and crushing when prying with the hive tool.
LUMBER
Beekeeping is not an inexpensive activity. Being on a seniorís budget, I have to be cost conscious. Unfortunately, wood, the prime component of hive construction, becomes more expensive by the day. And, for 125 years, builders have complained that lumber quality has declined. Having seen new lumber crush or split using a hive tool on propolized supers, I wanted to protect my investment in woodenware from early destruction.
To make 20 supers 120 lineal feet of lumber is needed. Having checked prices at big box stores, I went to a real lumberyard. They had better grades of wood, but far more expensive. I also checked out the area Craigslist and other bulletin boards. Luckily, on the internet, I found more pine than I needed. It was lumber left over from a big project and priced to move. It was about the same quality as big box store material but only pennies per foot. My wife and wallet voted for the overstock material. Using this lower quality material, I bought about 20% more than my estimate, but still spent less than planned.
TOOLS AND SAFETY
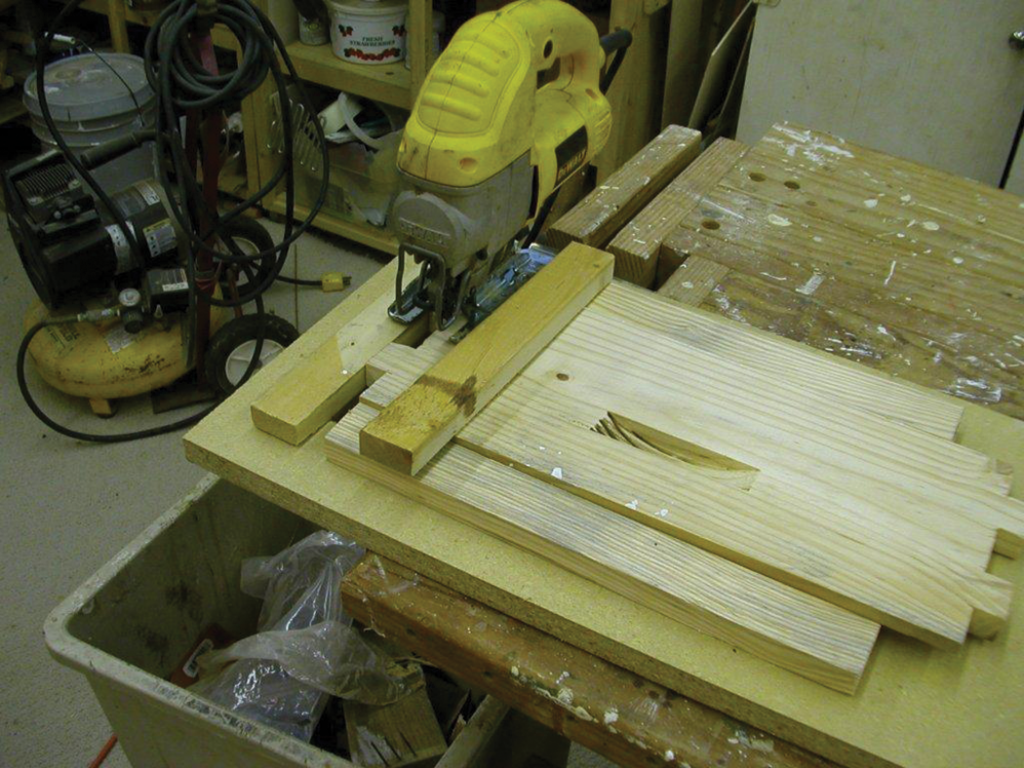
For this project I used a table saw (for both ripping and dado cuts), chop saw, band saw, router, rasp, clamps, hammer and electric drill. The table saw and router were the two power tools that seemed essential. Other tools could be used in place of all but the clamps and hammer.
CONSTRUCTION
Once I had the material home, I stacked it near the table saw. While it acclimated to my dehumidified shop, I planned my work so I would have the fewest moves between construction steps. The lumber for 20 medium supers is not an inconsequential weight according to my 65+ year old back. So as I cut, I wanted to put the results as close as possible to the next activity. I did not want to put any material where it would have to be carried to and from an intermediate location. I would not have tried it if I had to place and lift it off the floor. One way I kept moving was to use a metal two wheeled garden party stand. I could cut pieces, stack them on the stand and roll a load to the next work station.
Using the table saw, I ripped to medium super depth the 1″x 8″ pine stock.
Next, I used an end piece and a side piece from an old super as templates to figure how many sides I could get from each board. Since there were knots and other imperfections, cuts had to be planned to avoid those at joints, edges or hand holds. Big knots that might fall out were avoided completely. As I worked with the chop saw, I kept in mind that the saw blade used to make cross cuts has width, and uniform dimensions can be lost. With a lack of uniformity, corners cannot be brought to square at assembly. To insure accuracy, I put a pencil check mark on the side of the line I wanted the chop saw blade to fall.
I cut and made separate stacks of long and short sides. When I had a few more of each than I needed, I checked the stack to see if they had been cut to the same length. If some of the long sides were too short, they were cut down to short side pieces. If some of the short sides were too short – well, better luck next time!
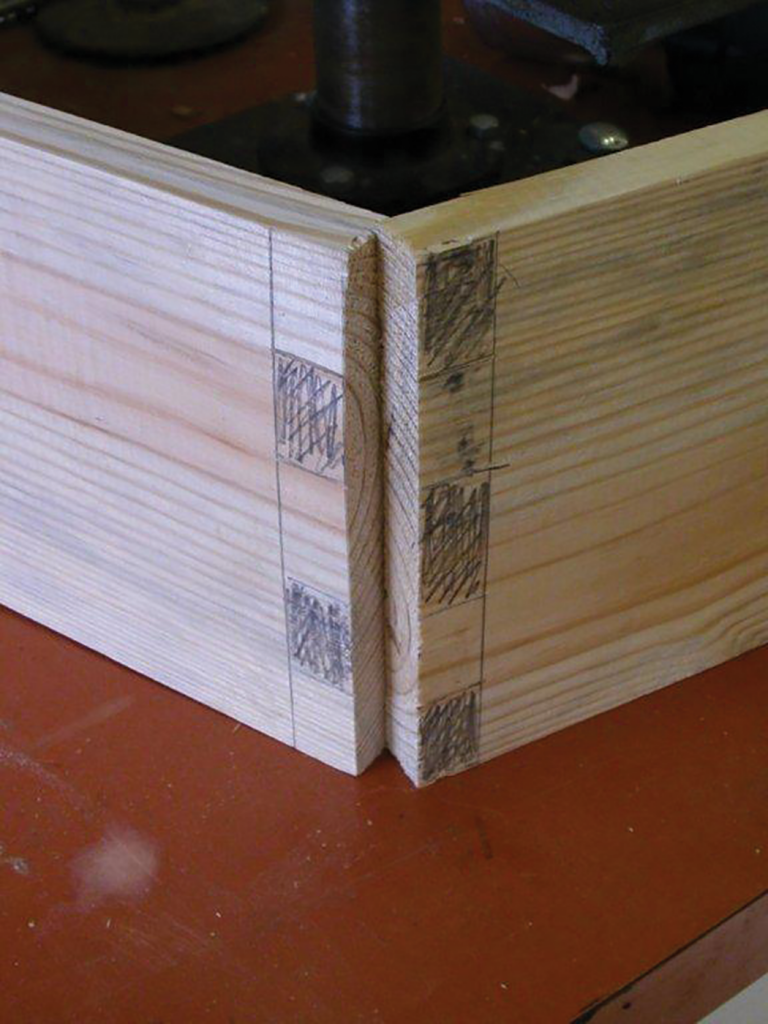
Mark the work so the fingers interlock.
No matter how many bees are in a super, there are two rabbets in each super. This is the wood that is removed to create the notches that the frames rest upon. To make these without having to measure, I used the old super end piece to assure I would perfectly preserve the bee space. First I put the end piece on edge and cranked up the saw blade until it just touched the rabbit. Then I slid the fence to the super so it was lightly pinned between saw blade and fence. Now I could cut with confidence. With the vertical cuts made, I repeated the process with the old super side lying flat on the table. I set the second cut on the side away from the fence. The other way can result in the piece that is removed flying back at the operator at a punishing speed.
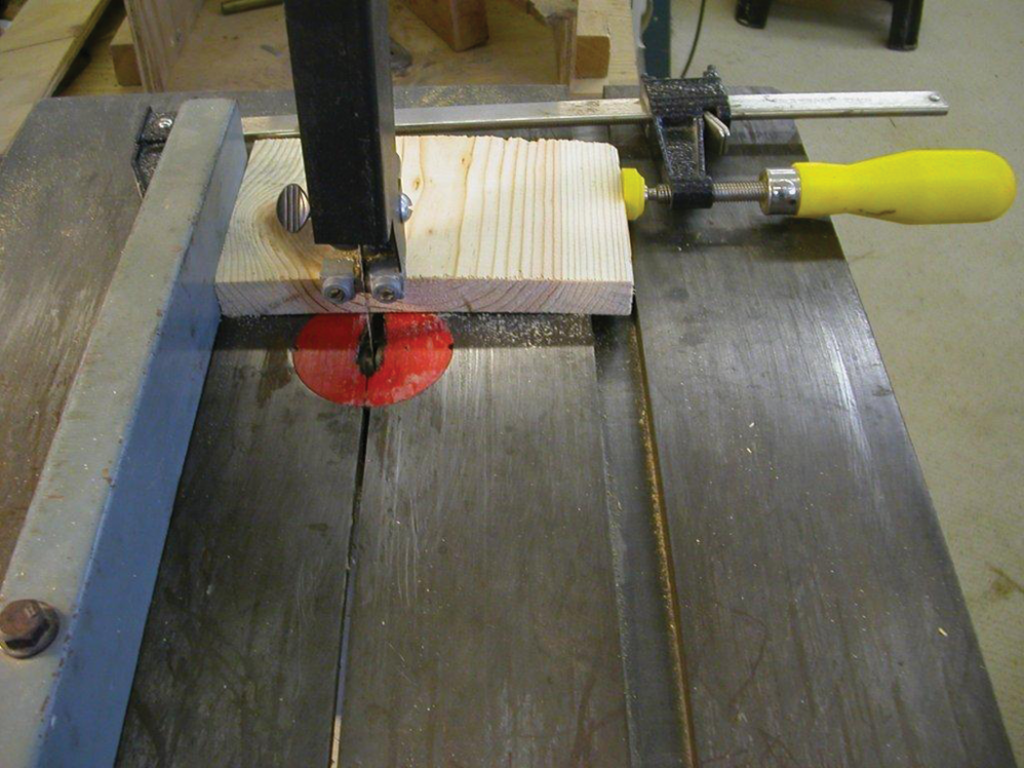
With the band saw fence set, add a stop block to preclude cutting too deep into the sides.
The resulting stacks of long and short sides may be somewhat tipsy, but I kept in mind that warped wood is flexible, and all can be brought nearly square at assembly. Since some wood can become unusable as it cups or warps after it is ripped, I was glad to have the extra pieces to serve as replacements for the ones too far gone.
SIMPLIFIED BOX JOINTS
To minimize cuts, I designed my super box joints with three fingers on the long sides and two on the short ones. This reduced the number of dado cuts per corner from seven to three. Except for the middle finger, each one is 1-1/4″ wide.
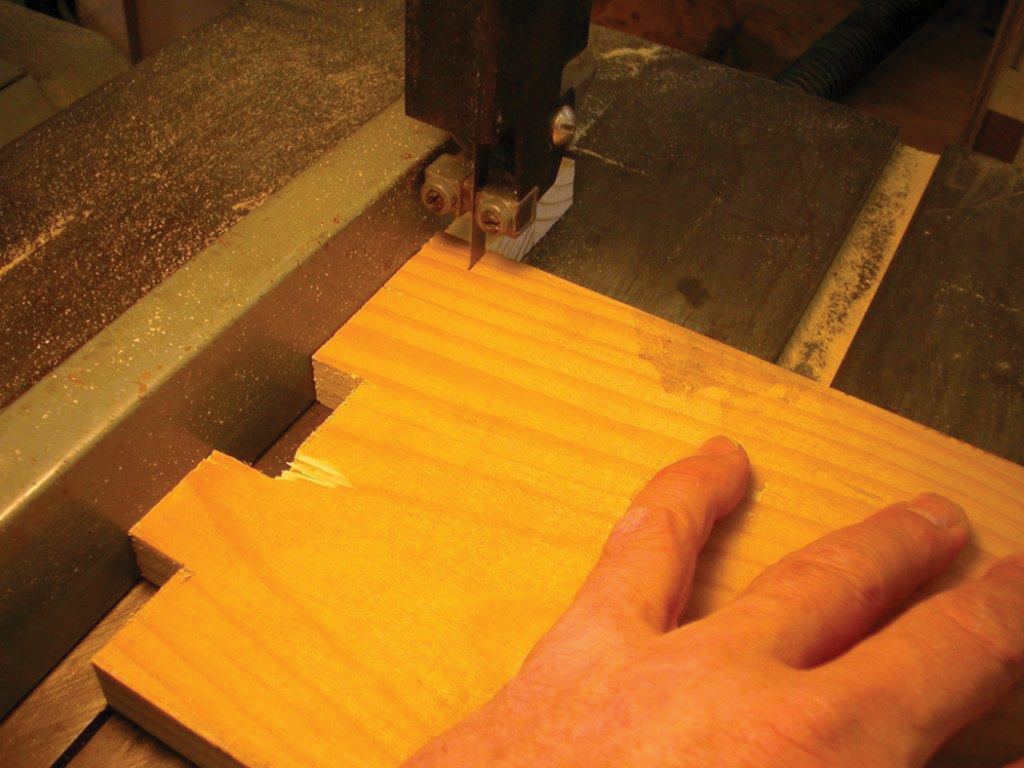
Rather than hog out the space between fingers with multiple passes by the dado blade set, I made one cut 3/8″ wide to start each void. A band saw or saber saw finished the removal between fingers with a cut with the grain and a finish cut across the grain.
With the band saw fence set to a ¾” cut, remove the wood to reveal the fingers.
If you cut your own joints, you probably have a method you are comfortable with. If not, there are scores of videos on Youtube that show ways to cut them with whatever tools you have. I would not be surprised to find a way to do the job with a belt sander and hammer.
HAND HOLDS
My next task was to cut recessed hand holds. (If I used cleats, I’d wait until the super was assembled before adding them.) To speed work I made two templates, one for the long sides and one for the short sides. These patterns have internal holes cut out from oversize 1/4″ thick plywood sheets. The holes are the size of the router base plus the area that is to be removed. Below the plywood, I attach strips of wood so the template fits over the sides like a shoe box lid. After clamping the jig and side to the outside work bench, I took my plunge router and cut away, making a shallow cut and a finish cut. I let the wind take all the fine particles to be recycled in the woods.
ASSEMBLY
With wood cut and stacked for easy access, I started to assemble the supers. Of first importance was making sure the work space was smooth and level. Since I have a heavy cast iron table saw top, which I often check for level, I used it. Plus, the saw table top could take whatever wooden hammer pounding might be needed to snuggle up joints.
For assembly I needed several items. I got out two clamps long enough to pull in the long sides and two clamps long enough for the short sides. The other items I needed included Titebond II glue, a test square, a wooden maul (to encourage joints to fit together), a wood rasp (to remove excess wood from too tight joints), an electric drill, a 1/8″ drill bit long enough to make holes at least 2.5″ deep, a regular hammer and eight penny 2.5″ long framing nails.
I grabbed two long and two short sides, and ganged them together with the handholds to the top. I applied a layer glue to the tops of the fingers. I didn’t bother gluing the undersides. I put the sides together, with handholds on the outside (don’t laugh-it has been done the other way, I blush to admit) and added the two long clamps over the tops and the two short clamps to pull in sides. I checked for square, and adjusted as needed.
Next I applied my idea for a strong, protective joint. I took a piece of masking tape and wrapped it around the long drill bit just over 2.5″ from the tip. Then I drilled holes in each top corner down through the fingers. Next I drove in a framing nail at each of the four corners. Following that, I removed the top clamps and rotated the super so top was now bottom. I re-set the long clamps and adjusted the side clamps to pull in the sides. Again, I drilled and nailed. What I had done was both make both an extremely strong joint, and added corner protection as those nail heads are pried against by the hive tool. I had also gone from over 20 small nails per super to eight bigger nails that do a better job at limiting warpage, are protected from moisture, and can be removed cleanly if you somehow need to take a super apart.
Some scrap pieces are easily assembled into a hold down, guide and stop. Note the hand holds chewed out with the dado set which lead to the router and template method of cutting hand holds.
The pre-drilling was critical. If I did not pre-drill holes 2.5″ deep the nail would split the wood and ruin the super.
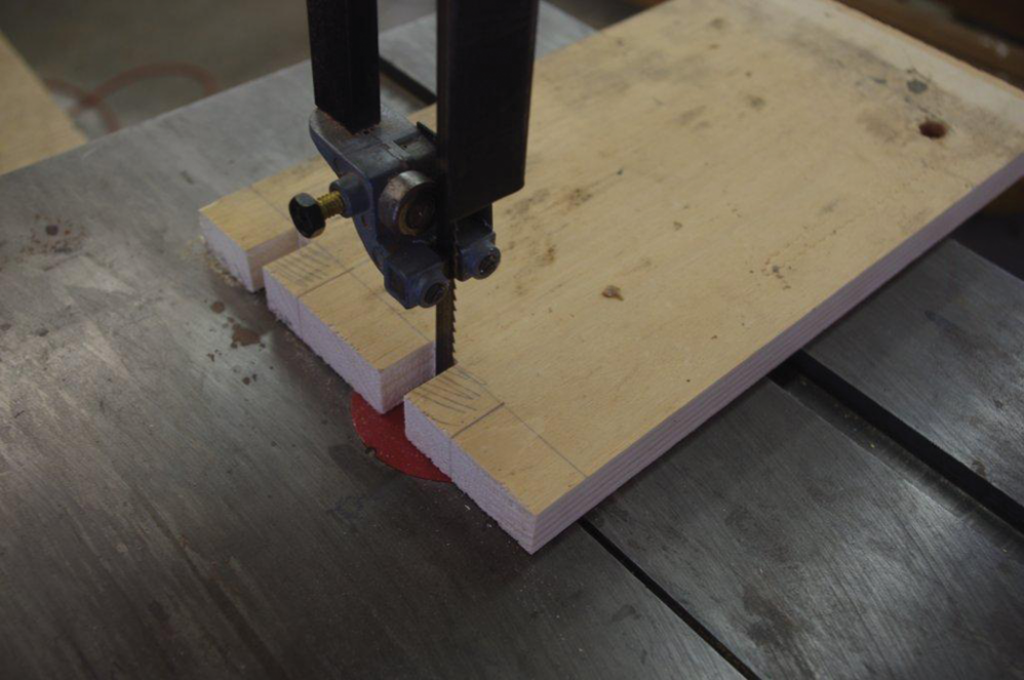
Using the band saw to remove the wood that creates the fingers.
FINISHING TOUCHES
With the supers assembled, I turned to cosmetics prior to painting. Any finger that protruded could be taken back with a belt sander or a low angle block plane (another advantage of the vertical nailing method). Any voids between the fingers were filled with wood putty or exterior latex caulk. If there were rough spots on the boards from milling over knots they were filled and smoothed. Any raised grain near knots, or within the handholds was sanded, scraped or chiseled away. Of course, I could have left things as they were – bees do not complain about such items. Any holes they do not like will be closed with propolis, thank you sir or madam.
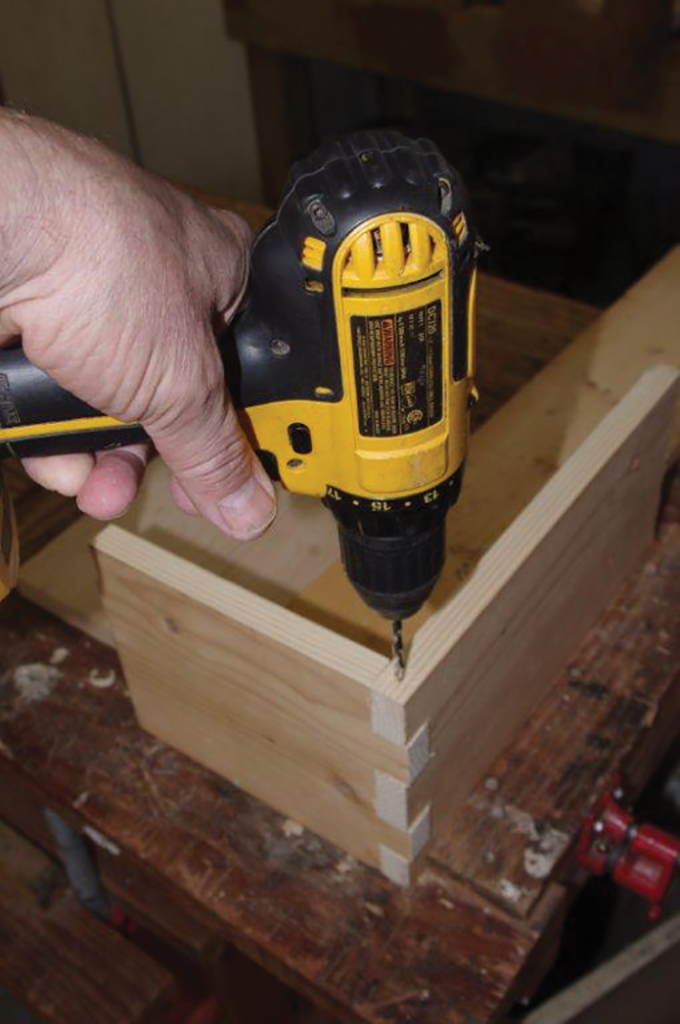
Clamp a piece in place and slide in its mate. Drill a pilot hole for the nail.
Finally, since the material was untreated softwood, I needed to paint. I primed and then added a top coat of exterior grade paint. The price of paint has exploded, so I use it carefully. I scuffle around construction sites, where it is often possible to find a few inches of paint inside discarded five gallon buckets near the trash hoppers (aka the “DBC” or Dumpster Building Center). My local paint center also takes back mis-mixed paints and re-sells these at a fraction of shelf price. I put them on alert that I have needs. It doesn’t hurt that I leave them a small jar of honey to keep me in mind.
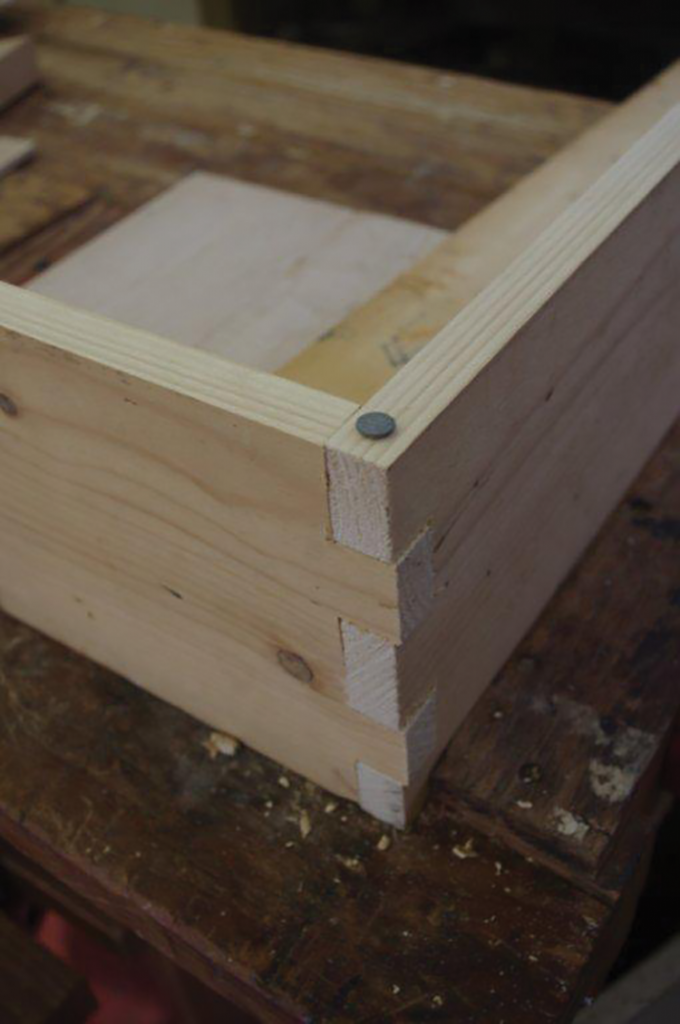
Drive the nail home to assure the drill bit is not too large or too small. The nail should need a medium tap from the hammer but not split the wood as it is driven.
The supers described here were constructed three years ago. To date, they show no signs of mechanical wear. On some older damaged supers that have horizontal nails, I’ve a taken a step to improve them. On those, I’ve added short roofers nails close to the joints on the long sides. Now my hive tool works against a wide nail head rather than cutting into bare wood.
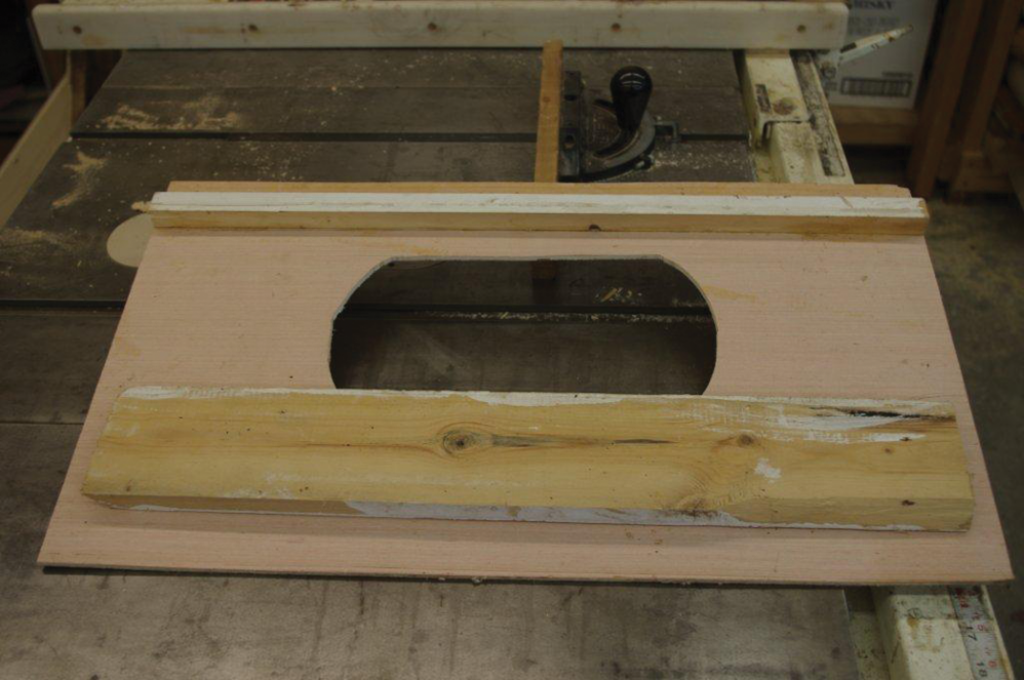
Photo shows the bottom of the template used to create handholds on the super sides. Place template over side, center, clamp to work place and route away.
A FINAL NOTE
If you decide to try this method, or take up any woodenware project, try to go at it with a clear mind. You want to enter the shop with the same frame of mind you have when you enter a hive and are so calm and careful that the bees don’t mind your presence. If you are angry or distracted, save the work for a time when you are at peace. Motorized shop tools carry a far deadlier sting than any bee can generate, and a trip to the ER will more than cancel any savings you planned by doing it yourself.