by Rick Andrews
 With the dog days of Summer in full swing, it might be time to start thinking about this year’s honey harvest. Do you recall last year’s harvest? Did everything go according to plan or were there one too many stings, endless attempts at brushing bees off frames or way too much commotion as those robber bees tried to grab themselves a free lunch?
Maybe this year, you’d like to make the process a whole lot easier and try using a bee escape to get the bees off of those frames. But, better still . . . why not make a bee escape for each of your hives. It’s really not too difficult a job and, in fact, you may find that most of the material is sitting around in that scrap pile which you’ve been meaning to go through for a number of years.
How It Works
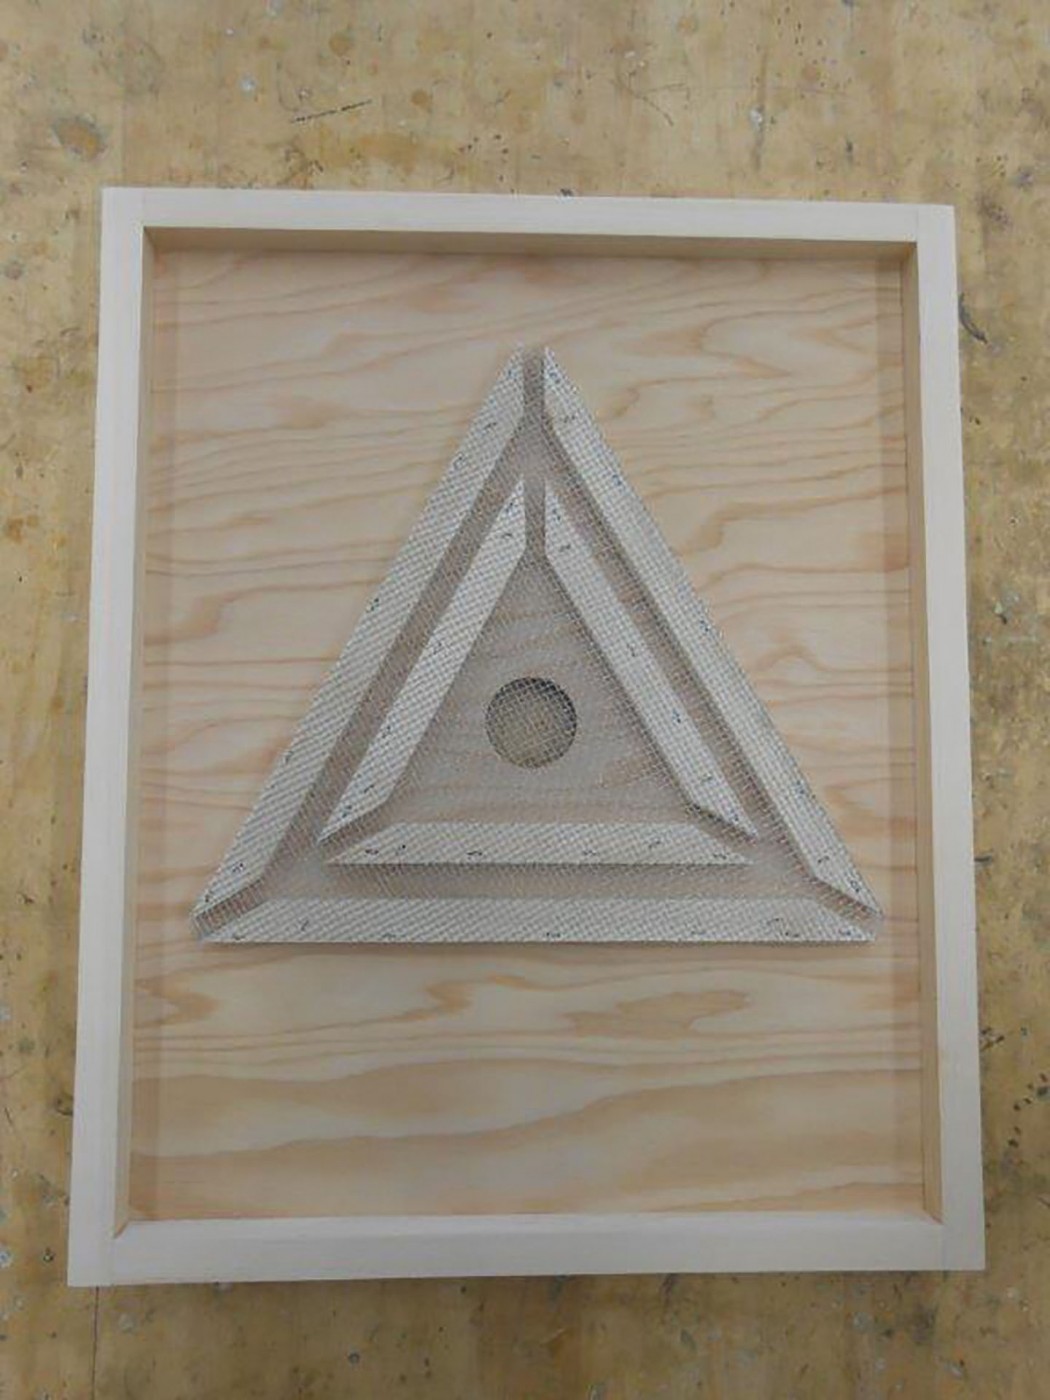
A triangle bee escape works on the following principle. First, you need to put the escape in between your supers and the brood boxes. As the evening approaches, the bees in your honey super will want to join the rest of the colony down in the brood boxes. In order for this to occur, the bees must pass through the center hole on this board and exit out of the openings in the triangles on the other side. The bees are not immediately able to figure out how to get back up to the supers on the following day and you are left with relatively “bee-free” honey supers. But, make sure to plan accordingly and do not leave the bee escape on for longer than a 24-48 hour period. In many cases the bees will figure out how to get back up to these supers if more time permits.
So, with that said, let’s get ready to make a bee escape or two. But, before we begin, let’s talk about safety. Make sure that you read and understand how to SAFELY operate your power equipment. In some of the pictures below, the safety guard has been removed so that you can get a better understanding of the photo. NEVER operate your equipment without the original guard or an auxiliary guard in place!
Material List:
Plywood: ¼″ x 15½″ x 19-1/8″
Front & Back Frame Strips: ¾″ x 1½″ x 14¾″
Side Frame Strips: ¾″ x 1½″ x 19-7/8″
Outer Triangle Strips: ½” x ¾” x 12½”
Inner Triangle Strips: ½” x ¾” x 8”
#8 Hardware Cloth
 Getting Started
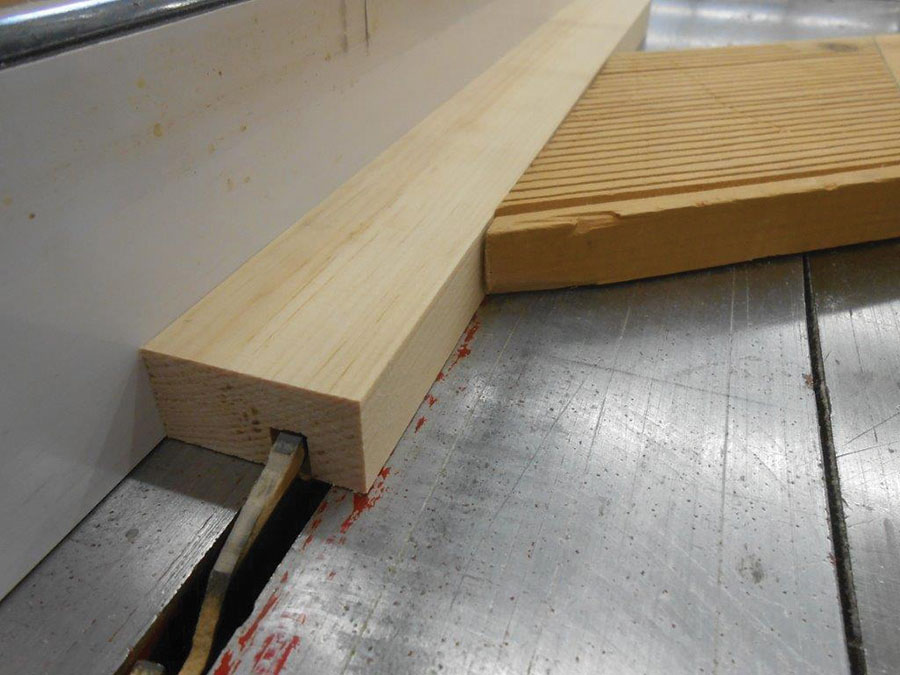
Begin by cutting the frame strips to their proper width and length. Next, cut the ¼” groove in these strips that will accommodate the plywood. There’s no need to set up a dado blade for this job. You can cut this groove in two passes on your table saw using a standard combination or rip blade. Just set the table saw blade to 3/8 for height and the rip fence to one from the right side of the blade. It’s a good idea to use a feather board for additional support and a push stick to guide the stock. Adjust the rip fence (depending on the thickness of your blade) to make the second pass in order to complete the ¼” groove. Once this is completed, use a 3/8” countersink bit to drill one hole (3/8” deep) in each end of the side strips. These will become the screw locations that will secure the frame together. *Note: If you do not have a plug cutter, then omit this countersink step and just set your screws flush with the frame when it’s time to assemble.
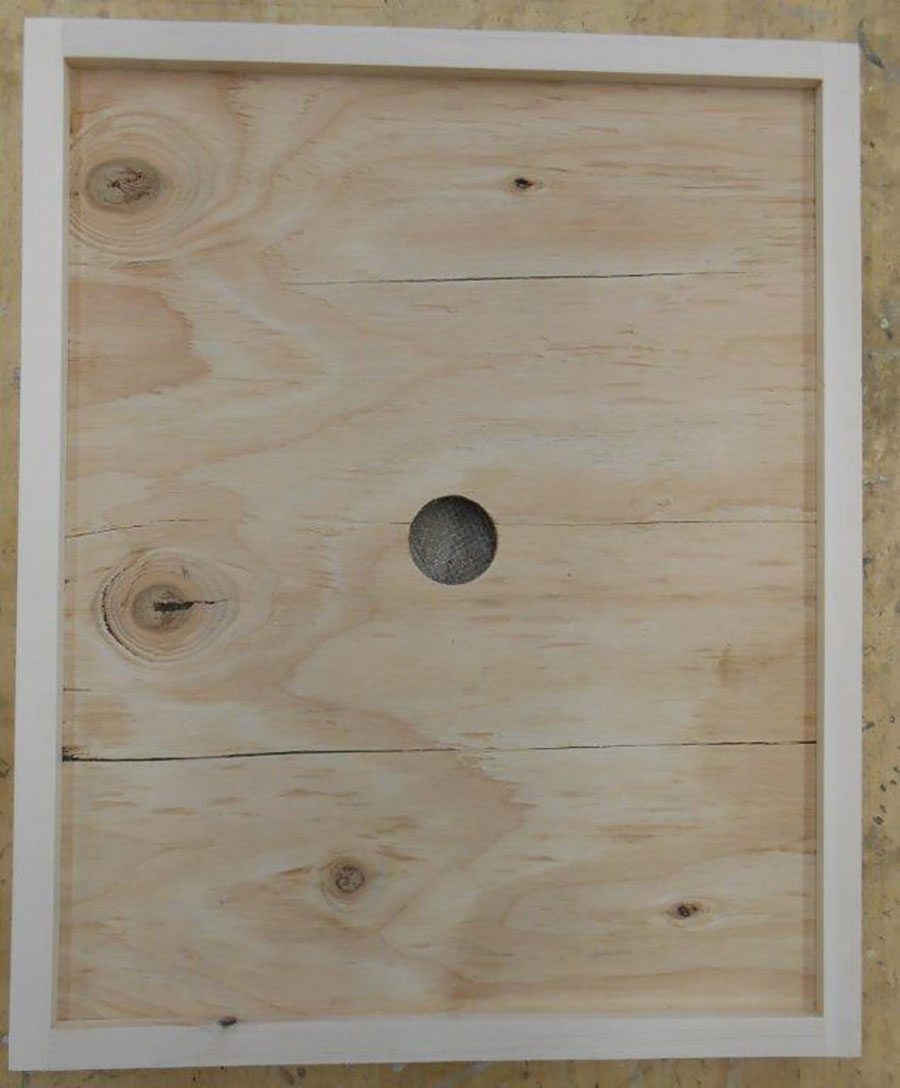
Next, cut the ¼” plywood to the proper length and width. Using a drill press or hand drill, cut a 1¾” circle (or what drill bit you have that is close in size) in the center of the plywood. This will become the exit hole for your bees.
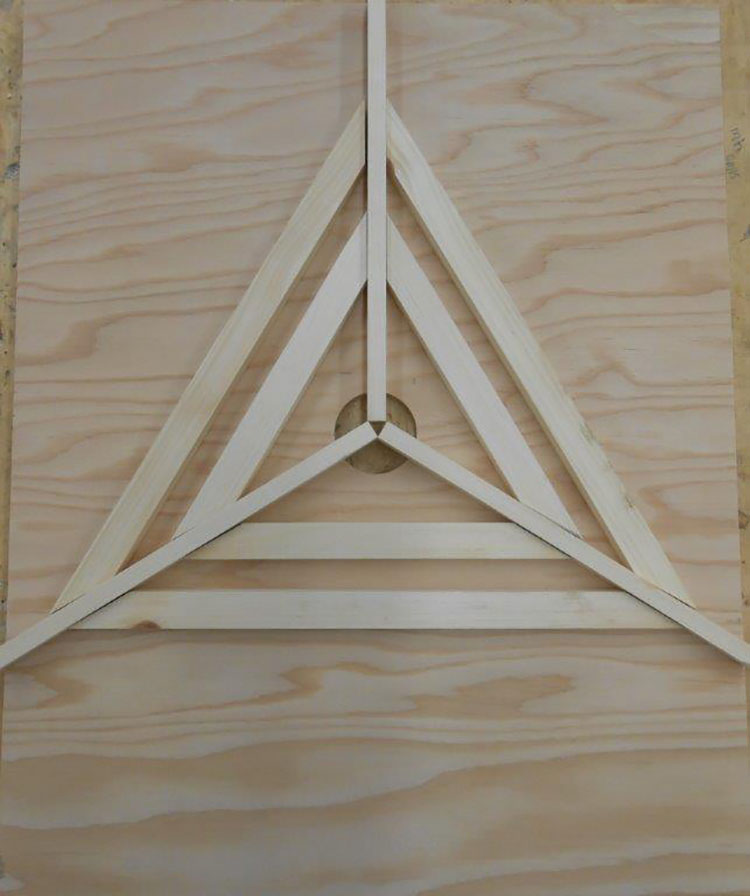
Making The Triangle
Using the table saw, rip two ¾” x ½” strips for the two triangles. The outer triangle should have a combined rough length of 42” and the inner triangle should be around 27” in length. It is much safer to rip the entire length of each triangle rather than the much smaller individual pieces. I recommend using a feather board and a push-stick that is thinner than the stock being ripped for this application. Never use a push stick that is thicker than the stock being ripped. This could cause serious injury.
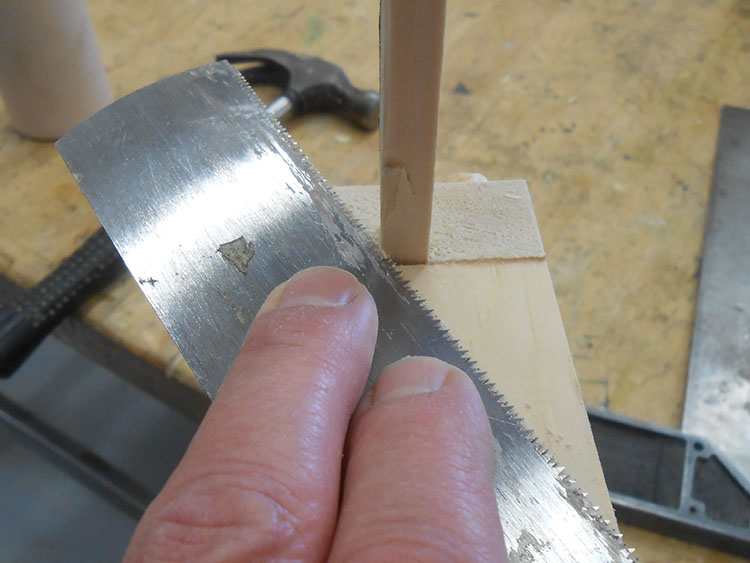
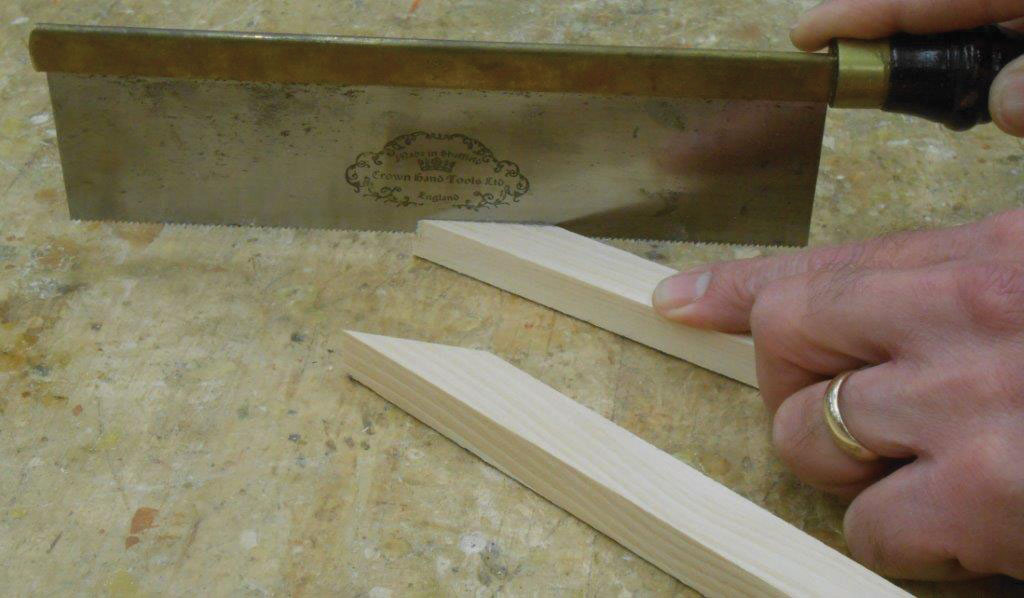 Cutting the 30° angles for the triangle pieces can be a bit challenging and potentially dangerous if one chooses to use the miter saw and a backer block for this application. It really just comes down to the fact that your fingers are pretty darn close to the blade when you are cutting the triangle ends; especially when it comes to the smaller triangle. It also may be worth mentioning to the novice woodworkers that the number 30 on the miter turntable is not 30°. It is, in fact 60°. 30° would be way past 45° and this angle cannot be found on the turntable. So, why not play it safe and go “old-school” and cut the angles safely using a fine tooth cross-cut saw. This way you’ll be able to keep those fingers for more important jobs like lifting your honey supers off of your hive.
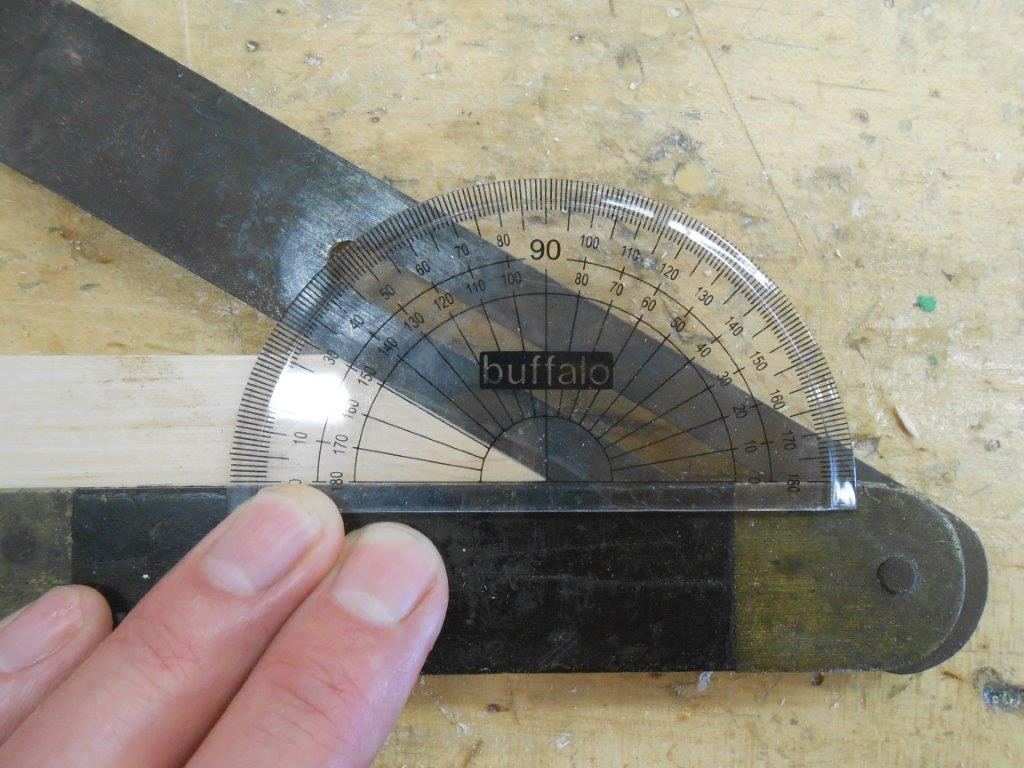
In order to accurately layout the 30° angle on the ends of the triangles, you will need a few layout tools. A protractor and a bevel gauge work well for this application. The protractor will easily illustrate the 30° angle and the bevel gauge can be then used to draw the angle on your triangle strips. You’ll just need to measure and layout one strip for each triangle and you can then use that piece (after the angle has been cut) to trace out your other pieces. Now, carefully and accurately cut each angle with your fine tooth cross-cut saw. Don’t get too worried if you’re not 100% accurate. I don’t think the bees are going to care too much.
Positioning and Assembling The Triangles
Accurately positioning the triangles on the plywood can be a bit challenging without a few points of reference. I’m big on accuracy, but not so big on time. So I “bit the bullet” on my first bee escape and worked out the measurements using three pieces of wood that would accurately, but quickly, provide the location and spacing for the triangles. In order for you to do this, you’ll need a few feet of ¾” stock that must be ripped to 3/8”. Remember to use that thin push stick for this step! The first two pieces must have a finished length of 9” and a 60° cut (30 on your miter saw) on one end. The other piece (center) will be 90° on both ends and 9½” in length. Align these three pieces over the center of the exit hole and begin placing your triangle pieces in their appropriate spots. With a little adjusting, everything will come together well.
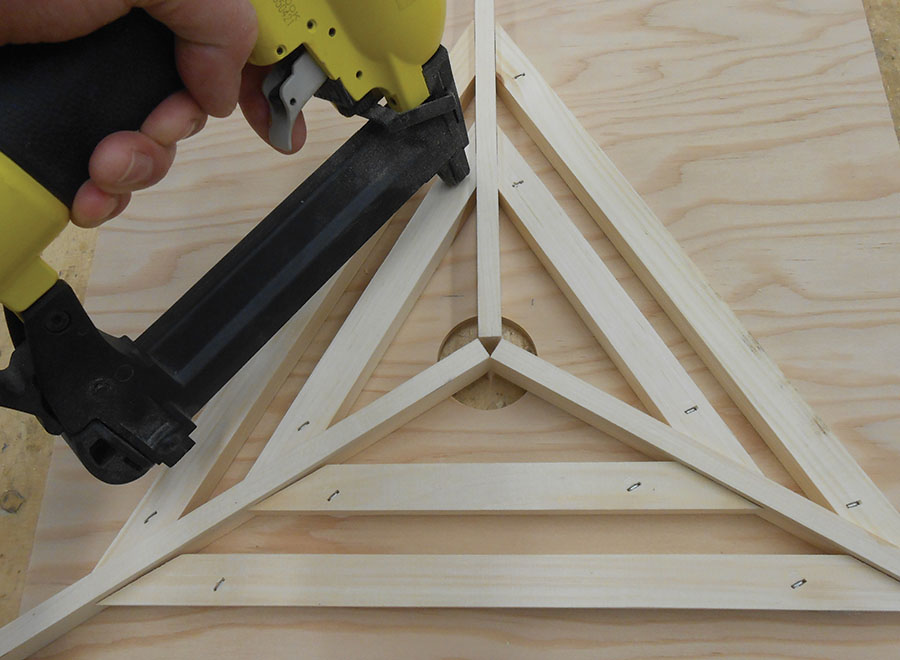
Now, lift one piece at a time, run a bead of exterior glue over the underside and fasten it back down to its original position with a few ½” staples or nails. Cover the triangles with #8 hardware cloth, secure with staples and trim with metal cutting shears or snips.
Assembling The Frame
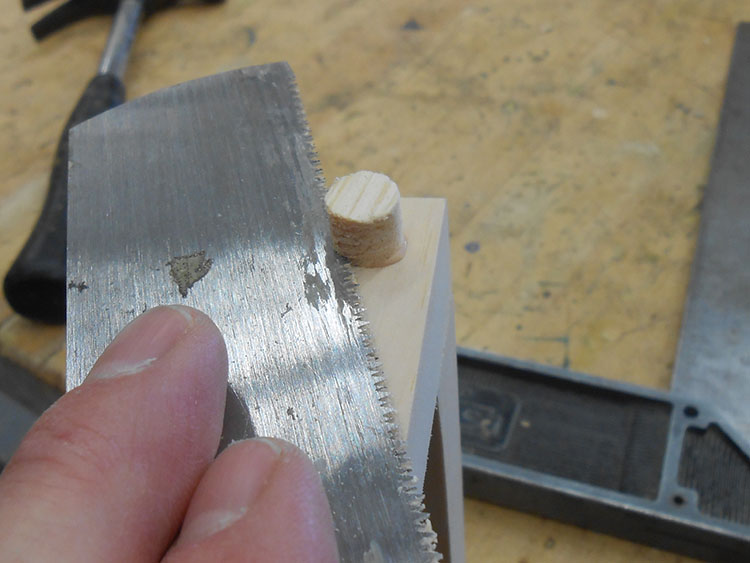
Generously cover the ends of the front and back frame strips with glue and slip the plywood cover in place; making sure that the triangles are on the wider side above the groove. Set the side frame strips in place and screw the entire frame together. Now, fill your screw holes with wood plugs and trim the excess to flush. Last, fill the ¼” x 3/8” grooves at the ends of the sides with some leftover scrap from your triangles. A utility knife makes good work for cutting these small pieces. Drop in a bit of glue in the space, set the plug in place and trim to flush. Now, give the frame a quick sand and get ready to harvest some bee-free frames of honey!
Rick Andrews lives in Southern Ontario, Canada with his wife, kids, cat, chickens and honey bees. You can follow his chronicles at www.cityboyhens.com.