By: Tina Sebestyen
My first mentor was a commercial beekeeper, so I learned Langstroth style management, but it was a Kenyan top bar hive that really got me started in beekeeping, and I still love horizontal beekeeping best, after all these years. I chose the Kenyan top bar hive because it would be in my dad’s backyard, and I wanted something that looked like art, and wouldn’t scare the neighbors. I have since discovered that there are other great benefits to top bar or horizontal beekeeping. One is that there is much less equipment required, everything is right there. I keep a follower board and queen excluder under the lid when they are not in use. For traditional Langstroth hives, an entire shed full of extra hive bodies, frames, tops, bottoms, feeders, entrance reducers, and a million other things, is needed.

Another wonderful aspect of horizontal beekeeping is the greater flexibility of the hive itself. One of the reasons extra equipment is unnecessary is the fact that a split can be made on the spot, simply by placing the follower board and moving the old queen or queen cells to the opposite end of the hive. Of course, once the colony grows to full size, they will need a new home. But suppose the virgin queen does not return from her mating flight. The follower board can be removed, and the bars slid to the back of the queen-right colony to re-combine.
The Kenyan top bar hive can be built from plain old lumber. Sometimes what is needed can be found leaning against the barn, for nothing. Here in the U.S., we call this “dimensional lumber”, which means that each board has been straight-lined and cut to a certain size, or dimension. This makes building a top bar hive something that can be done without any fancy woodworking tools. It is also one reason top bar beekeeping has been done the world over for so many years. A top bar hive can be built almost anywhere with nothing but a hand saw and some nails. There are even top bar hives built out of sunflower stems tied together and grouted with mud.
One reason so many people are becoming interested in top bar or horizontal beekeeping is the fact that there is no lifting required. In Langstroth beekeeping, the hive bodies must be un-stacked and re-stacked every time an inspection is done, and this is most important in late Summer when the Varroa populations must be monitored and treated before Winter fat bees are born, just when there are multiple heavy supers to remove. A full deep can weigh almost 100 pounds, while full medium supers are “only” 60 pounds or so. In top bar beekeeping, the only thing to lift is the roof, and even that can be hinged to the hive body.
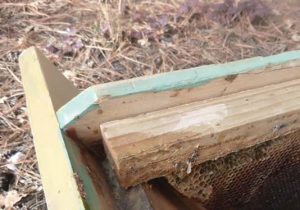
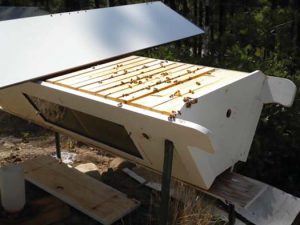
Attach the handle. See how the handle captures the ends of the bars and creates a bee-tight space to eliminate robbing.
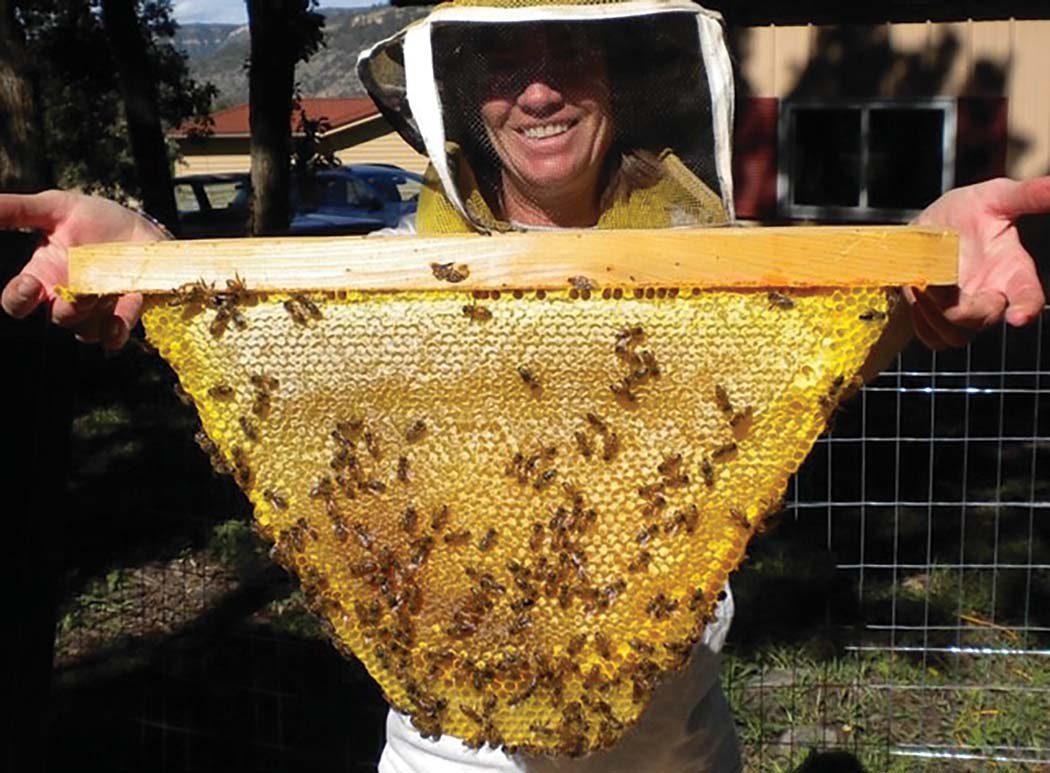
Natural comb is a wonderful result of top bar beekeeping. Store-bought beeswax is commonly contaminated with pesticides. In top bar beekeeping, the bees build their own. When bees build their own comb, they build a lot more drone comb, and raise a lot more drones. This can be a big advantage if drone culling is done, or a big disadvantage if mite numbers are not monitored, are allowed to climb, or culling is not done. It is nice to keep bees in a way that allows them to do things the way they want to do them. It is also much easier to conserve and move queen cells when they are built in natural comb rather than on foundation. Typical top bar management helps keep old black comb from infecting our bees with brood diseases that lurk in old cocoons.
There are also some disadvantages to top bar beekeeping, some of which can be overcome with better design than has sometimes been used in the past. Top bars typically have a short wooden spline inserted in the center, to give the bees a guide to anchor their comb to. The fact that the spline is fairly short means that the bees can easily ignore it, and build what is the bane of top bar beekeepers, cross comb. Cross comb can go in any direction the bees wish, often at 45° or even 90° against the direction of the bars. This means that all the bars are connected to one another, and the colony cannot be inspected. Another disadvantage to the wooden spline is that it is not a very positive anchor for heavy honey comb. In hot weather, the comb can fall off quite easily. If inspections are done when comb is new and fragile, and the weather is warmish, full honey comb can fall to the bottom of the hive. This is a real mess to clean up, and a major bee killer. These disadvantages are easily overcome by replacing the wooden spline with one made of a one and a half inch strip of plastic foundation, which is both a very positive foundation, and also tall enough to really encourage the bees to build comb in the direction we humans would like them to. The bars should be 1-3/8” wide to give proper bee space for the comb.
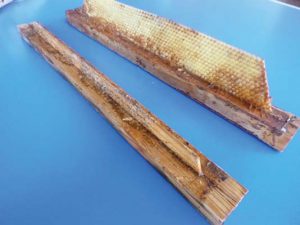
A traditional top-bar with wooden spline, and a better top bar with a 1½” piece of plastic foundation. Wax foundation will not
work here, it deforms under the heat of festooning bees.
A commonly used top bar design attempts to keep honey comb from getting quite so heavy by making the hive body shallow. This is a big disadvantage to the bees. They need enough vertical space to raise brood, with a good pollen band, and a thick honey band above the brood area. Faced with limited vertical space, the bees reduce the size of the pollen and honey bands in order to maintain a proper brood nest. In winter, the cluster easily consumes all the honey they are in contact with, and must move more frequently. If not possible due to prolonged cold, freezing from starvation is the result. This disadvantage is easily overcome by building hives with greater depth top–to-bottom, which we can now do because our honey combs can get as heavy as they need to be without falling, due to the positive spline on the top bar.
Some thought also needs to be put into the typically designed entrance, which has been three or four holes drilled in the side of the hive. Unfortunately, the ability to use an oxalic acid vaporizer is eliminated by the entrance holes. A better design leaves the entrances on the ends of the hive. This allows the vaporizer to be used, and also allows the use of Boardman feeders. It is very important for the entrance to be at the end of the hive, rather than in the center. The bees like to put their brood chamber near the door, and the cluster starts winter on the brood chamber. If they go into winter in the middle of the hive, they follow the honey bars to the end of the hive, and never realize that half of their honey is stored on the other side of the brood chamber. They just cannot travel that far in winter. The bees must begin winter at one end of the hive, and follow the honey from bar to bar, contiguously to the other end of the hive.
Top bar hives are built in a triangular shape to help keep the bees from attaching the comb to the hive wall too much. The angle we use is the same one the bees use in their hexagonal cells, 120 degrees. Using this same angle means that we are making it easy for the bees to conserve space and energy in comb building. However, if the wooden spline is still used in the top bar, the bees will still attach the comb to the walls very well, to help stabilize what they know is fragile comb. The plastic foundation spline relieves them from having to strengthen the comb by attaching it to the walls.
Now that we understand why the top bar hive should be built in a certain way, let me show you how to build one. I designed this so that commonly available dimensional lumber can be used. If you own a table saw, you could build the hive from exterior grade plywood, but it is a risk. Plywood contains formaldehyde, a bee killer. It is usually off-gassed enough by the time we can buy it, but maybe not, too. To be safe, I use untreated wood. Spruce and pine are commonly available, and are both lighter woods than some, and so help keep the hive from becoming too heavy.
At the lumberyard, choose the flattest and straightest boards you can find. When you look down the length of it while holding it horizontally, check to see if the board is cupped from side to side. Then hold the board vertically, look down the length, and check to see if it twists from one end to the other. At home, our first job is to cut the pieces to length. There are usually cracks in the ends of boards, called checking. Cut off enough of the first end to get past any checking, making sure that you cut the end square. Measure the correct length, mark, and cut the first side. Measure and cut the second side to length checking against the first one. Draw the outlines of the two ends, and cut them, again checking them against each other. Cut the two triangles that form the ends of the roof. Then cut the two hive handles and the four rafters.
To assemble, lay one side on the workbench, and hold one end against it, with water-proof glue (use Titebond II, not Gorilla Glue or expanding glue) on the seam. Pre-drill and screw through the end and into the side, in at least three places. Attach the other end in the same way. Lay the other side on the bench, turn the hive body, and screw the second side on. Attach the full length handles on each side, even with the angled cut on the end, again using glue and screws. Turn the hive body upside down, and attach the two halves of the bottom with piano hinges. Be sure to leave enough clearance to the center stabilizer that it is easy to open the bottoms. Assemble the roof. The ends of the roof go on the outside of the hive body, and the lowest two rafters rest inside the handles, creating a bee-tight space around the top bars. For free plans, please visit my web site, beequest.buzz or email me at bee.seeking@gmail.com.
Although any new hives I build for myself will be long Langstroth hives, I do not plan to abandon my top bar hives. I have a lot of them, and really love top bar beekeeping. Future articles in this series will address ways to rectify problems with incorrectly built top bar hives and bars, installing a new package, splitting, comb management, and simple queen rearing. These articles will apply to long Langstroth beekeeping as well.