By: Ed Simon
Although not a standard section of a hive, Winter feeders can be a significant boon to your hive.
 By creating a box that will be insulated, have a moisture absorber and contain a top entrance, it is a one stop addition for the wintering of hives in a northern climate. Tom Bramble has been using this style Winter feeder for many of his 30+ years of beekeeping. Tom is a lifetime member and past chairman of the Southeastern Minnesota Beekeepers Association who swears on a stack of supers that this top is the best and many of his mentored beekeepers agree with him.
Some of the problems that this wintering top help solve are:
- It provides an entrance for the cleansing flights when the snow covers the bottom entrance.
- It provides a collection spot for the frost and provides ventilation for the hive when the moisture builds up.
- It provides a feeding area when you need to feed the bees, but you don’t want to unwrap the hive.
- It provides an inspection area with minimal disruption of the bees.
Parts (Thickness x Width x Length)
- ¾” x 19⅞” x 3⅛” – Sides (2)
- ¾” x 14¾” x 3⅛” – Ends (2)
- ¾” x 2⅜ x 14¾” – Section dividers (2) – Note: the height of this piece should be the height of the box minus 1”. This allows for the polystyrene insulation cover.
- ¾” x ¾” x 16¼” – Bottom end rims (2)
- ¾” x ¾” x 19⅞” – Bottom side rims (2)
- 16¼” x 19⅞” Aluminum window screen
- ⅛” x ¾” x 16¼ – lathe (2)
- ¾” polystyrene insulation board

Construction
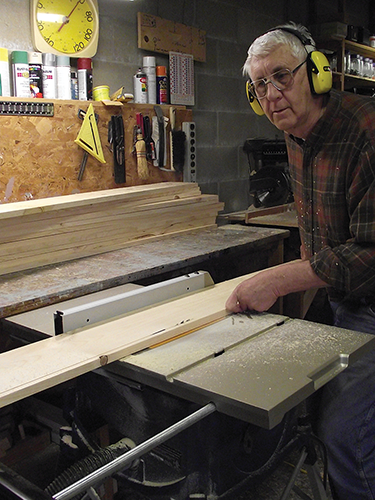
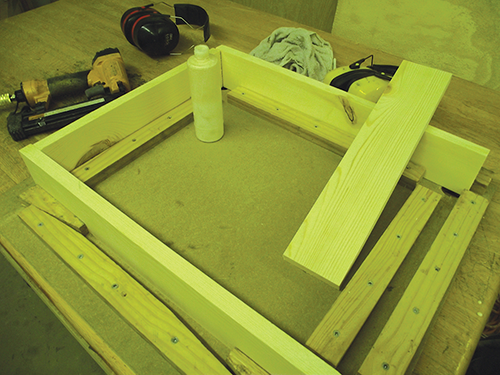
We will start with a 1” x 8” x 6’ or 8’ pine board. Remove a ¾” strip from one side of the board and then cut the remaining board lengthwise into two equal strips. These strips provide the front, back and sides for two Winter tops. After a box is made, a window screen bottom is added and ¾” x ¾” rim pieces are added to hold the screen in place and allow for the top entrance.
Step 1: Rip cut a ¾” strip from one side of the original 7¼” wide board. This strip will provide material for the rims (parts 1 and 2) of one top.
Step 2: Using the remaining board, rip cut it into two equal strips. This should result in two lengths of board about 3⅛” wide. These strips provide the front, back and sides for two tops.
Step 3: Take one of the strips cut in step #2 and cut the two sides (parts 1) and the two ends (parts 2) from it.
Note: If you Started with an eight-foot board you should be able to cut some the pieces described in steps #4 and #5 from the scrap lumber.
Step 4: Cut the two section dividers (parts 3).
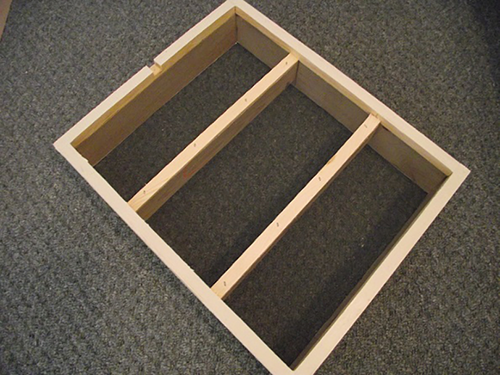
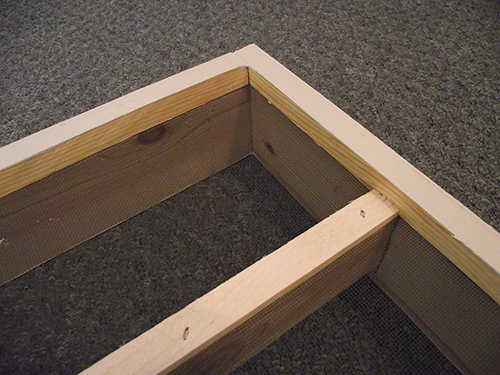
Step 5: We can now assemble the top. Build the outside walls from the two sides (parts 1) and the two ends (parts 2). Use a good grade of exterior glue and nails or staples. Make sure the resulting box is square.
Note: If you are making a volume of hive bodies or winter tops you should consider making a “Super Jig” described in the book “Bee Equipment Essentials”. It provides for the easy assembling of hive bodies and ensures the squareness of the resulting product.
Step 6: Add the two internal section dividers to the box built in step #5. One edge of the dividers needs to be even with the bottom edge of the box.
Step 7: Using a stapler, attach the window screen to the bottom of the box. The window screen can then be cut to size using a utility knife.
Note: Don’t cut the window screen to size until you tack it to the box. It can stretch in an unpredictable manner.
Step 8: Using the ¾” x ¾” strip of wood cut in step #1, cut to length the side and end rims (parts 3 and 4) to size.
Step 9: Cut a ⅜” deep by a ½” wide entrance notch in the center of one of the end rim parts. This will be the top exit.
Step 10: Nail or staple and glue the rim pieces to the bottom of the box. This will hold the screen in place and cover the ragged screen edges.
Note: Use a bead of glue that covers the screen. This helps holds the screen and rim in position.
Step 11: Cut two thin ⅛” thick pieces of lathe (parts #7). These will be used to cover the screen and the edges of the section dividers.
Step 12: Nail and glue pieces of lathe to the bottom of the separator boards. These cover the screen and hold it in place. The ⅛” thickness allows enough room between the tops of the frames and the top’s bottom screen for bees to move to the winter exit.
Step 13: Cut a piece of polystyrene to cover the center section.
Step 14: Using your recycled paint, paint the box to your liking.
Usage
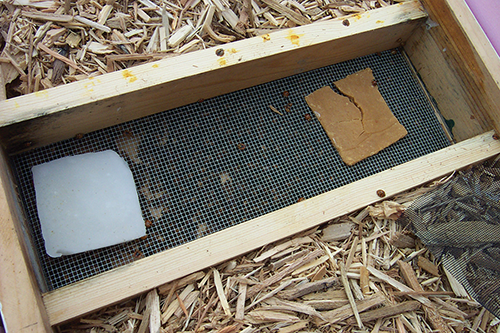
A Winter feeder is added to your hive as the top box, immediately above the bee boxes and under another moisture absorber and/or the top cover. The outside sections of the Winter top are then filled with dry wood chips or any other absorbent material to absorb the moisture in the air or as it drips from the top.

The open area in the center can be used to contain any food supplement or crystalized honey. Without breaking apart the hive, you see if the bees have eaten their way up the hive and are directly under the Winter top. At this point you know that they need to be fed. Crystalized honey, pollen patties and sugar patties can be placed directly on top of the screen, so the bees can access it.
Hint: Remember to replace the polystyrene cover over the center section to help keep the hive warm.
Alternative Construction
Unused supers or brood boxes can be cut down to a 3½” or 4” height and then modified with a screen and a rim to provide the same capabilities as the previous construction. Please be careful when sawing old hive bodies. The nails, screws or staples can dull a saw blade very quickly.
Get a copy of Ed Simon’s book Bee Equipment Essentials with detailed drawings, construction hints and how-to-use instructions for dozens of beekeeping tools and equipment from www.wicwas.com. Ed can be contacted through SimonEdwin41@gmail.com.
Note: The height of the Winter top can be varied depending on the width of the original material.