by Ed Simon
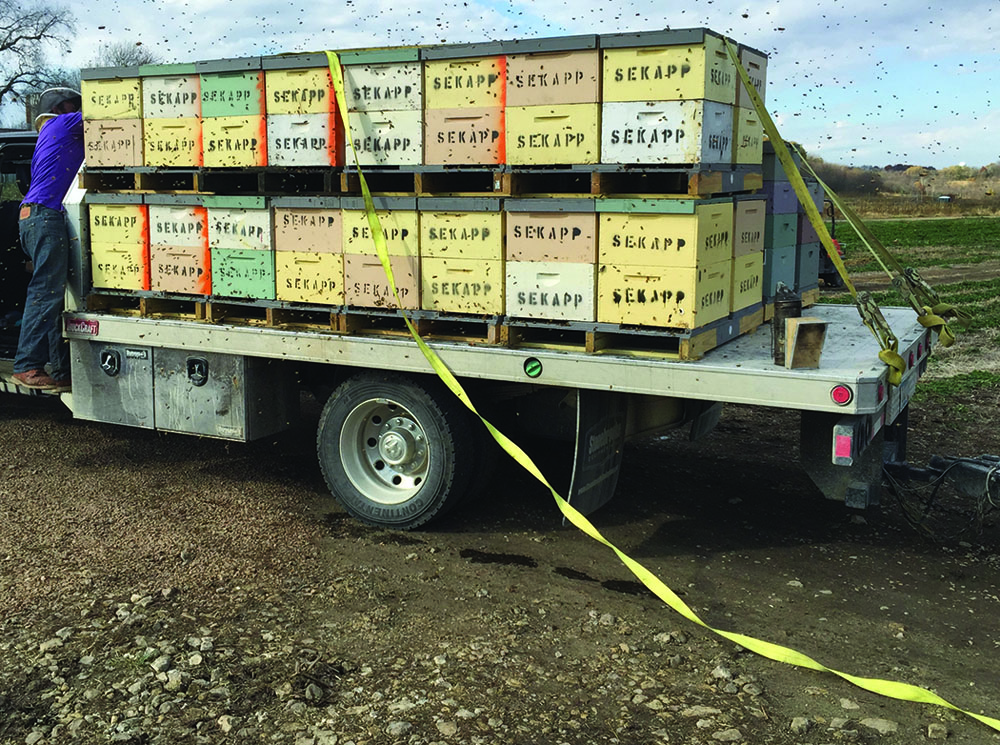
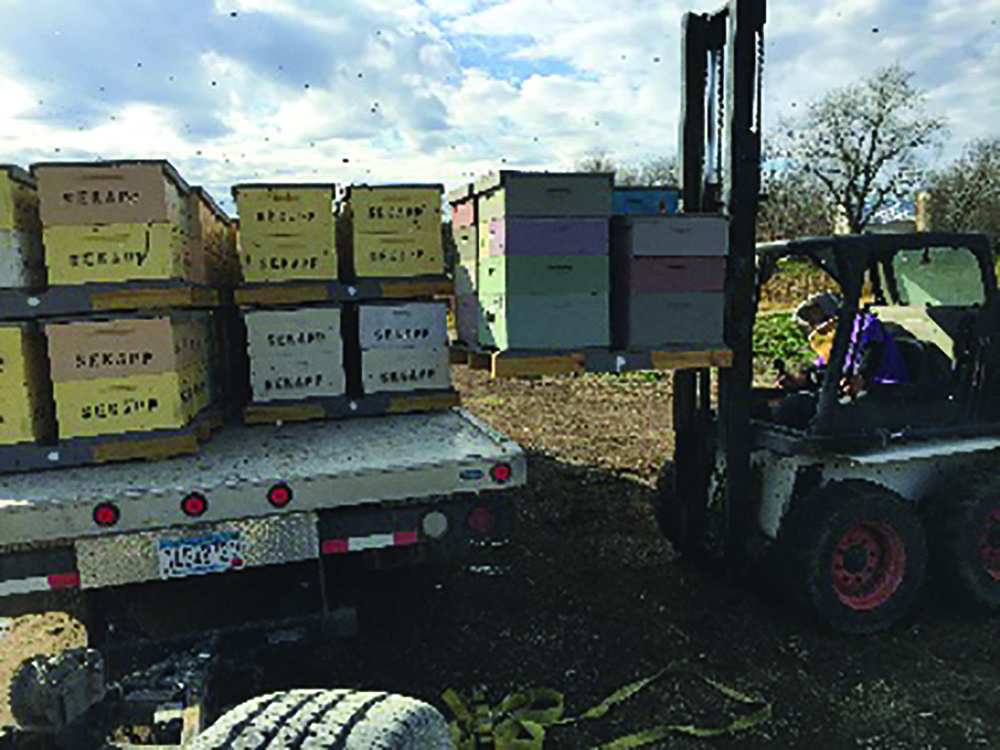
Last year we tested moving some of our bees to Texas. We moved six hives with great results. Not only did the hives come back with a large population, they also had good brood patterns and were healthy.
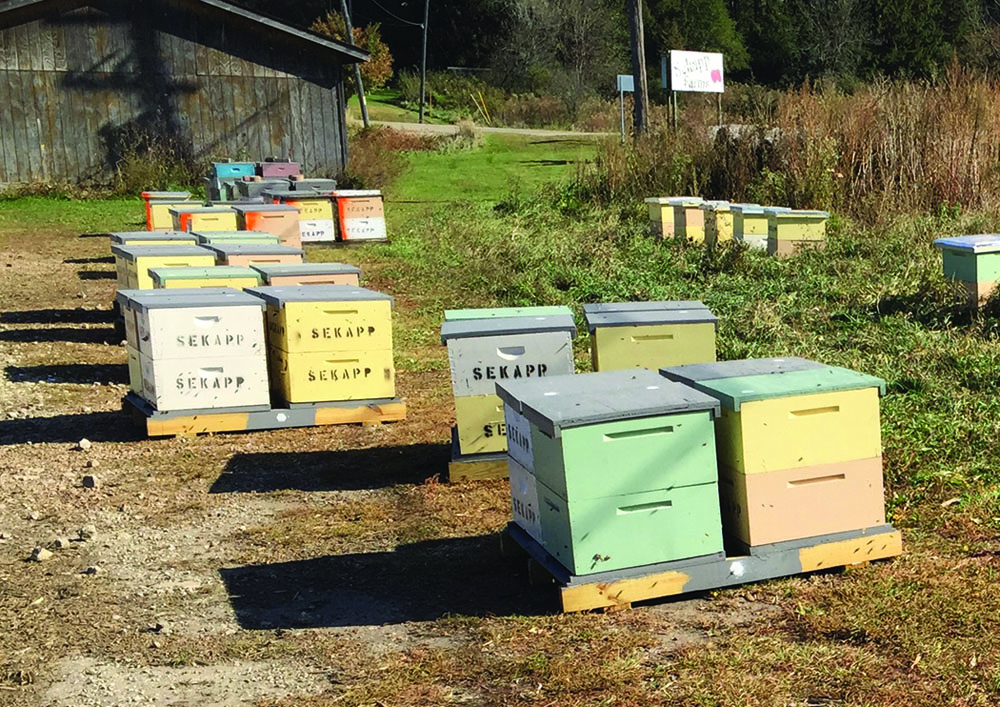
This year we decided to move most of our bees south. Working with a well established commercial beekeeper, Corey Belke of Homestead Apiaries in Dennison, MN, we contracted for taking our hived south. A long time friend, Fred Kapoff of Sekapp Orchards in Rochester, decided to join us in this adventure. By working together we tried to eliminate each problem as it arose. Needlless to say there were obsticles that had to be overcome. The first problem was the need of pallets for shipping.
The main requirements for the pallet was durability – It had to last for many years of rough use.
It also had to be relatively easy to make and inexpensive (cheap).
Using an old migratory pallet as a pattern, I built 15 pallets for our combined sixty hives. The following design and construction fulfilled all of these requirements. At a cost of around $20.00 each, was more than reasonable since I expect the life of a pallet to be from 15 to 20 years.
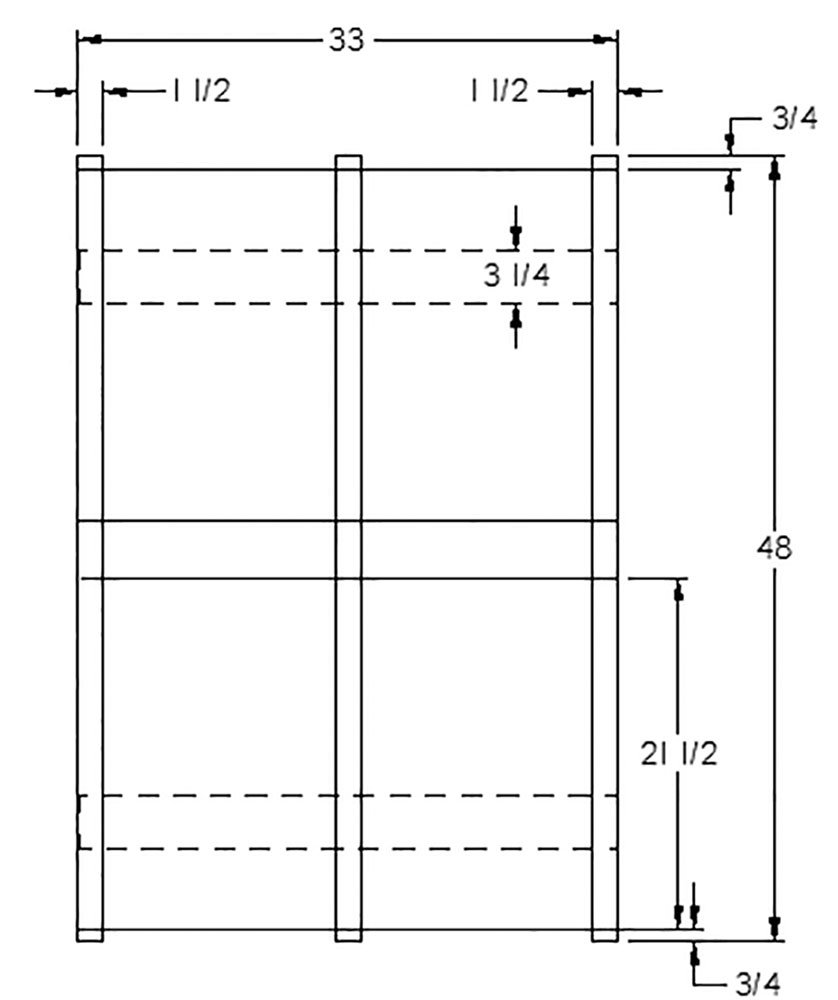

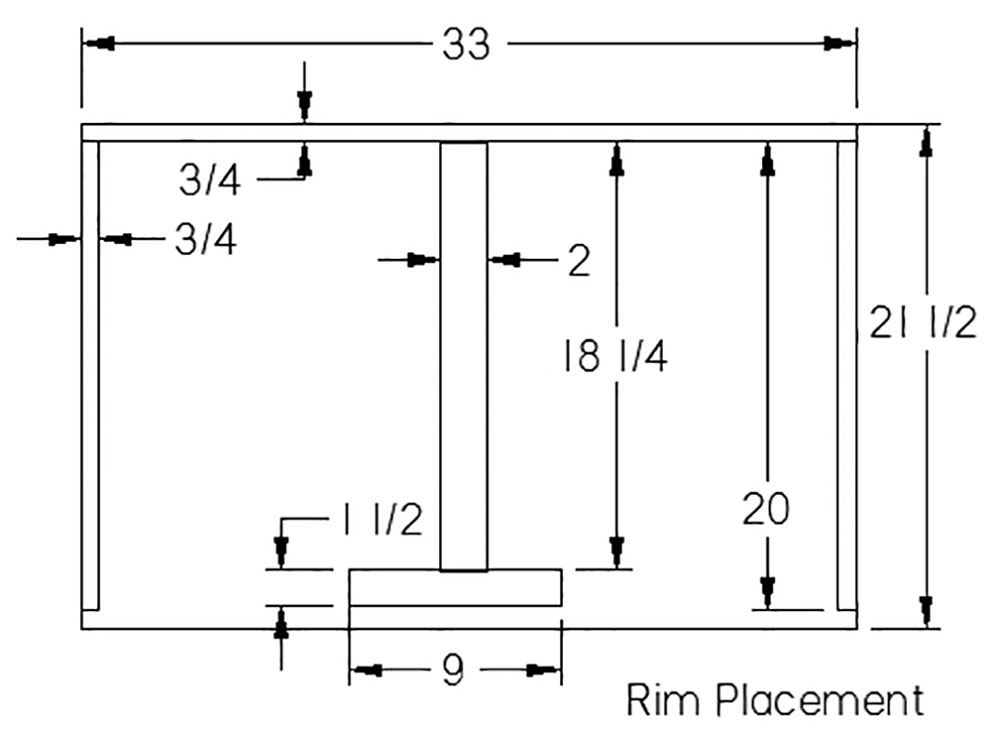
Parts (Thickness x Width x Length) – migratory pallet
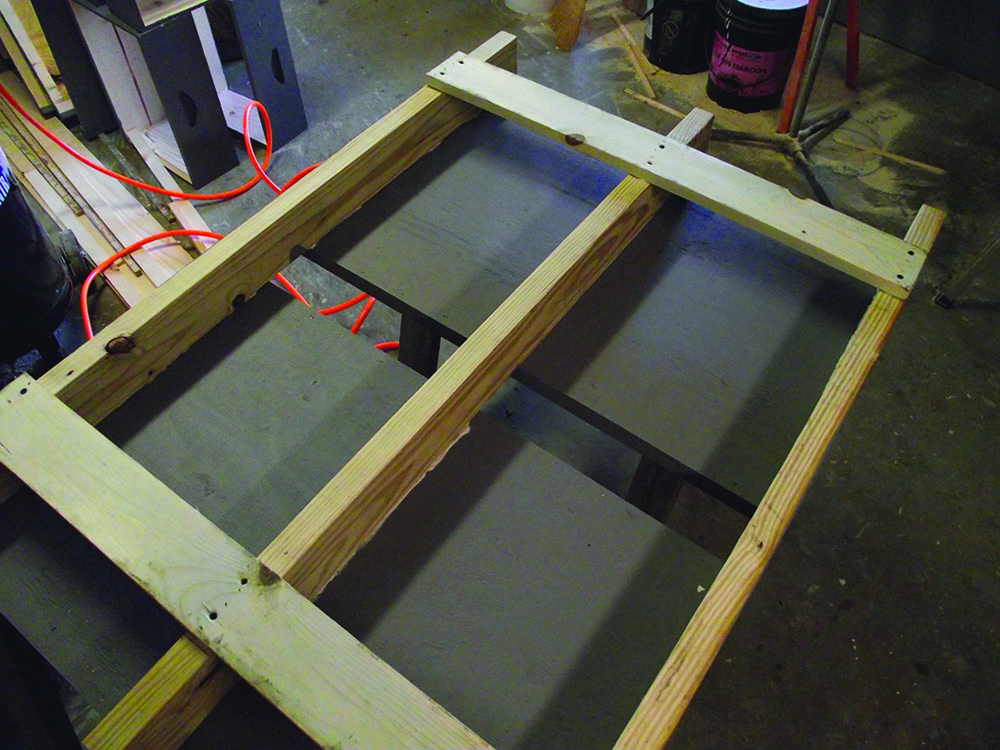
2” x 4” x 48” – ground standoff supports (3) – pressure treated
½” x 21½” x 33” – hive bottom boards (2) – CDX plywood
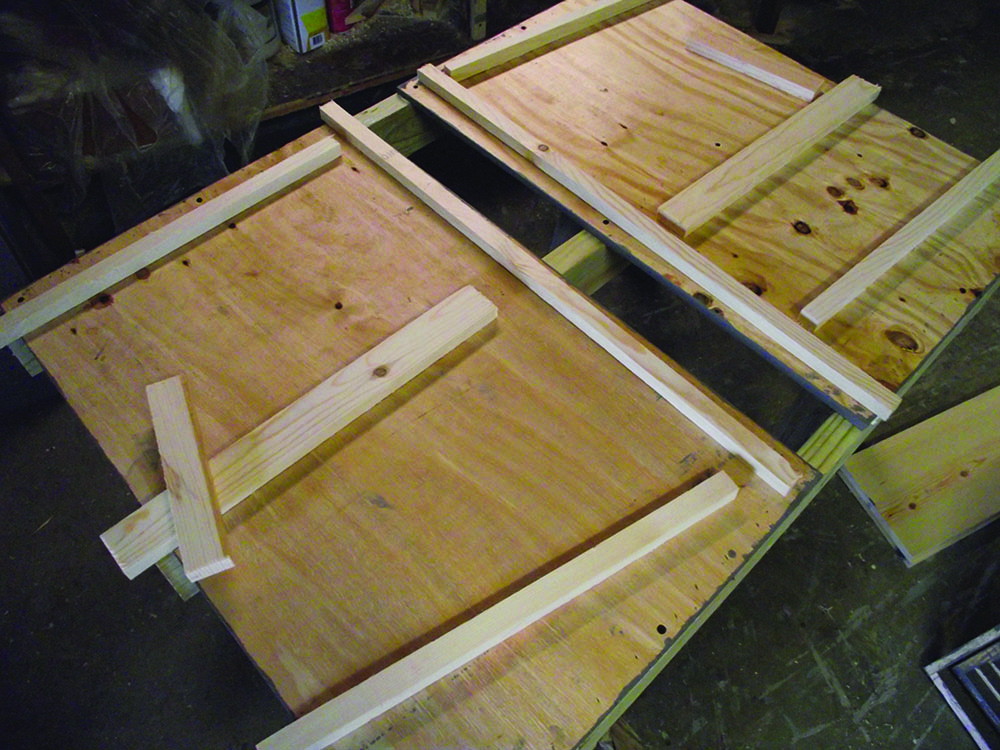
¾” x ¾” x 33” – bottom board back rim (2)
¾” x ¾” x 20” – bottom board side rim (4)
¾” x 2” x 18¼” – bottom board center rim (2)
¾” x 1½” x 9” – bottom board front rim (2)
1” x 4” x 33” – standoff stabilizers (2) – pressure treated
Hive clips (4) – Mann Lake # HD-649 – “W” or HD-648 – “U”
Construction adhesive – one tube
Construction
Because of the size of the pallet, a relatively large workspace is needed. As parts are added to the pallet it becomes increasingly heavy and unwieldy. But once they are complete they are meant to be moved by a skid loader or forklift.
Forewarned: The hive clips (parts #8) are available in 2 designs. The “U” design forces you to have your hive body sides touching each other. Consequently the migratory tops are touching. The “W” design provides for a space between the hive bodies and allows you to manipulate the hives a little easier. The decision is yours.
•Step 1: Cut the three standoffs (parts #1). These are made from pressure treated wood that when stood on edge, provide the space under the hive bottom boards for the forklift slip its lifting tines into.
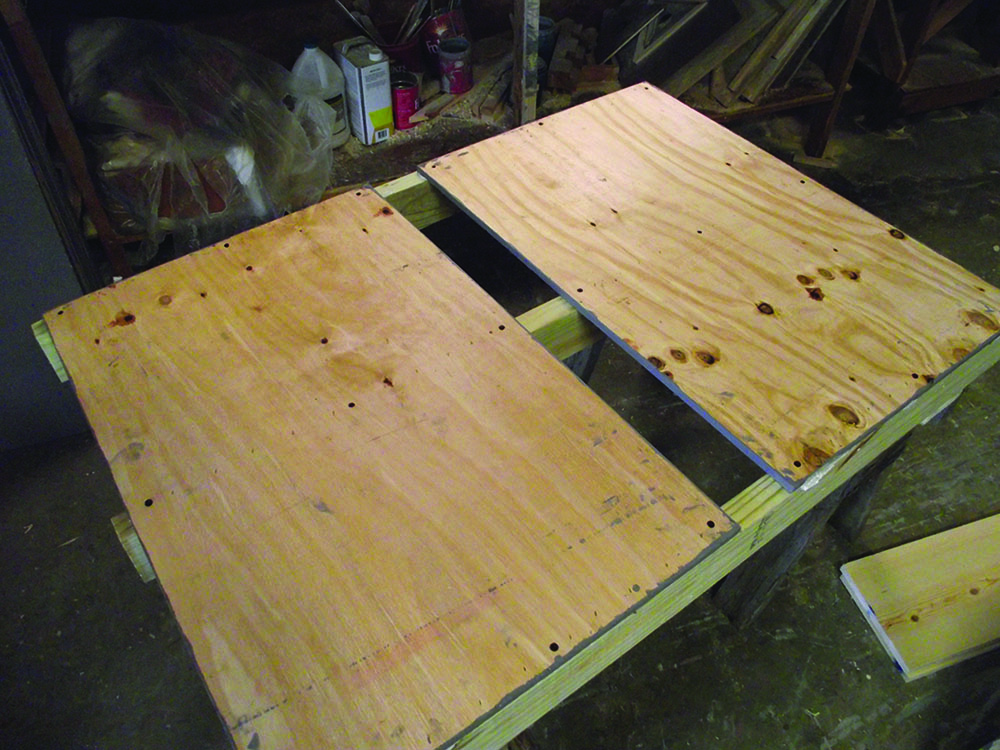
•Step 2: Cut two of the bottom boards (part #2) from ½” cdx plywood. Paint one side of the bottom boards at this time. The painted side will become the bottom (underside) of the bottom board. Two thick coats of paint help ensure a long life for the pallet.
Hint: Some home improvement stores will cut wood for you at no extra cost. I can no longer manipulate a 4’ x 8’ sheet of plywood, so it comes in handy to have the sheets cut to manageable sizes.
Hint: Free paint is usually available at the local recycling center. It is available in individual cans or in five gallon pails. A pail is usually marked as to the type of paint.
•Step 3: Lay the standoff supports cut in step #1 on a flat surface. Place them on edge and mark a ¾” line from each end of each board. This is the setback to the front of the bottom boards. By allowing ¾” of the supports to extend in front of the bottom boards you provide a little protection from overzealous forklift operators.
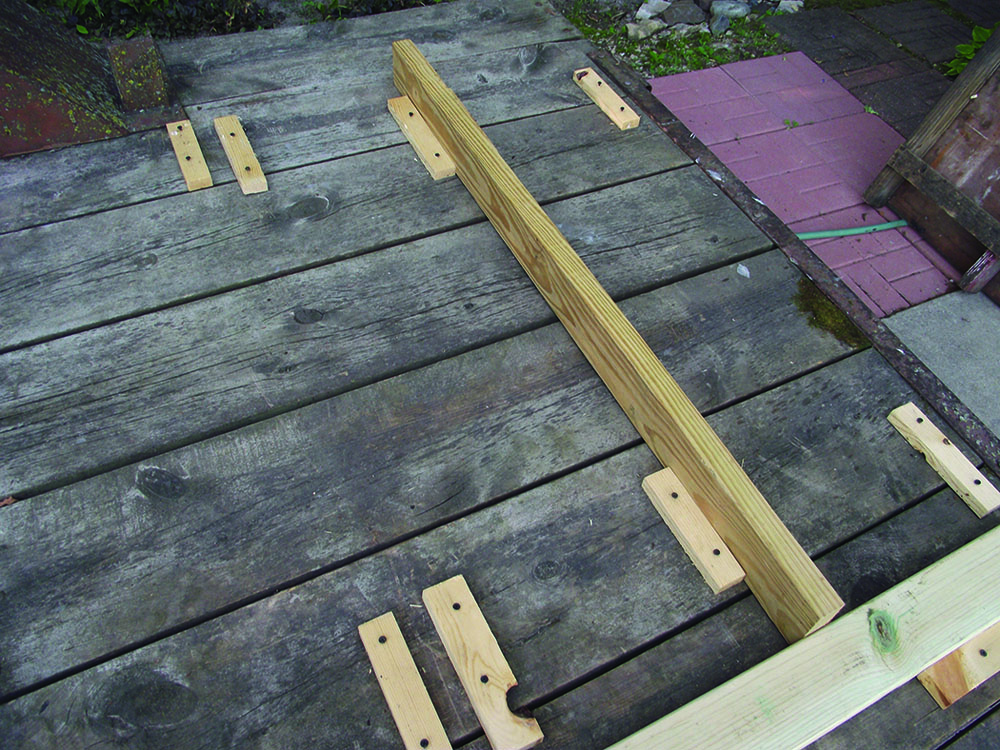
Hint: You are probably going to build multiple pallets. If so, consider making a jig to hold the standoffs in position. I used the bed of an old trailer and screwed positioning cleats to hold the standoffs on alignment while I added the bottom boards.
•Step 4: Place the bottom boards painted side down on the standoffs, two standoffs on the outside edges and one in the middle. When positioned and everything looks square, remove the bottom boards and lay a bead of construction adhesive (part #8) on the standoffs. Replace the bottom boards and put a screw in the outside corners of the bottom boards. Remember to keep the ¾” setback from the edge of the standoffs. After making sure the pallet is square, finish screwing the bottom boards down.
•Step 5: Turn the pallet over and using construction adhesive and screws add the standoff stiffeners (parts #7) to the bottom of the pallet. In addition to stabilizing the standoffs they provide the support when a pallet is stacked on top of another set of hives. These stiffeners are set 5” back from the front of the standoffs and provide extra stability to the pallet.
•Step 6: Turn the pallet right side up and add the rims (parts #3 thru #6) to the bottom board. Use wood glue and screws, nails or staples that are long enough to penetrate the rim, bottom board and still extend into the standoffs.
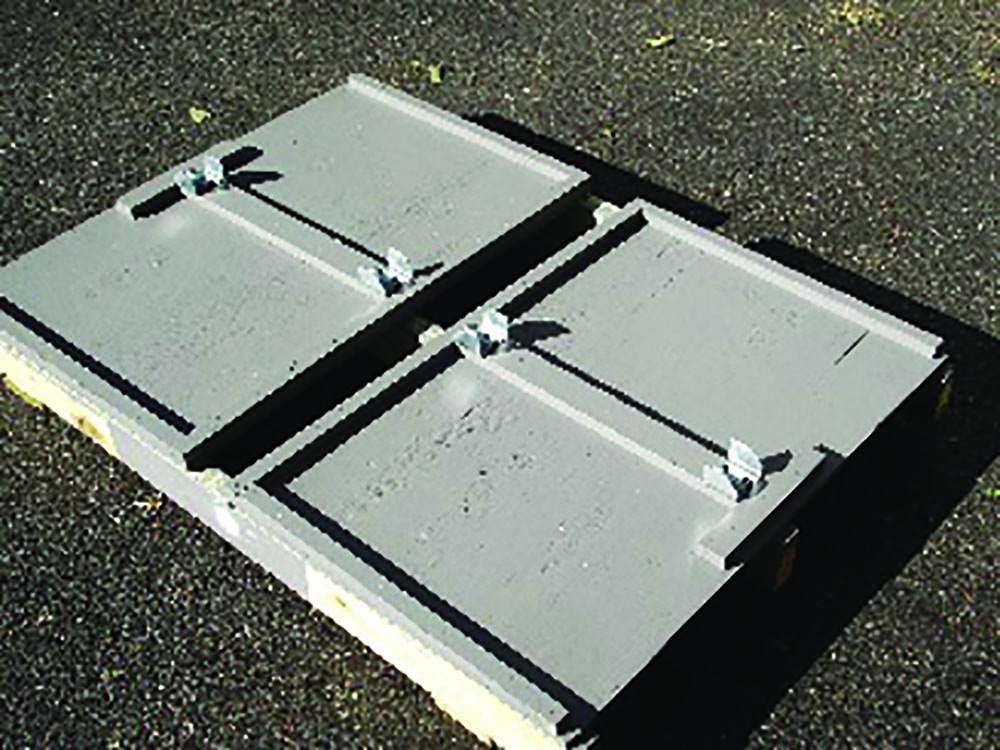
•Step 7: Test fit the hive clips (parts #7) at this time. Make sure the hive bodies fit correctly and are able to be tilted for inspection. Set the clips aside for later installation.
Note: The beveled edges of the hive clips face the front and back. This provides for easier positioning of the hive body and allows you to tilt the hive body to look at the underside of the frames.
•Step 8: Now is the time for two more liberal coats of paint to the top of the bottom boards. Be sure to coat the edges of the bottom board. Moisture getting in here will separate the plywood laminates.
•Step 9: Add the hive clips (parts #7) at this time. They are positioned on the center rim just inside the back and front rims. Before screwing them down, make sure a pair of hive bodies will be able to fit in them and align correctly with the front and back bottom rim.
•Step 10: Paint your identifier on the pallet where it is clearly visible. If you are small like we are and consigning your hives to a company for wintering, they usually require that all your equipment be identified.

Conclusion
A well-constructed pallet should last a long time. Even if you do not have the equipment to handle a pallet of hives. The company that transports your hives probably does. Then it becomes your responsibility to get your hives onto the pallet for shipment and when they return, get them back onto a standard bottom board.
Note: Transportation pictures were provided by John Shonyo.
Get a copy of Ed Simon’s book, Bee Equipment Essentials, with detailed drawings, construction hints and how-to-use instructions for dozens of beekeeping tools and equipment from www.wicwas.com. Ed can be contacted through Ed@TheBeeShed.com. Now available are all of Ed’s “Bee Culture” magazine articles. They can be accessed through The Bee Shed website at http://www.thebeeshed.com/publications.html.