By: Jessica Louque
Bee Equipment Take II
In our line of work, we have some really odd issues sometimes. Walking around in public with a swollen or black eye because you had an encounter with an angry bee can lead to stares or confused questions. Smelling like smoke and covered in sweat picking your kids up from school (also in camo pants and dirty t-shirts) can cause a different set of questions for parents who don’t know what you do for a living. As is common with beekeepers, we may have a slight hoarding tendency with bee equipment, causing the delivery guys to wonder why your house looks like it should be packed up and moved to the dumpster. To be fair with this, hive boxes sitting around make it harder to mow, but we leave some patches to grow up for our birds to hide from predators – or at least, that’s our excuse. For bee equipment, most of the time you use it until it falls apart, but a lot of times we have an excessive surplus that’s not reusable for a variety of uncommon reasons, such as being used in a study or pollinating in a field that had a spray incident. For these additional pieces of equipment, I can’t bring myself to just throw them away, but I know they shouldn’t be used again with bees. This is when you start getting creative with your bee equipment usage to give it a second life.
As most people who even vaguely know me would realize, I love shoes, books, and birds. There are now maybe 14 hive boxes in the bedroom holding shoes and some clothes. Our house is around 70 years old and closet space was apparently optional at the time of construction. There are five closets in the house and none are more than two feet deep or four feet wide (that’s the biggest one). It would be pushing the measurements to say the linen closet was 2’ x 2’ and nowhere near big enough to hold towels and sheets for six people. Hive boxes make pretty good stackable shelving though, and can usually fit long-ways on the ground in the closets to add vertical space. One eight-frame box sits underneath my monitor as a computer stand. Hive bodies can also be turned to accommodate books of varying sizes, making bookshelves a popular option for reuse. For books in particular, a shelf liner is a necessity because wax or propolis is not necessarily the best thing to have on the bottom of a shelf for book bottoms. After overuse of hive equipment in the house, you begin to look for places to use them outside.
Three hive boxes turned sideways can make a nice little “tunnel” where you attach a hook to the middle box at the top to hang a chicken feeder. It makes a good rainy day shelter for an additional feeder, and keeps the chickens from knocking too much of the food out since it’s only accessible on two sides. The height can also keep the chickens from getting into the top of the feeder (a favorite place to stay for some of them). Stacking the hives in a sort of stairstep-fashion can create a fun roosting playhouse for your birds as well. For the turkeys, when they were younger they could fit through hive boxes, but now they use them for a perch. Marshall is a broad breasted white (an accident on my part) and besides the horrible wobble walk, he/she can’t really perch well from the weird angle of his drumstick legs on the sides of his/her body. I thought Marshall was a boy but now I am thinking he might be a girl, hence the he/she above. The hive stands are the perfect width for Marshall to rest comfortably without fear of falling off, and Scooter (I think a broad breasted bronze but he doesn’t have the same horrible leg issues as Marshall) seems to like sitting on the boxes more than sitting on a perch.
-
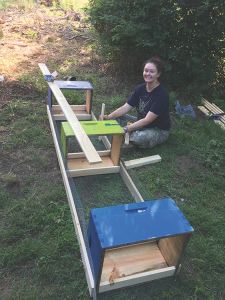
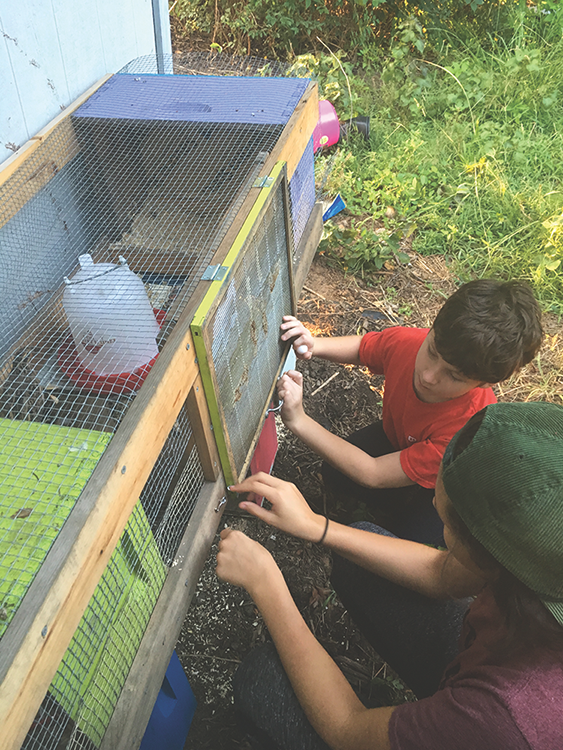
- Putting together the pieces.
-
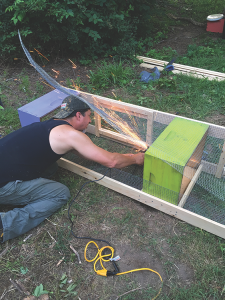
- Grinding down the edges.
The current project is a quail pen made from hive equipment. I am fairly sure this is going to be a never ending building game, but it’s at least functional. For any of you that might be interested in raising pheasants or quail, this might be a good option for you in the future. It definitely cuts down on some of the more particular details of woodworking and sizing. This was a basic design I came up with after looking at other people’s small bird pens. I’m sure this can be modified for other sizes or uses, but hopefully this will at least get your creative juices going.
This pen will be (eventually) a three-tiered freestanding “condo” structure, but for now, we don’t quite need that much space, and also we will probably move them soon and the “standard edition condo unit” will be easier to move. Each unit is the perimeter dimensions of a hive body; roughly measuring the sides comes out to 20” wide and 16” tall. The length is approximately eight feet just to make cutting easier. We could buy 8’ pieces of wood to stabilize the outside and not have to cut any edges for that part. To cap the ends, old migratory tops were used because they fit perfectly on the sides of the hive boxes.
Here’s a basic list of materials used per “condo unit” level:
- 4 – 1”x4” boards eight feet long
- 4 – 1”x2” boards six feet long
- 1 – box of 2” wood screws
- 1 – roll of 50’ hardware wire
- 2 – packs of hinges (two per pack)
- 2 – sets of eye hooks
- 2 – handles
- 2 – wooden bound queen excluders
- 7 – deep supers
- 2 – migratory tops
The first part of construction was to take three hive boxes and space them out to be centered for an eight foot length. The 1×2 boards were cut so that they fit inside the boxes to make a nesting area. Migratory tops were screwed into the two end boxes for the sides. We wrapped wire around the outside that had ½” squares for the caging, and used a slap stapler to attach it to the boxes. The 1×4 boards were attached to the outside on the front and back for structure support and framing using way too many wood screws. On the front side, the 1×4 boards were cut to size to frame the doorways. In this instance, it’s so difficult to reach everything in a quail pen that we wanted to have a door on each side to remove eggs, clean up, and add food or water easily. The doorways were sized so that a queen excluder would cover it completely. There was some debate as to how to attach the doors. It might have been easier to attach them as a “normal” door that hinges to the left or right, but hanging hinges from the top was better for weight distribution. It took two hinges per door to hold the excluders because they are a bit heavy. We had a couple options for handles as well, going between a knob or the open handles, but knobs add too much weight to an already heavy door.
George and Maggie getting eggs.
Eventually the plan is to attach legs to the bottom by way of 4×4 posts, but more hive boxes were perfect right now because they are the same size as the boxes on the inside. We had to go for one extra though, giving us a sad odd number of boxes (I like symmetry). In the original plan to make all three interior boxes into a nesting area, I didn’t think about the fact that the waterer would not be able fit in that area. This meant that the waterer (not a light object when full) had to sit on the wire with no support. Another hive box had to be put under the waterer to keep it from pulling on the wire too much. I think it might have supported it, but I don’t want to find out the hard way that it doesn’t.
Another thing to keep in mind is that Bobby went in behind me and used a Dremmel tool to grind down the sharp ends of the screws. Sometimes the screws were just a bit too long and watching the birds impale themselves on the points was not really in the game plan. It made nice sparks and a really cool slow-motion video during the process. There’s still a few literally “loose ends” because I haven’t made time to trim the wire off of the ends, but I don’t see that as an immediate danger to the quail (maybe the turkeys since it’s at eye level).
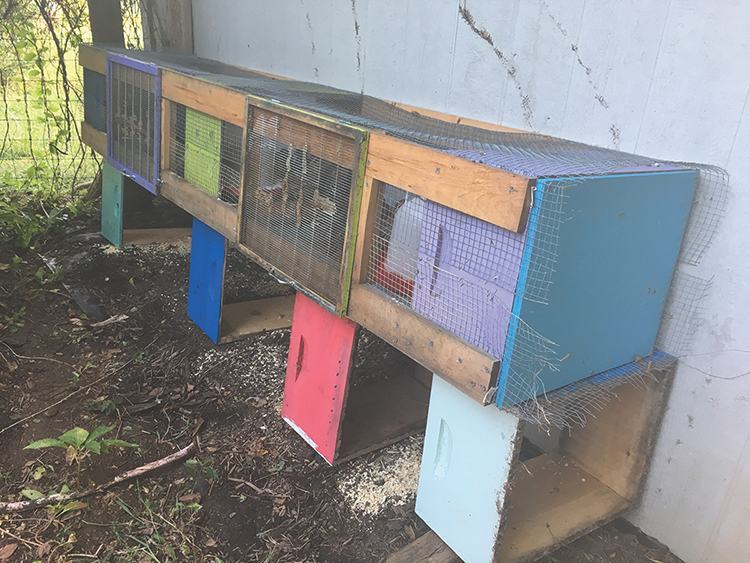
The finished product.
In the future, we will attach tin to the top for a roof, but it is resting under the overhang of the shed right now and has decent overhead protection. When we have a bit more time and can build the other two levels, the tops of each one will have a tray built in to be able to remove poop without it going on top of the birds below, and only the highest level will have a roof. This will be a bit difficult to move as one entire piece, so it might stay in single “condo units” for now.
In Magic Land, the place where all my ideas are completely finished, we would have a small concrete pad with a three-sided shed that almost perfectly fit the entire quail condo and could be closed in by a fourth side during the winter to avoid drafts and keep temperature consistently while allowing ventilation. I guess after we move, maybe part of that can happen in real life!