By: Allen Hayes
Easy To Build – Anyone Can Do This!

Many backyard beekeepers bottle their honey using a plastic bucket with a honey gate valve in the bottom. These buckets are sold by most of the bee suppliers and considered the standard for smaller operations. But there are problems with these. First, should your honey crystallize in one of these dispensing buckets you cannot immerse it in a warm water bath to liquefy for fear of the gate valve seal leaking and water entering and contaminating your honey. More importantly you need to have one of these for each variety of honey your bees produced. Then too if your crop is in several unmodified buckets, you must transfer the honey into your bottling bucket. This is messy and you always loose some honey in the process.
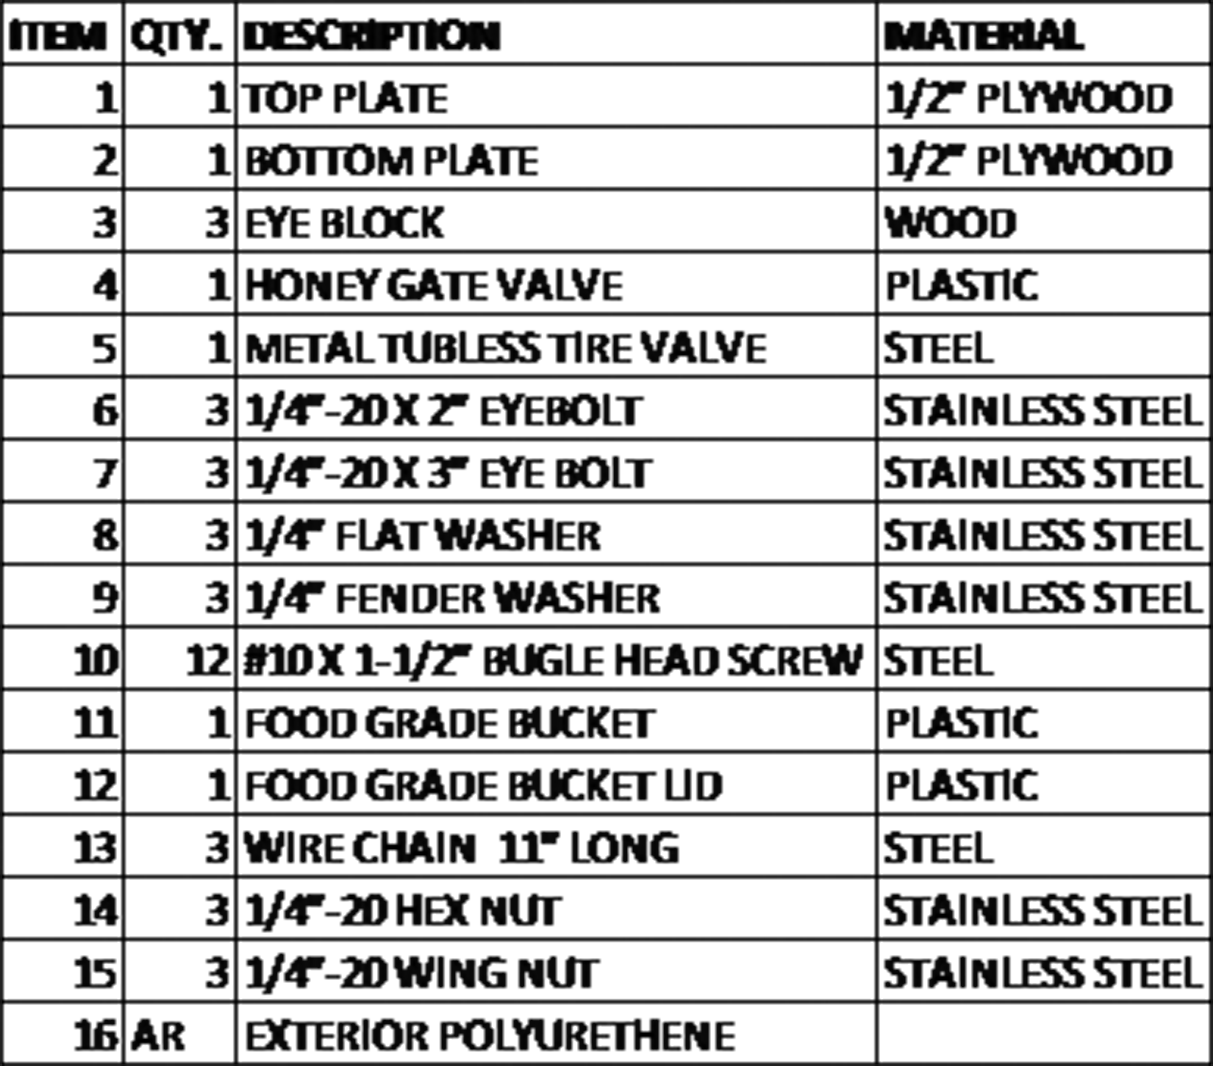
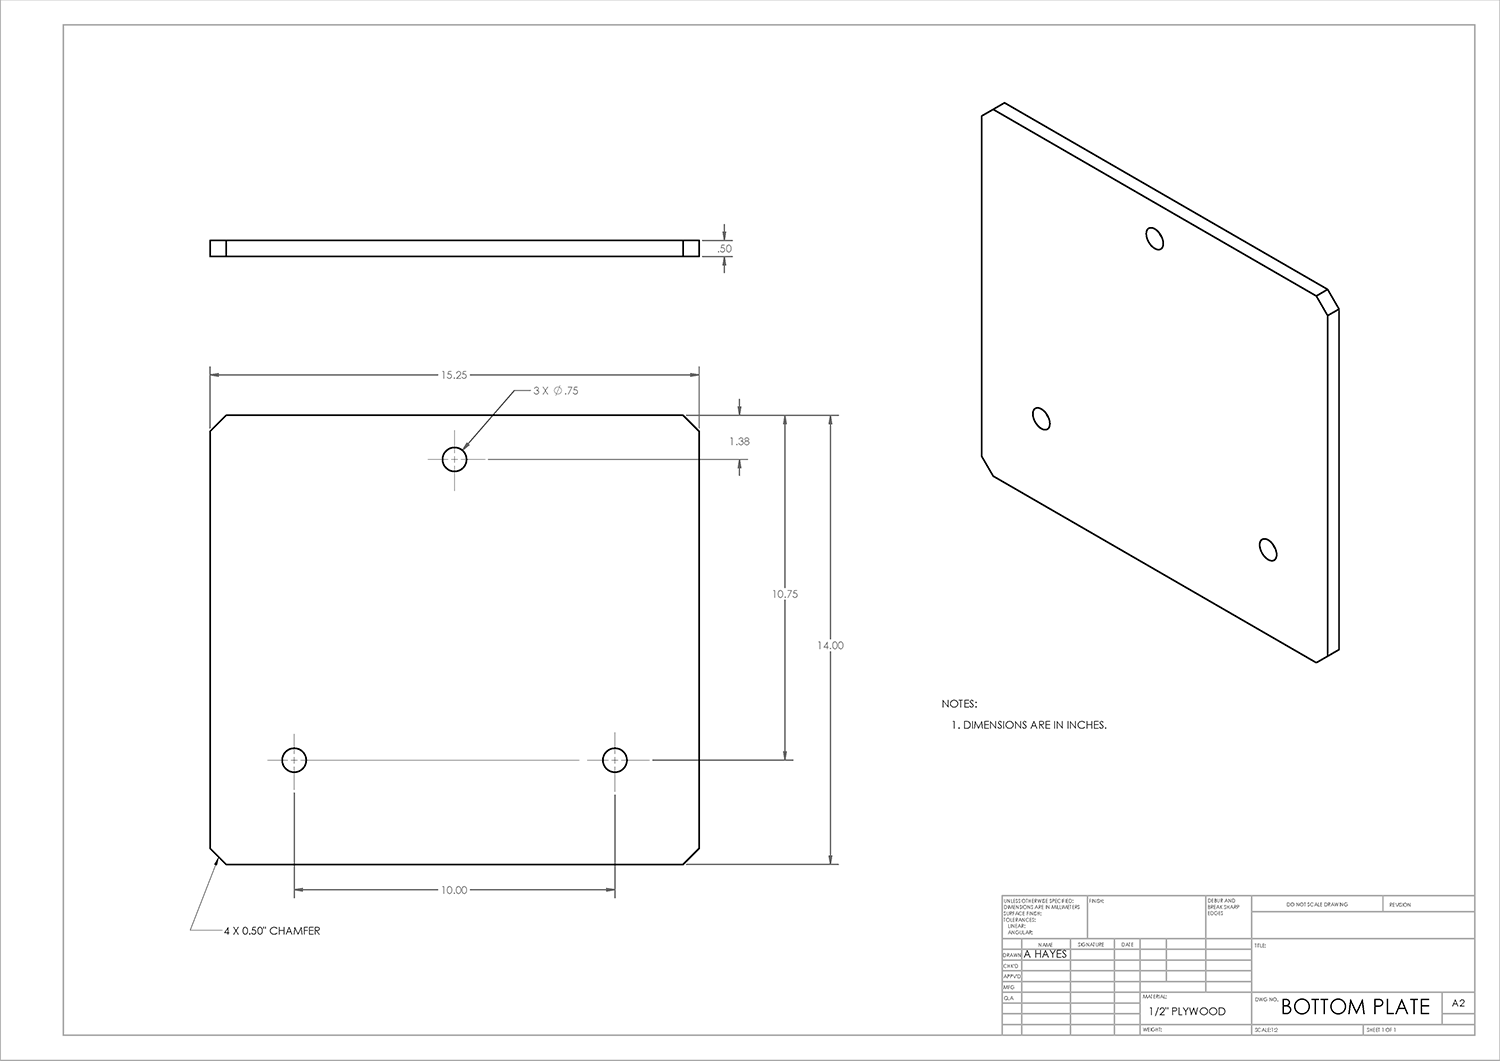
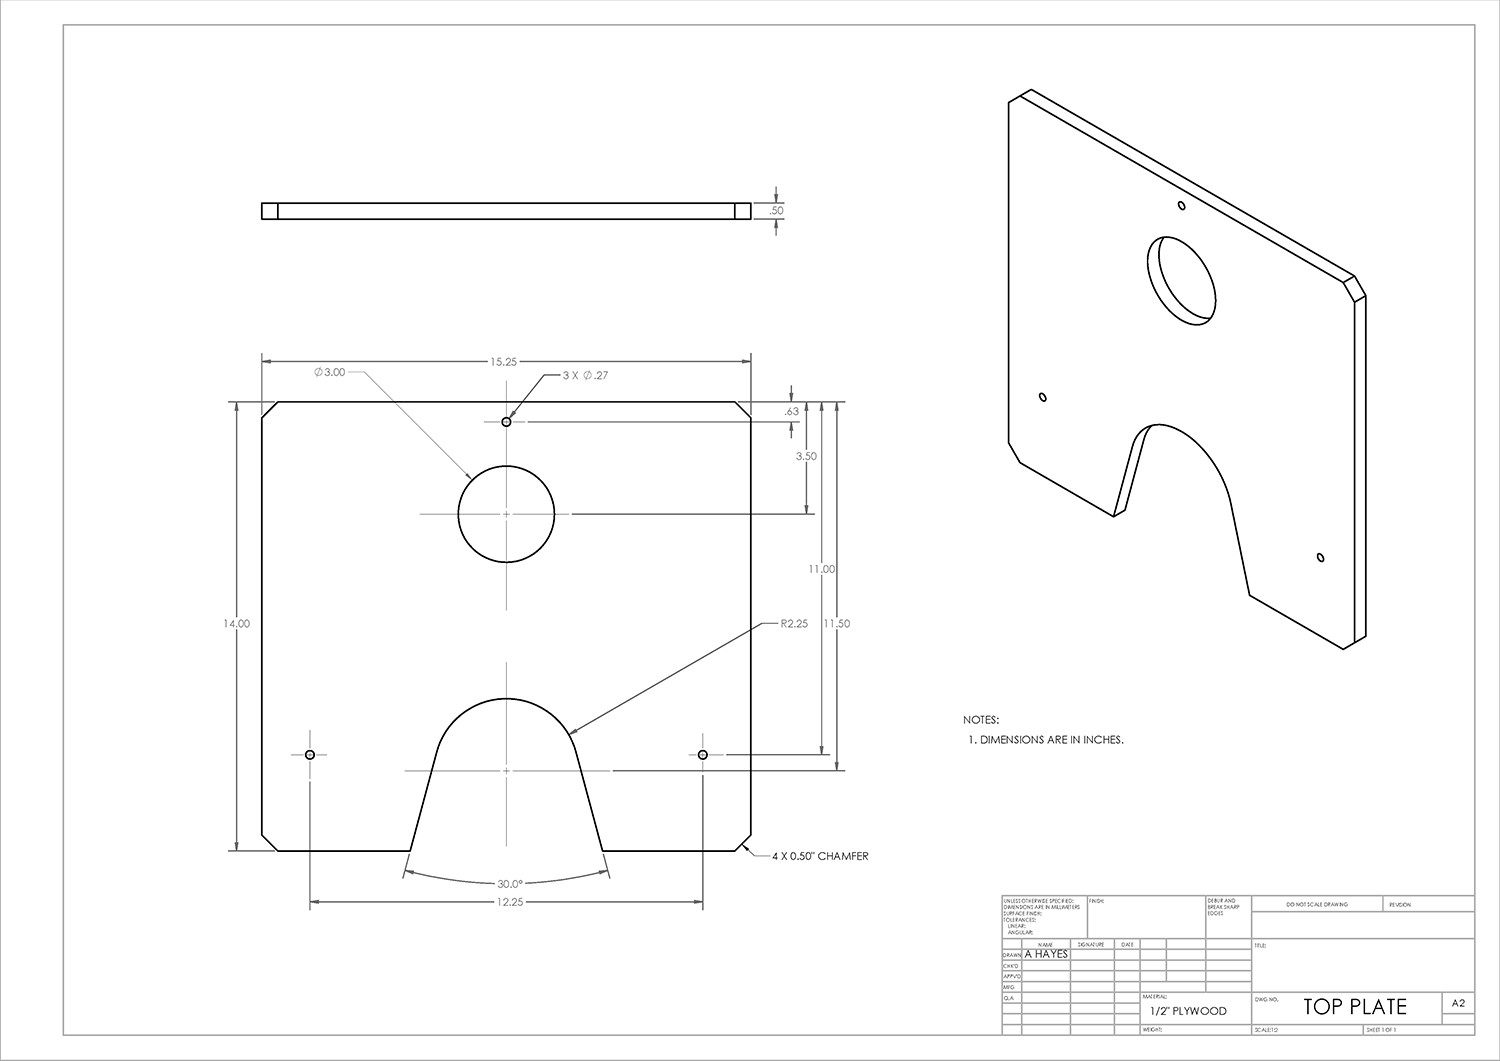
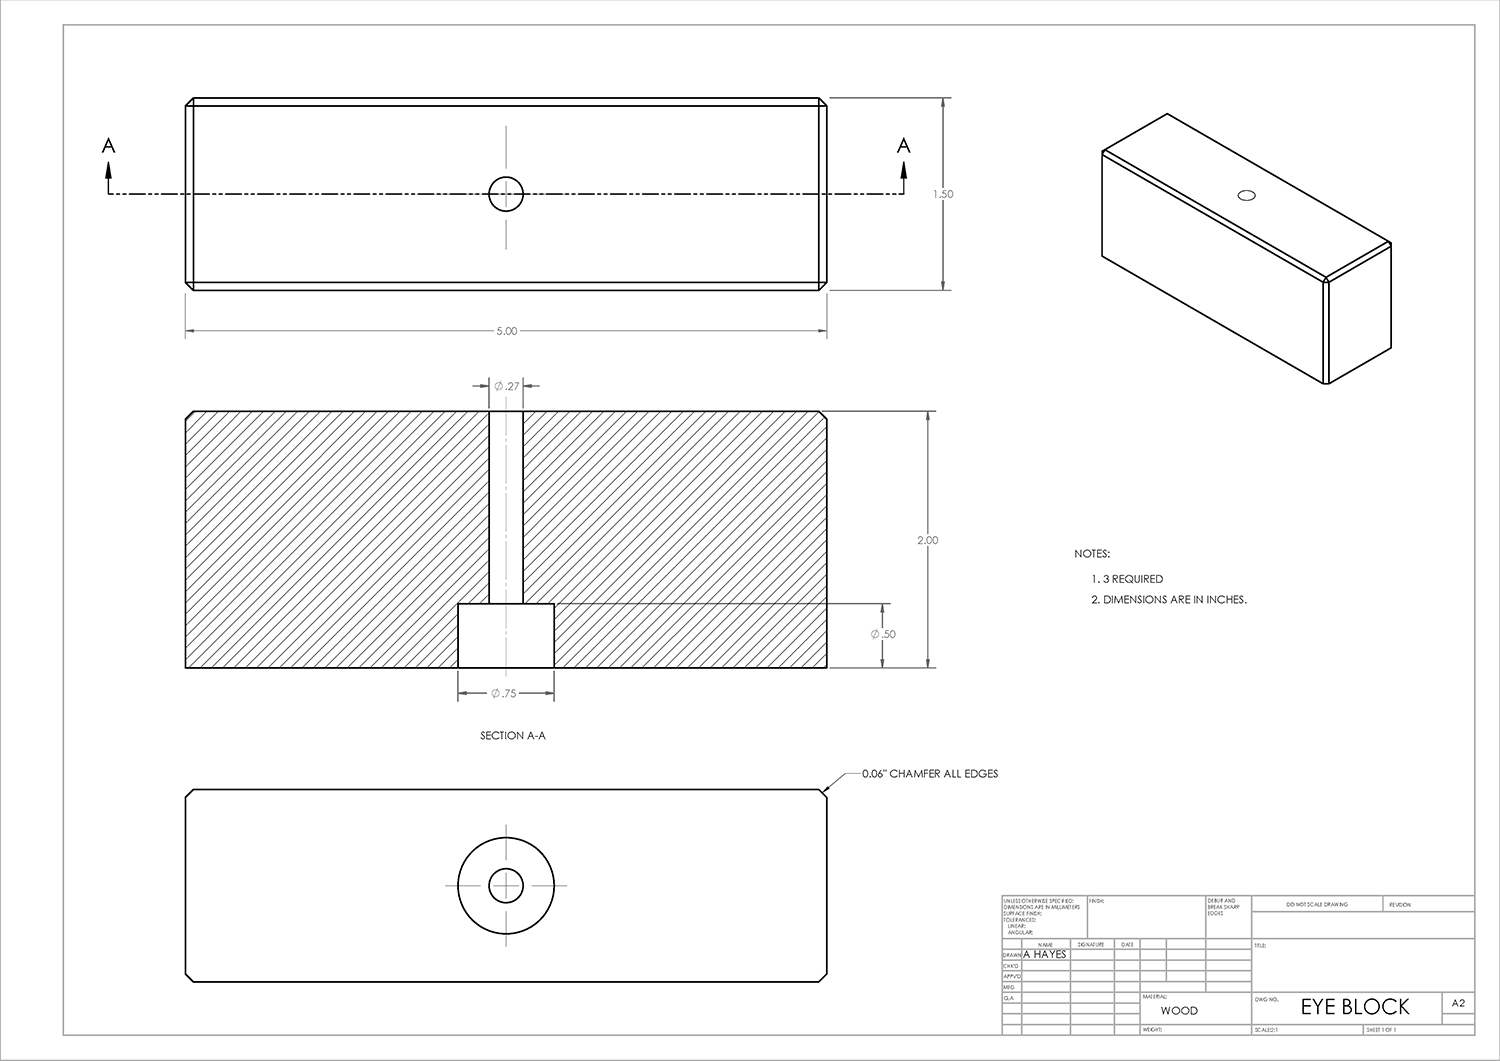
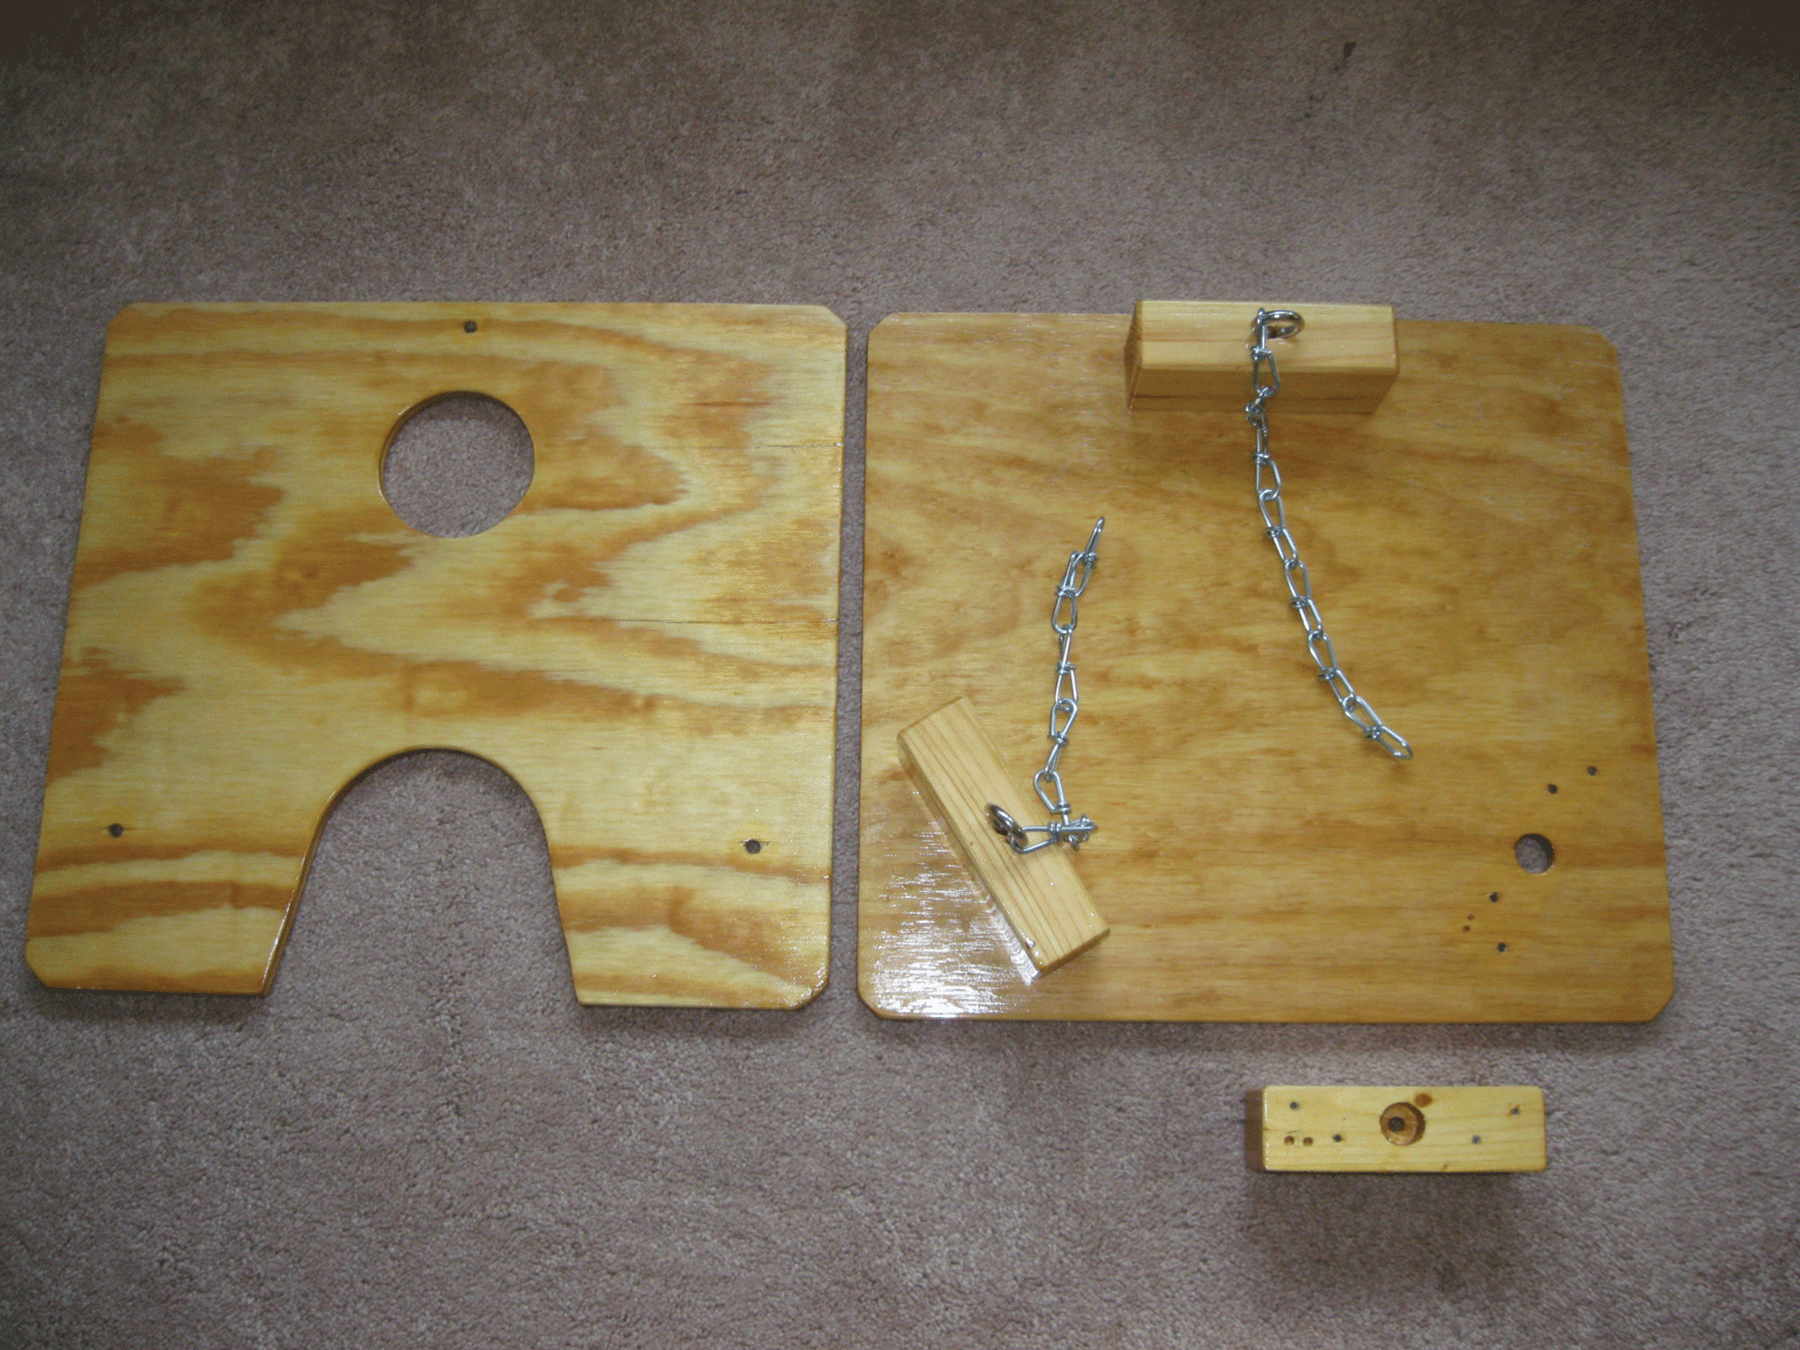
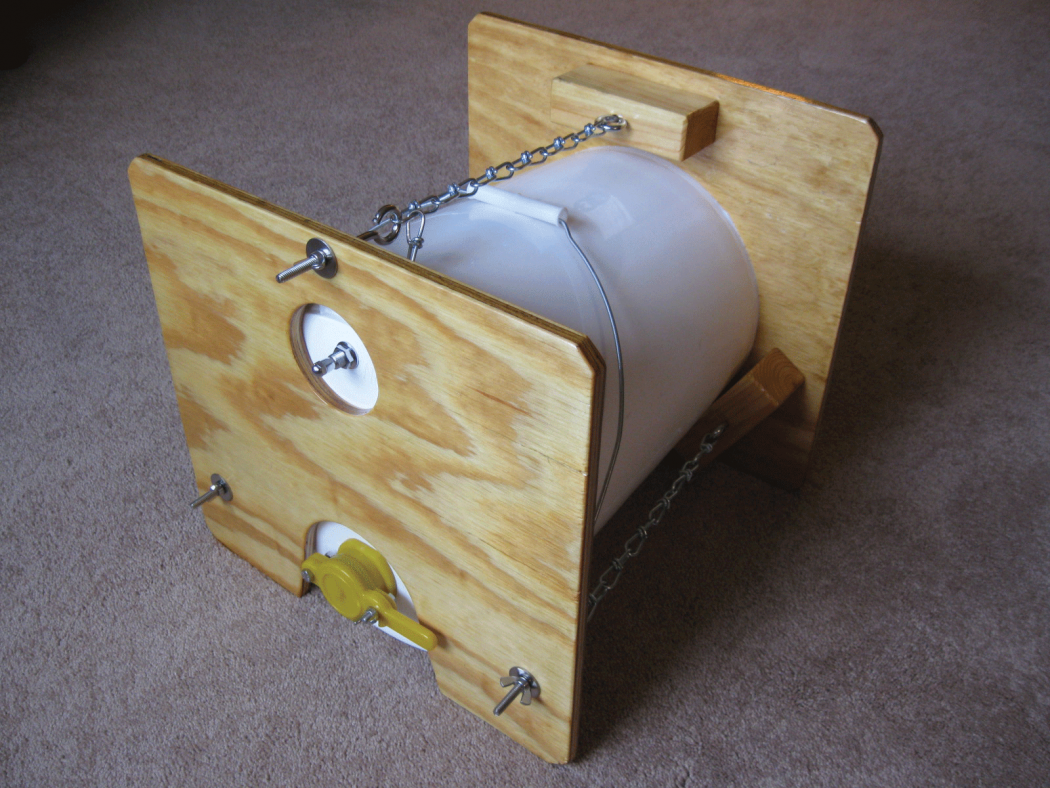
With the setup I am showing here you only need one honey gate valve mounted in a lid that fits all of your buckets. As you bottle, when the first bucket runs empty, simply transfer the lid to another full bucket and continue bottling. This device is easy to make and uses tools that most beekeepers have in their workshop. Most of the items can be purchased at a big box home improvement or hardware store. The metal tubeless tire valve can be purchased at an automotive store. You can buy regular food grade buckets or use ones from a doughnut shop. Select a bucket and lid that has a 5 inside the recycling triangle. That tells you it is a food grade container. Start by making the wooden parts, you can use a hole saw in an electric drill or drill press to make the large holes in the lid and the top plywood plate. Then coat the wooden parts with exterior grade polyurethane, this will allow you to wipe off any excess honey with a damp cloth. The tire valve is necessary to let air in; you will need to drill a 15/32” diameter hole in the lid for the tire valve. Remove the core from the tire valve. The bugle head screws (AKA drywall screws) are used to secure the eye blocks to the bottom plate use 4 screws for each block. The 2” long eye bolts go on the bottom with the flat head screws and hex nuts and the 3” long ones go at the top with the fender washers and wing nuts. You will need to open the eyes of the eye bolts a little to allow the chain to go in and you can spread the eyes open enough with a hammer and cold chisel. By using chain and wing nuts on the 3” eye bolts, this arrangement will accommodate many different height buckets like 3, 4¼ or 5 gallon.
To remove all of the foam, etc. floating on top, first let the honey settle for at least one week. Then remove the lid and lay plastic food wrap directly on top of the honey and press it down to contact all the junk floating on top. Then pick up the plastic wrap and discard it. You may have to repeat this until all of the foam and other floating debris is gone. Then lay the bucket on its side, remove the cap from the tire valve to let air in and begin bottling. If you do not use these two plywood plates and chains you risk the top coming off and spilling your valuable honey.
LIST OF MATERIAL